Billing / Prior Authorization
- Payor information comprises essential data on the entities responsible for covering healthcare costs by government programs like Medicare or Medicaid, or patients themselves.
- Prior authorization involves obtaining approval from insurance payors before providing specific medical services.
Adding Patient Payors
Healthcare payors play a crucial role in the healthcare system by providing financial coverage and helping individuals access necessary medical care.
The Payor details of the patient can be added in the system by using the option Billing / Authorization. Select the Patient Payor and update the required Payor Information and Click Save.
Client >> List >> Select Patient from List >> Billing / Prior Authorization >> Payor
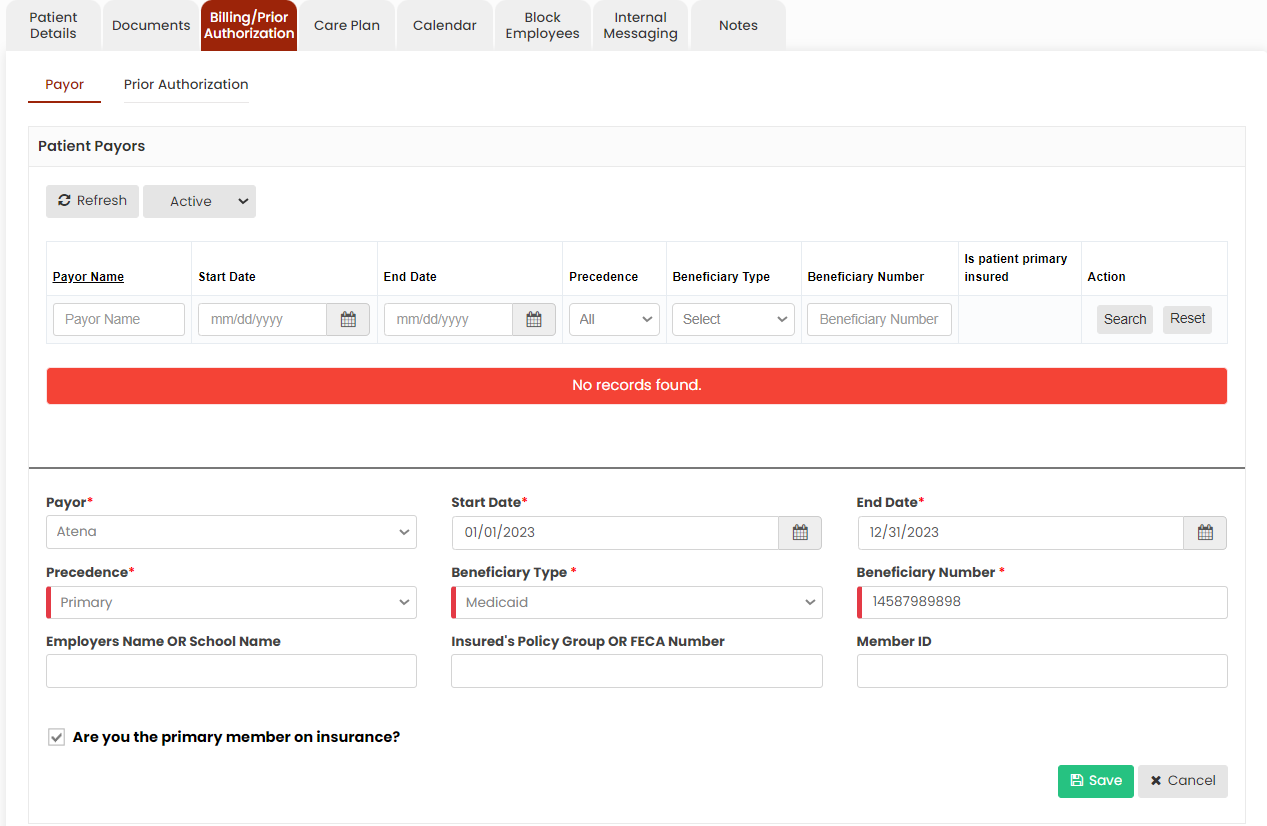
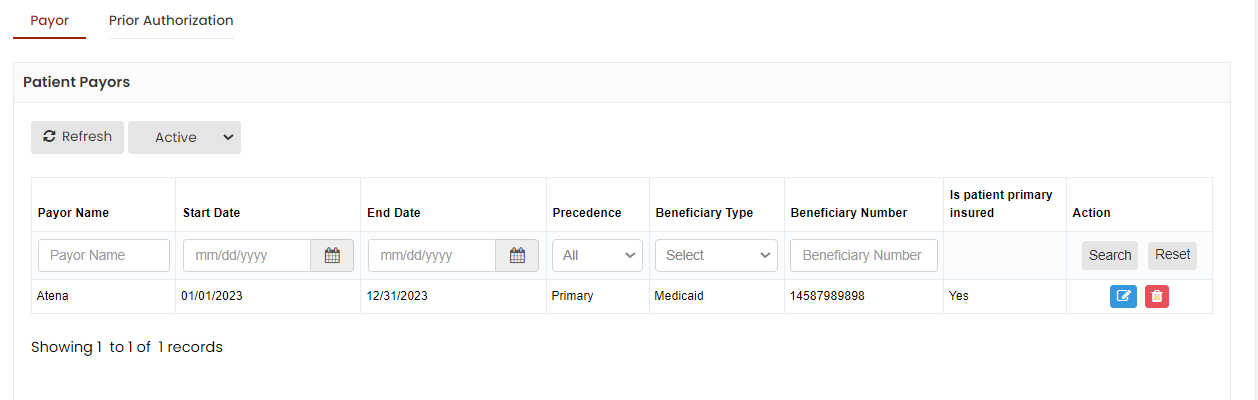
Now, the Payor details has been added successfully in the system. We can also edit the payor information using the edit option.
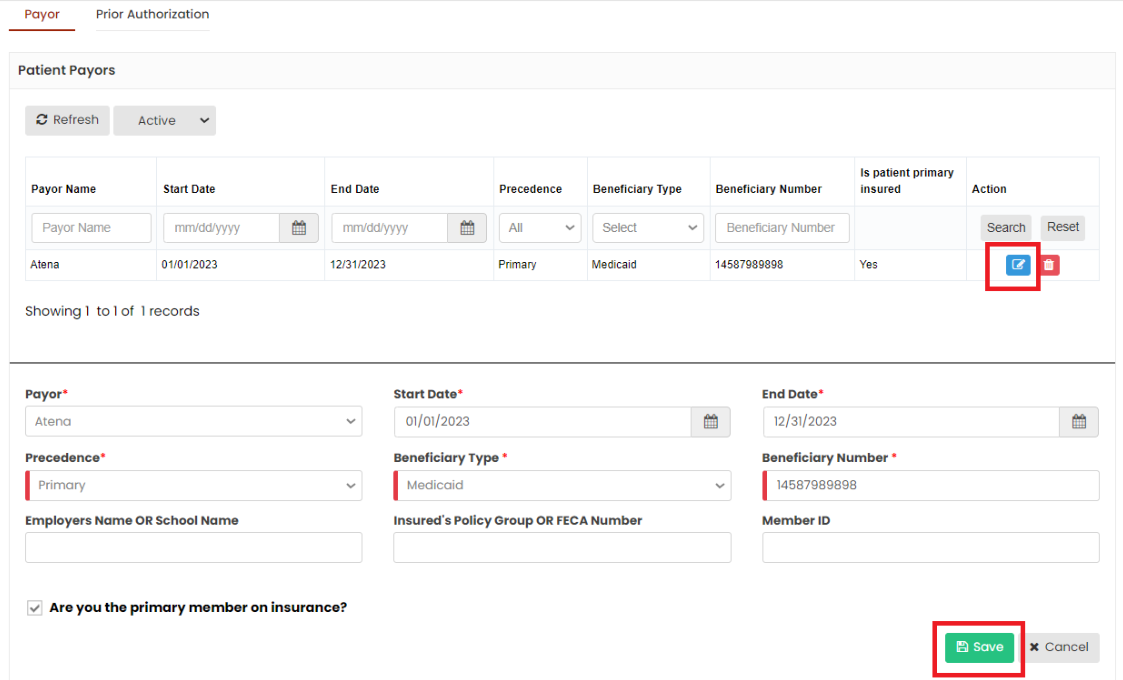
Editing Patient Payors
The Payor information of the patient can be edited by using the Edit option. Click the edit option, complete the required information and click Save.
Client >> List >> Select Patient from List >> Billing / Prior Authorization >> Payor
Delete Patient Payors
Client >> List >> Select Patient from List >> Billing / Prior Authorization >> Payor
The Payor details can be deleted by using the option Delete on the right side of the payor under Action.
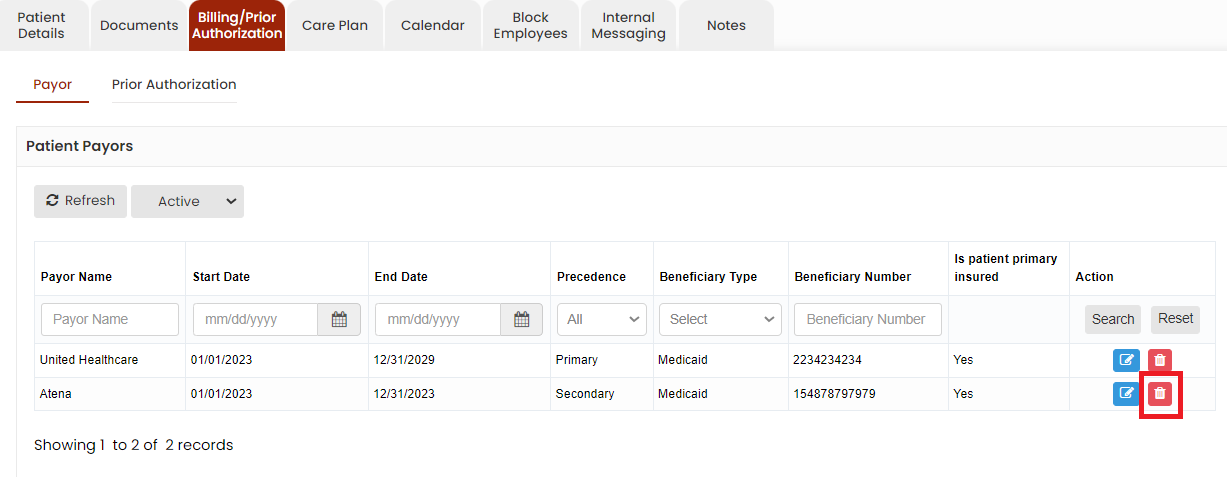
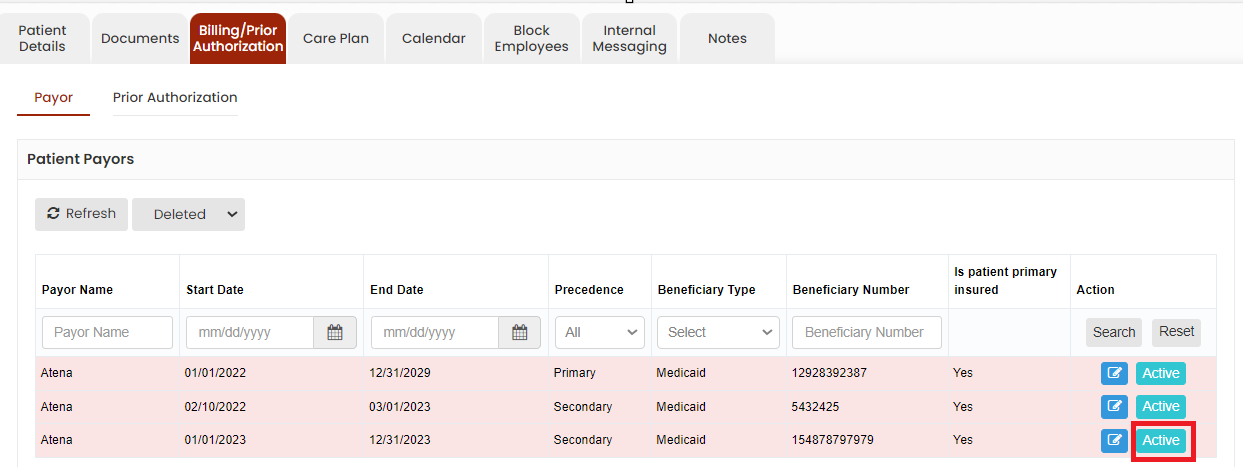
Now, the payor details gets deleted and we can view the payor under Deleted list.

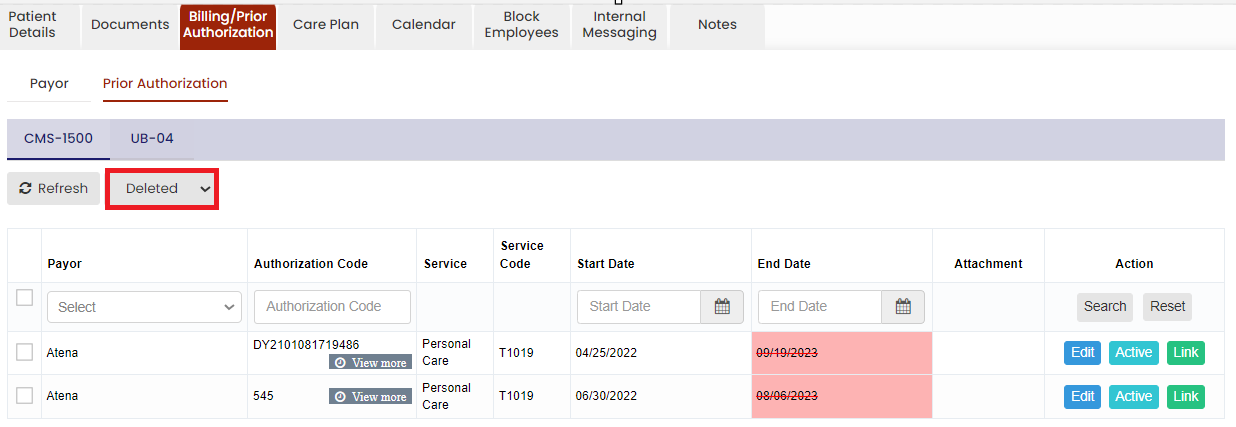
The user can also Activate the deleted payor by using the option Active on the right side of the screen.
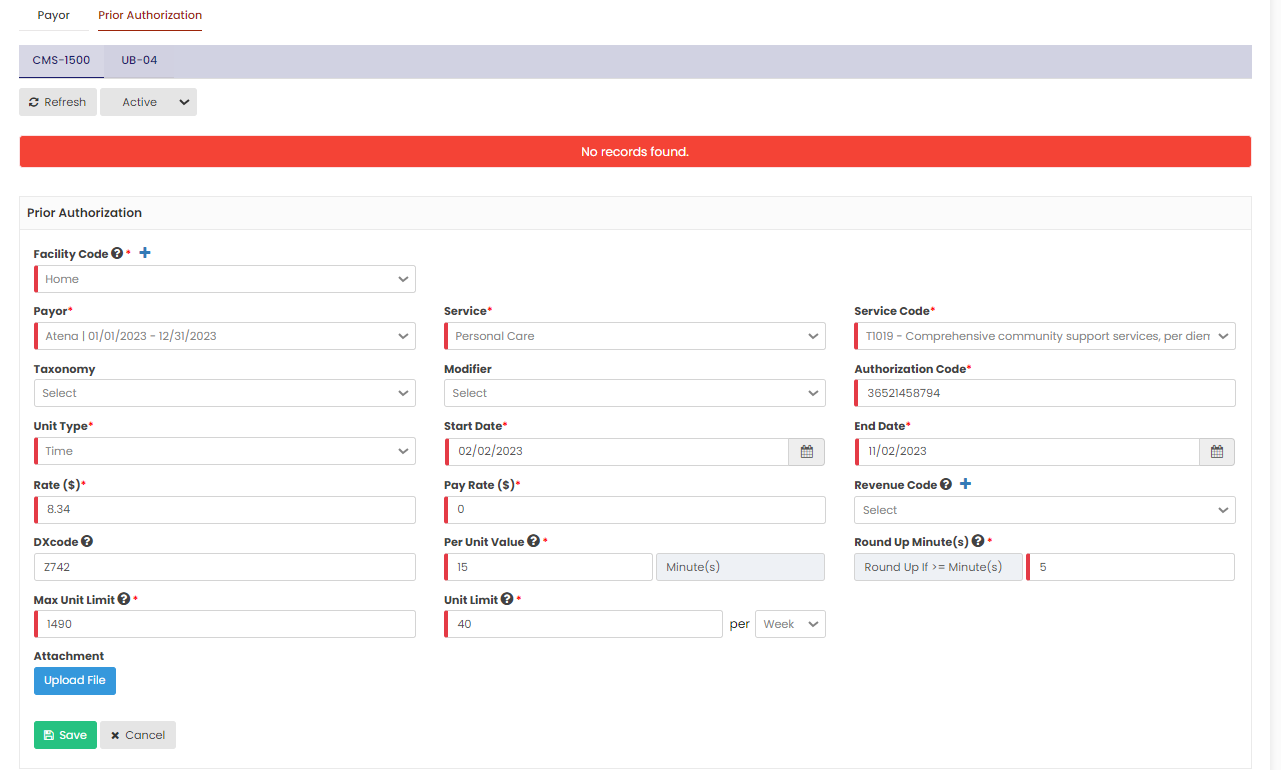
Adding Prior Authorization
Client >> List >> Select Patient from List >> Billing / Prior Authorization >> Prior Authorization
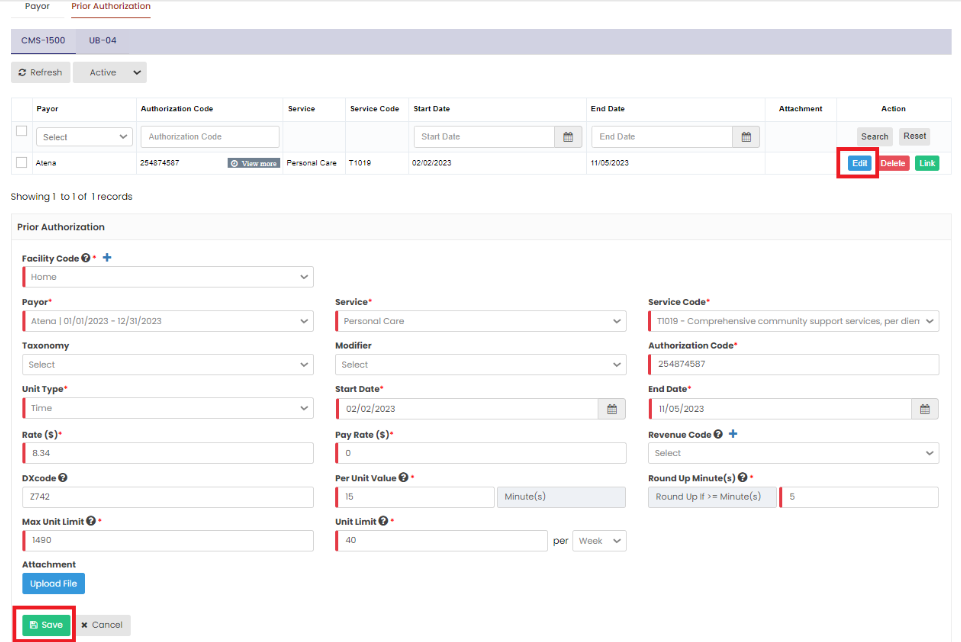
Editing Prior Authorization
The Prior Authorization information of the patient can be edited by using the Edit option. Click the edit option, complete the required information and click Save.
Client >> List >> Select Patient from List >> Billing / Prior Authorization >> Prior Authorization
Delete Prior Authorization
Client >> List >> Select Patient from List >> Billing / Prior Authorization >> Prior Authorization
Select the expired Prior Authorization by using the check box and click Delete or Disable Selected option on the screen.
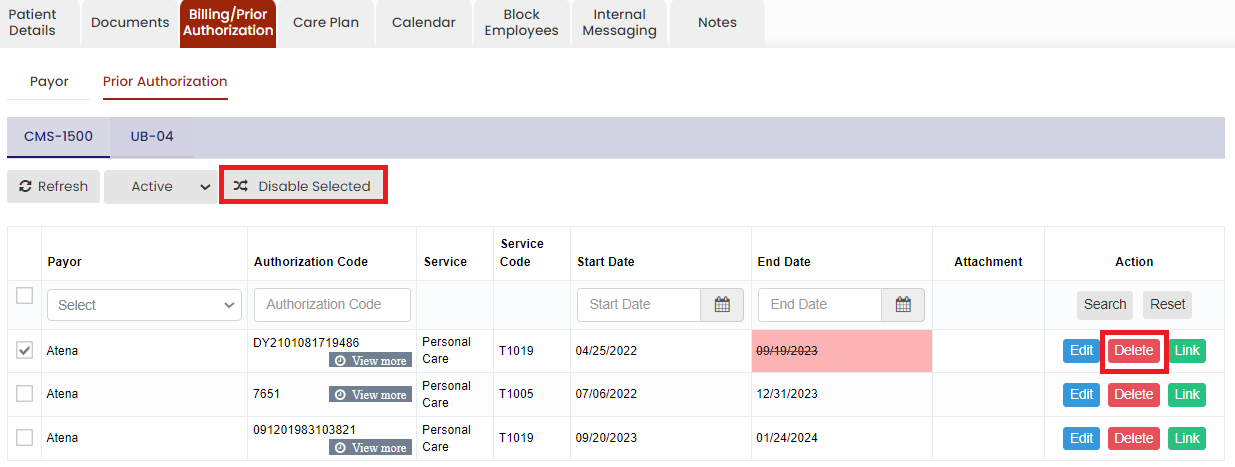
Now, the Expired Prior Authorization details gets deleted and we can view the Authorization details under Deleted list.
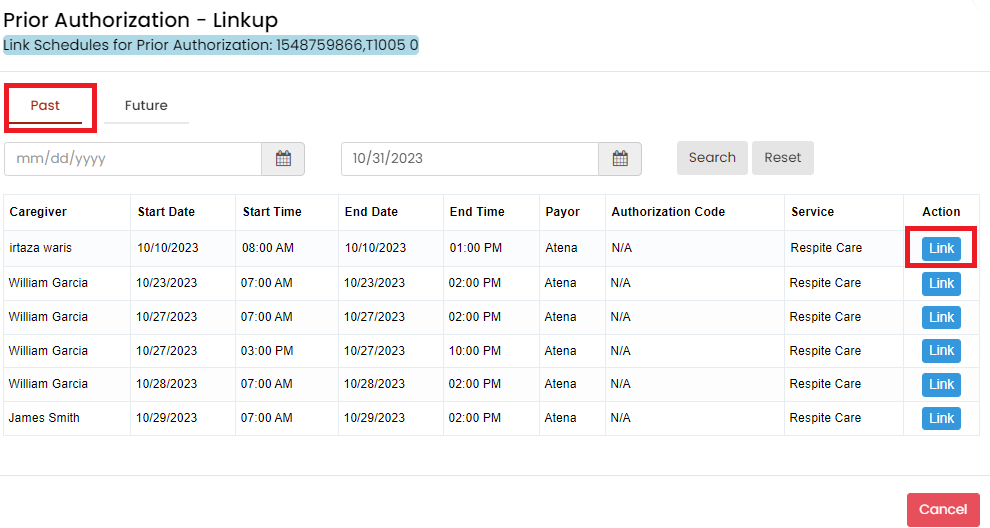
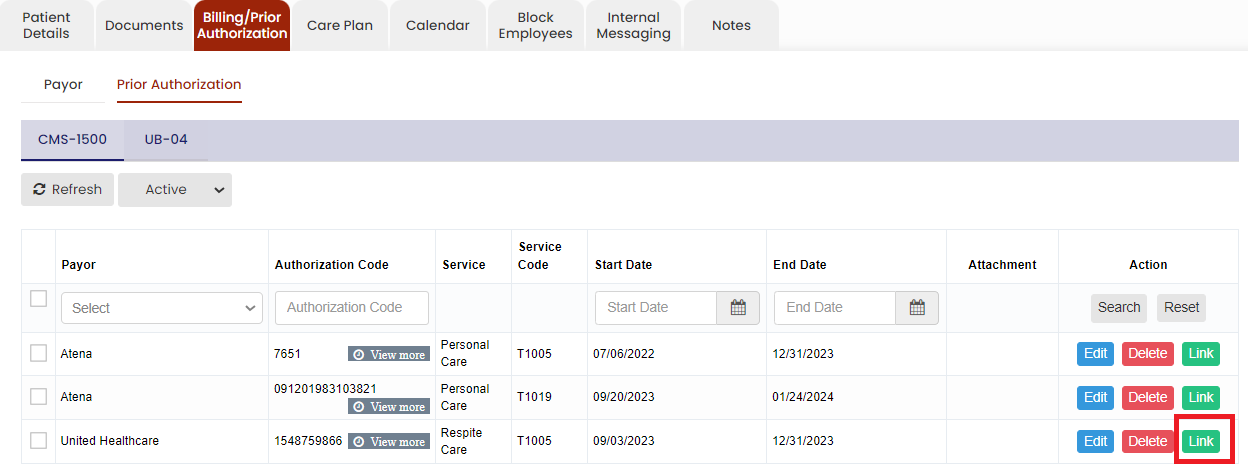
Link Past and Future Schedule
The Link option is used to link the Authorization code with the schedules which is created without Prior Authorization.
If the user created the schedules without Prior Authorization for a patient and receives the Authorization details later, then the schedules without Authorization can be linked with the Authorization details added in the system for the past and future schedules.
Client >> List >> Select Patient from List >> Billing / Prior Authorization >> Prior Authorization
Click Link option on the right side of the Authorization details under Action.
The following screen appears in which the user can click link option to update the Authorization code for the past and future schedules. Click Link button on the visits to link the Authorization code.