Patient Document
Patient document consist of essential medical records, treatment plans, and progress notes. These documents track the patient's health history, medications, diagnoses, and care schedules.
Uploading Patient Documents
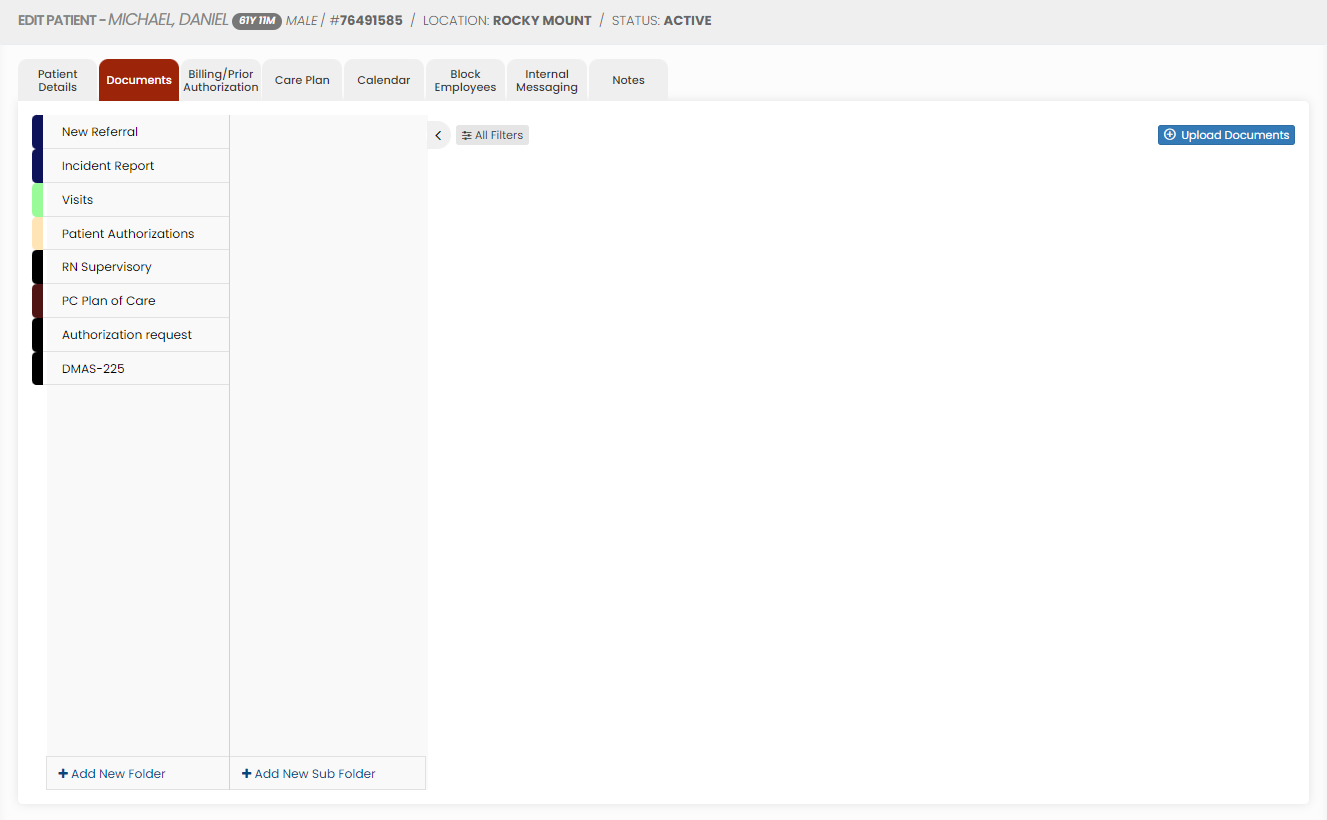
The required documents of the patient can be uploaded in the system by using the option Patient Document.
Client >> List >> Select Patient >> Document
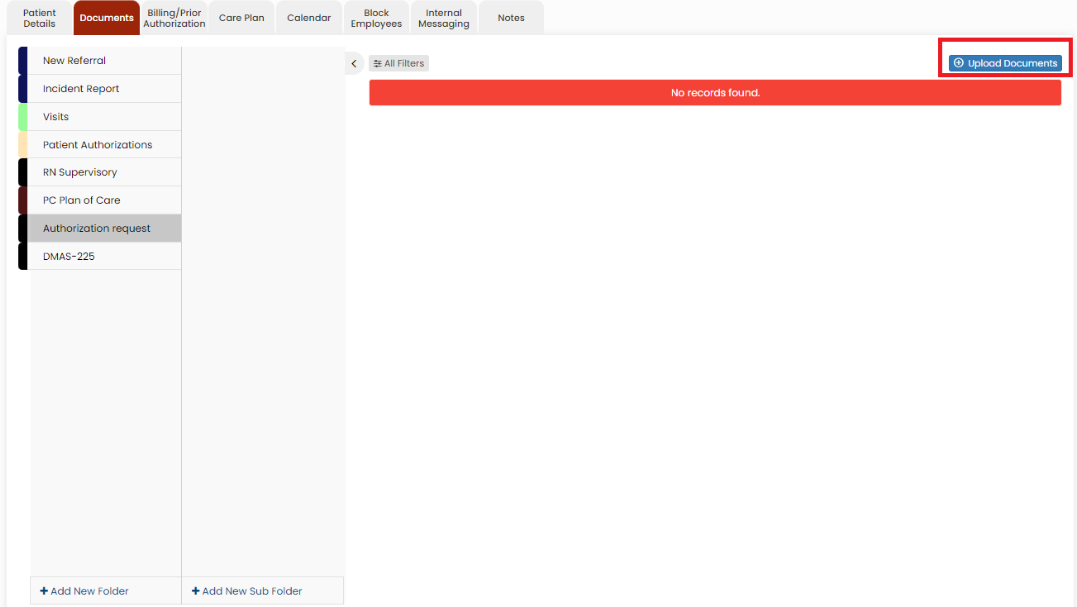
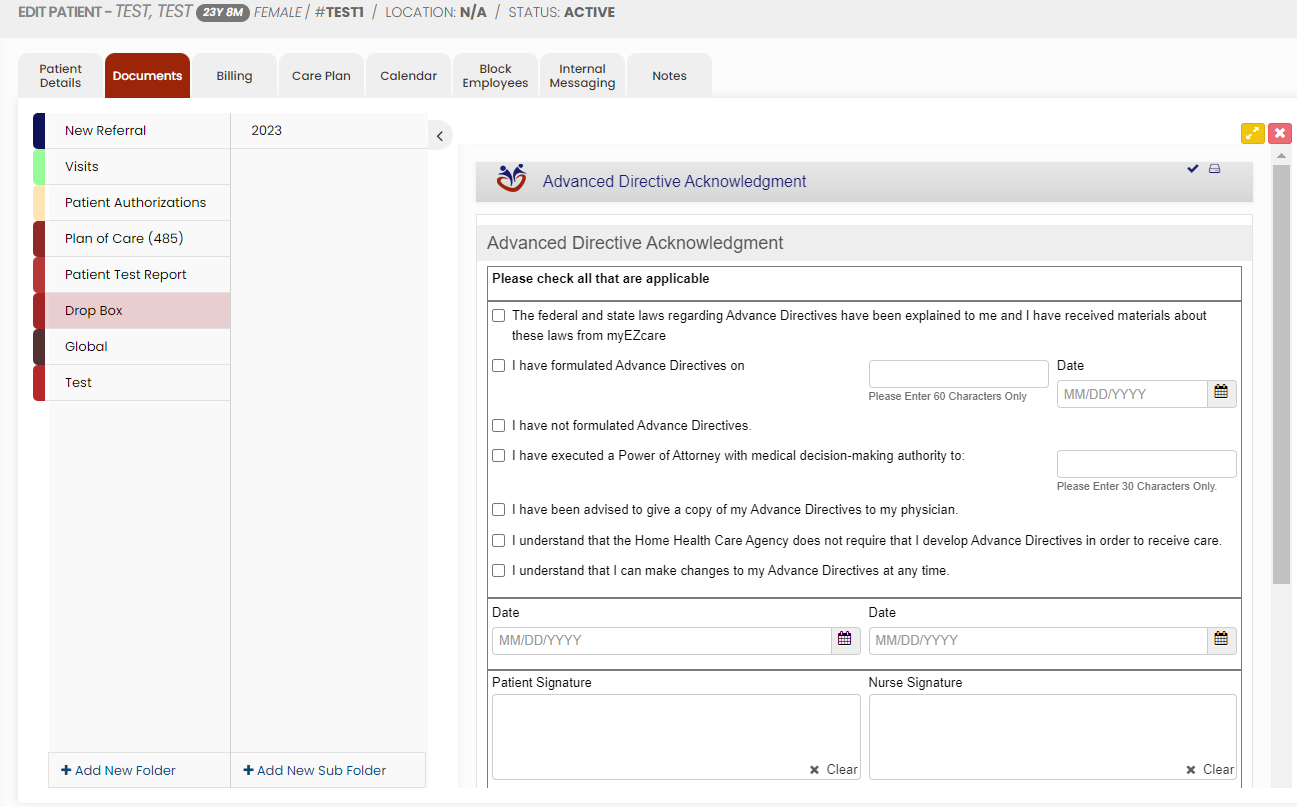
Select the type of document from the list and Click the Upload Documents option. The user can also Add New Folders and Subfolders to upload the documents.
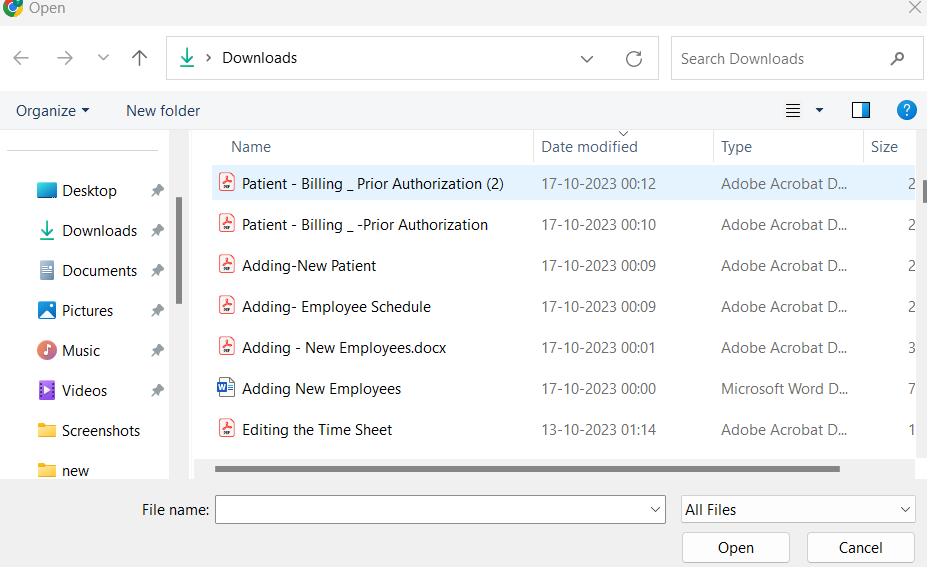
When we click upload documents, the following screen appears. The user can choose the options whether to Upload Scanned Documents or to Fill New form.
Upload Scanned Document option allows the user to upload the scanned documents as per requirement.
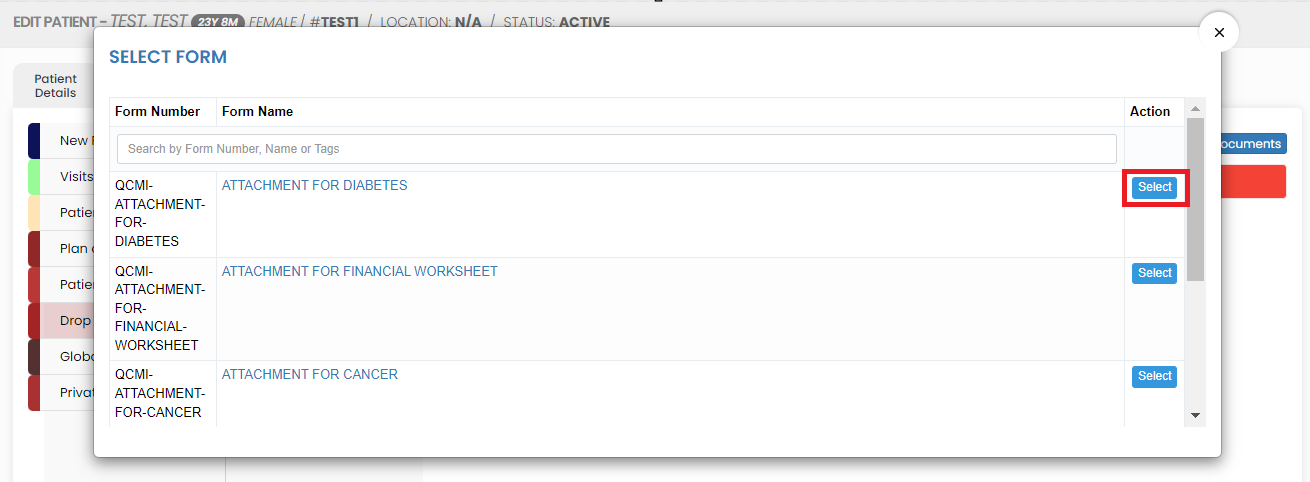
Fill New Form option allows the user to select the form from the list.
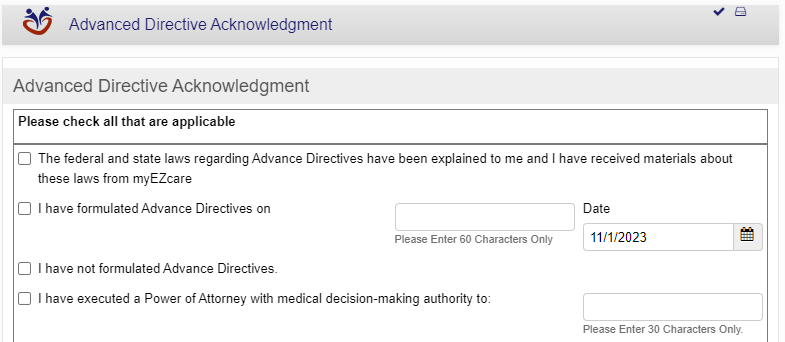
After selecting the form, the following pop-up appears whether to Map Form. Click Yes option if the user wants to preserve this preference for future use, if not Click No. The user can now edit the form and click save option at the bottom of the document.
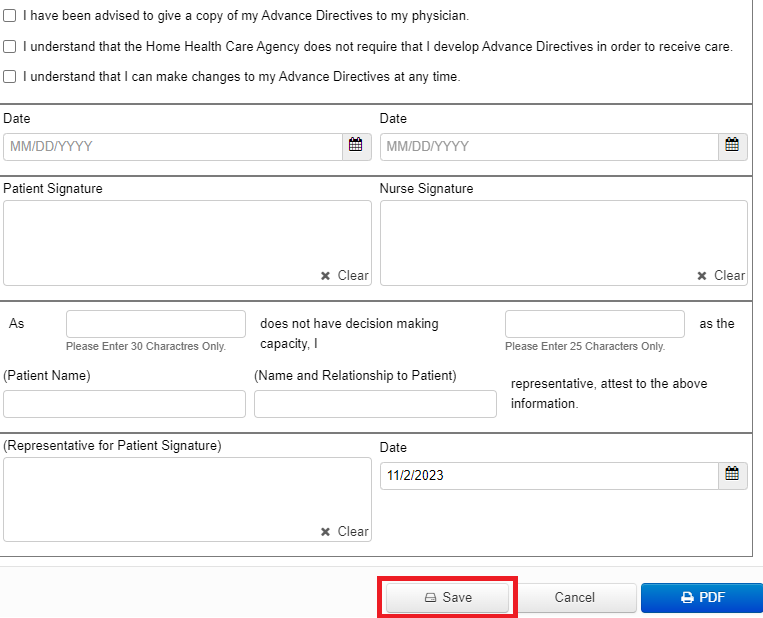
The following screen appears, click Save option.
Under Action, we have the following options like Archive, Edit, Clone and Email.
The features under Actions are :
- Archive
- Edit
- Clone
Archive
To Delete the uploaded document, click Archive option under Actions.
The following pop-up appears, click Yes to continue. The document will be deleted from the folder.
Restore deleted document
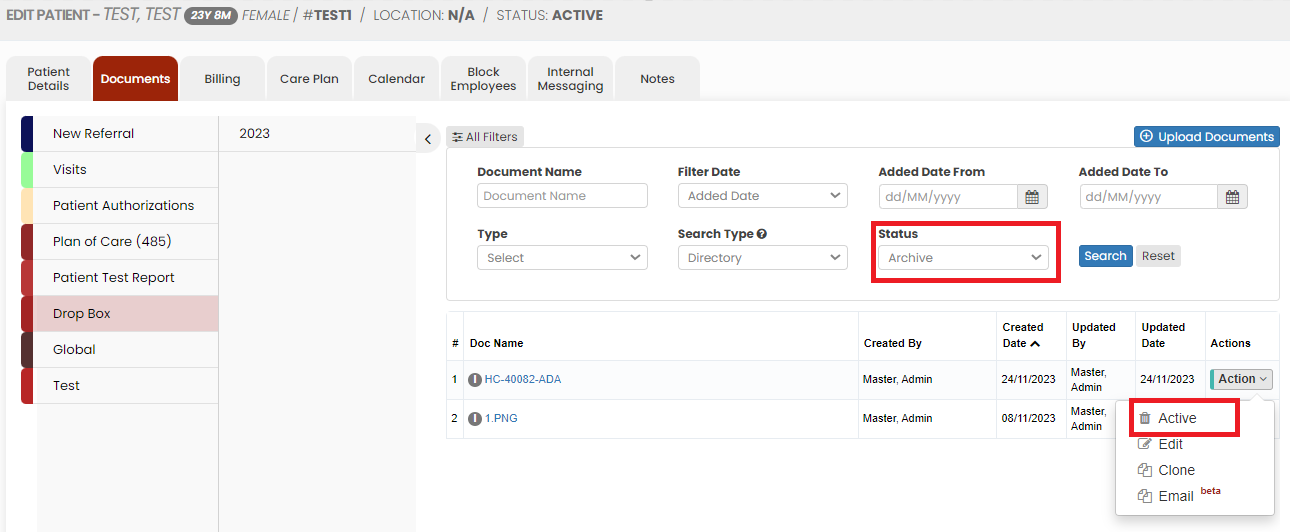
To Restore the deleted click All filters option.
Select the Status Archive and click Search option.
The deleted document is found in Archive Status. The user can click Active option under Action to Restore the deleted document.
The document is now restored under Active Status in the system.
Edit
The Edit option is used to edit the information in the document. Click Edit option under Actions to make the changes in the document and click Save.
Clone Option
The Clone option is in progress within the application.
Email - Beta ( This is an optional beta feature, which may not be stable at this time. Use it at your own risk and we appreciate your valuable feedback to improve the user experience.)
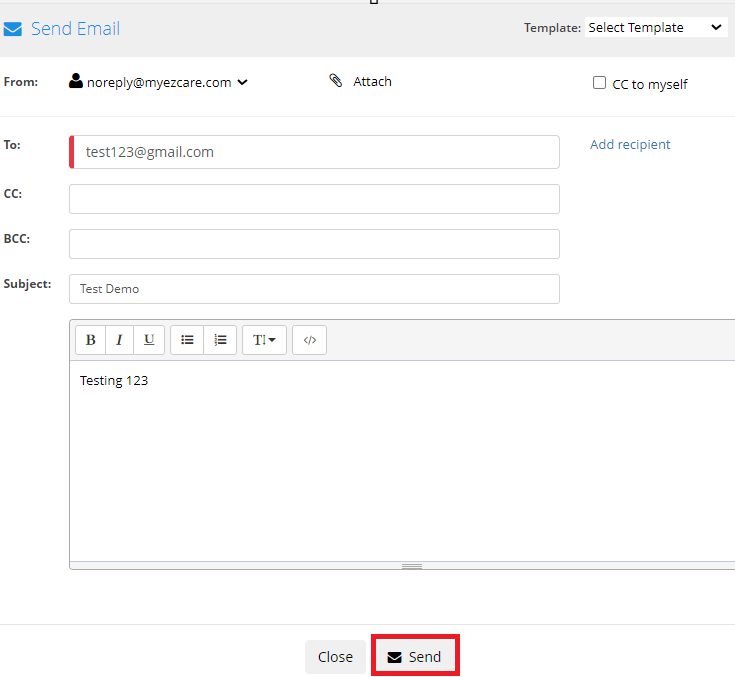
The Email option is used to send documents to patients and to get the electronic signature from the patient.patients. Enter the required fields in the Send Email screen and Click Send option. The user can also send Attachments with the email.
Most of the options are under Beta in Send Email screen.
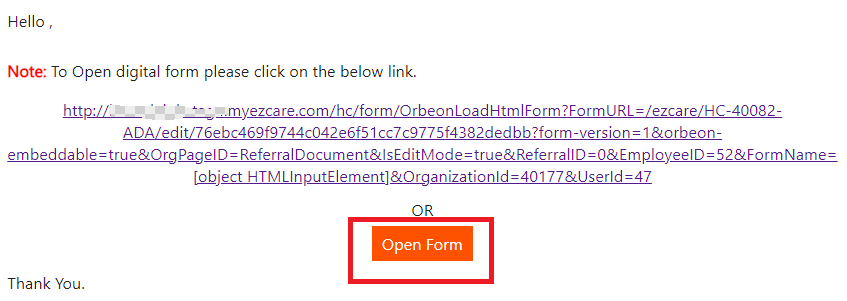
The patientEmployee / Staff will receive the email from the Employeepatient to sign the document. The patientEmployee / Staff has to click Open Form option to Sign the document.
After the signing the document, it has to be saved using the the Save option in the document. Now, the Employee can open the signed document in the application.
Adding New Folder
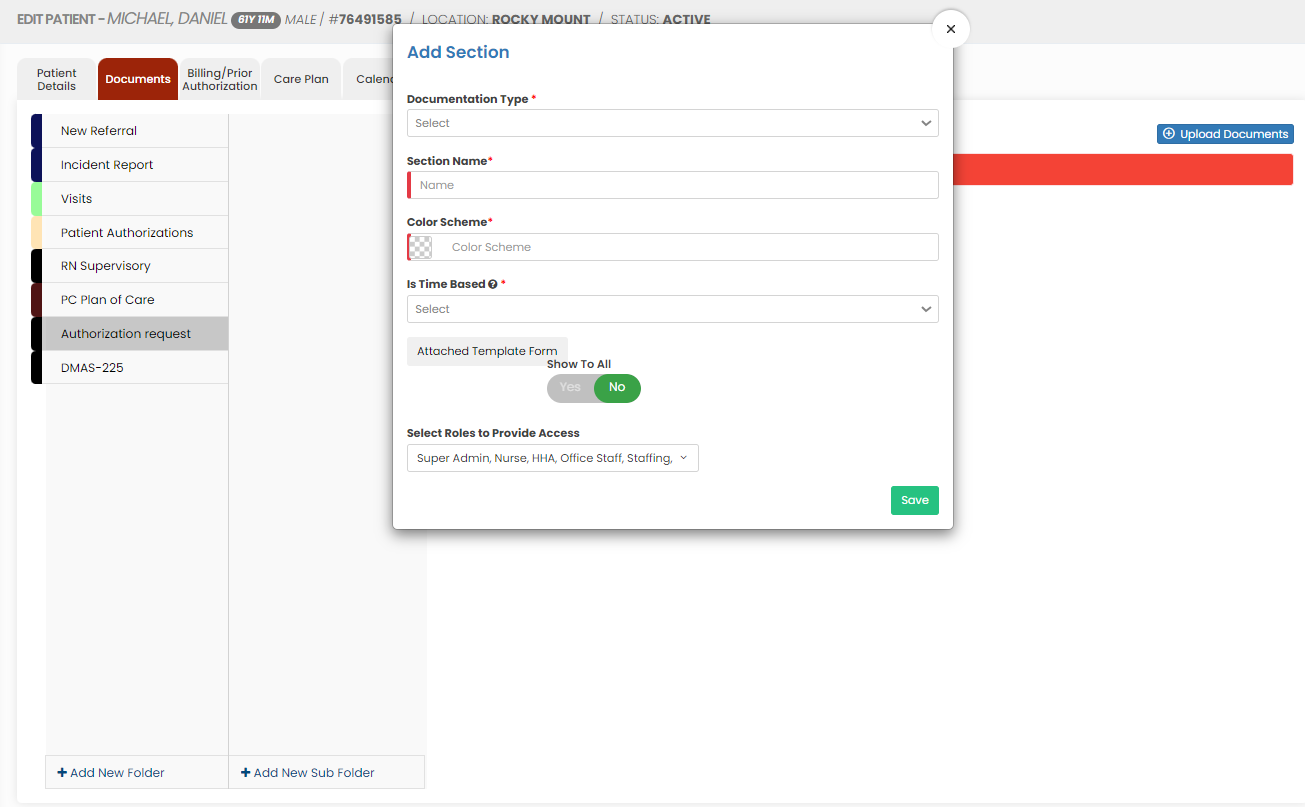
Click + Add New Folder option in Patient document. The following screen appears, update the required information. Also in the option Show to All, if the user needs the folder name to be added for all the patient click Yes option. If the user wants the folder to be added only for the particular patient click No option and click Save.
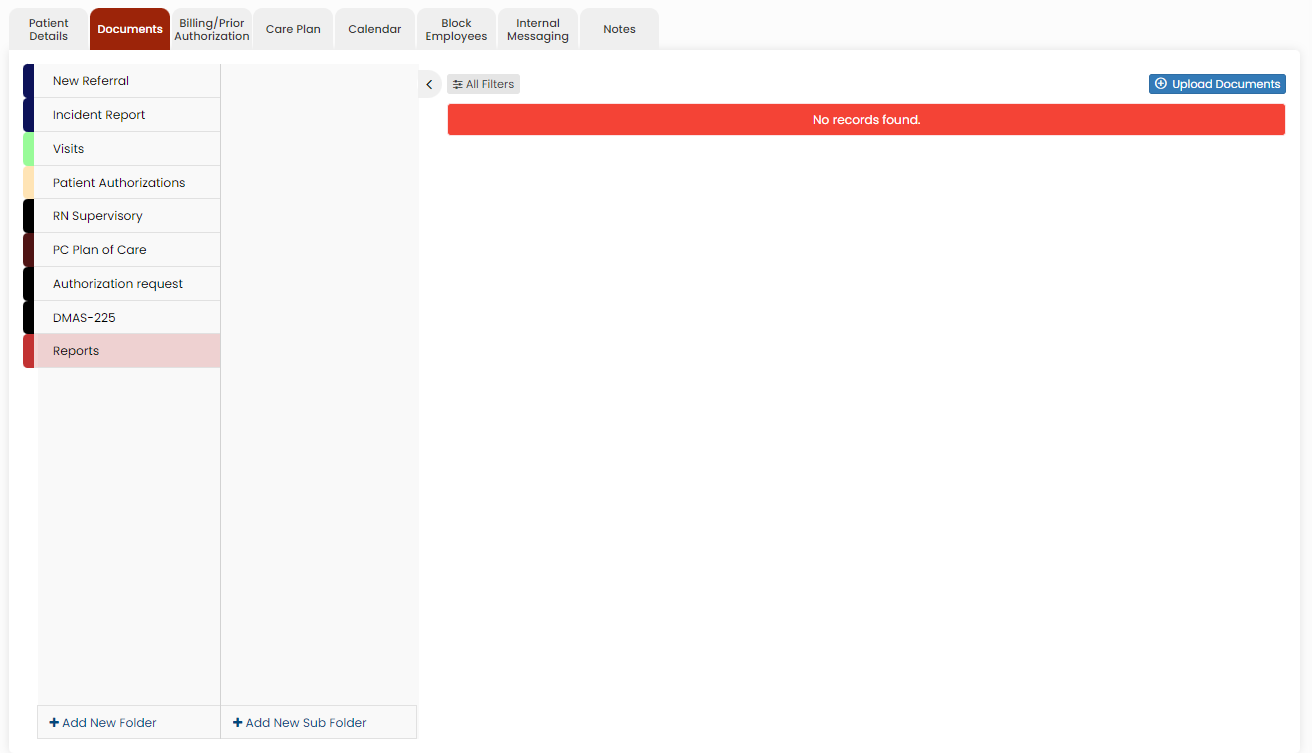
The folder Documents is added successfully to upload the required documents of the patient.
Adding New Sub Folder
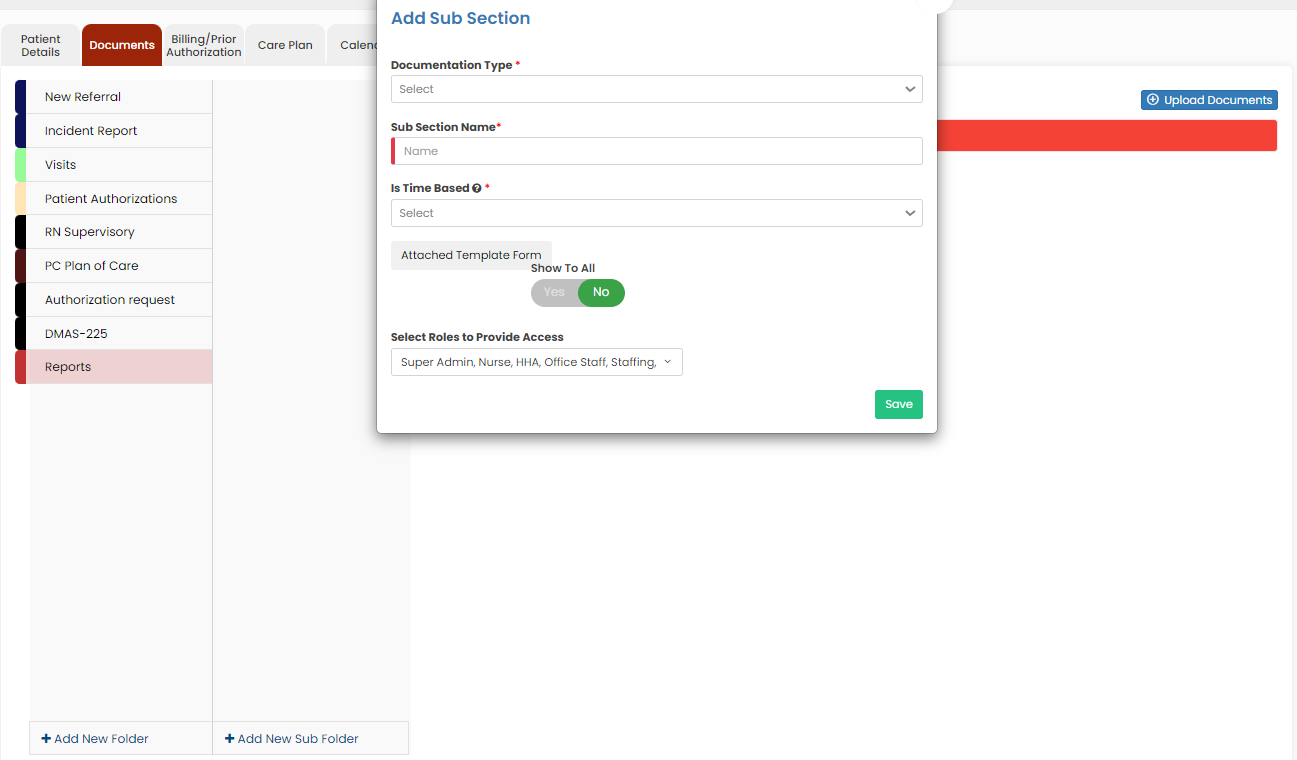
Select the folder name and click the option +Add New Sub Folder option. The following screen appears, update the required information. Also in the option Show to All, if the user needs the Sub folder name to be added for all the patient click Yes option. If the user wants the folder to be added only for the particular patient click No option and click Save.
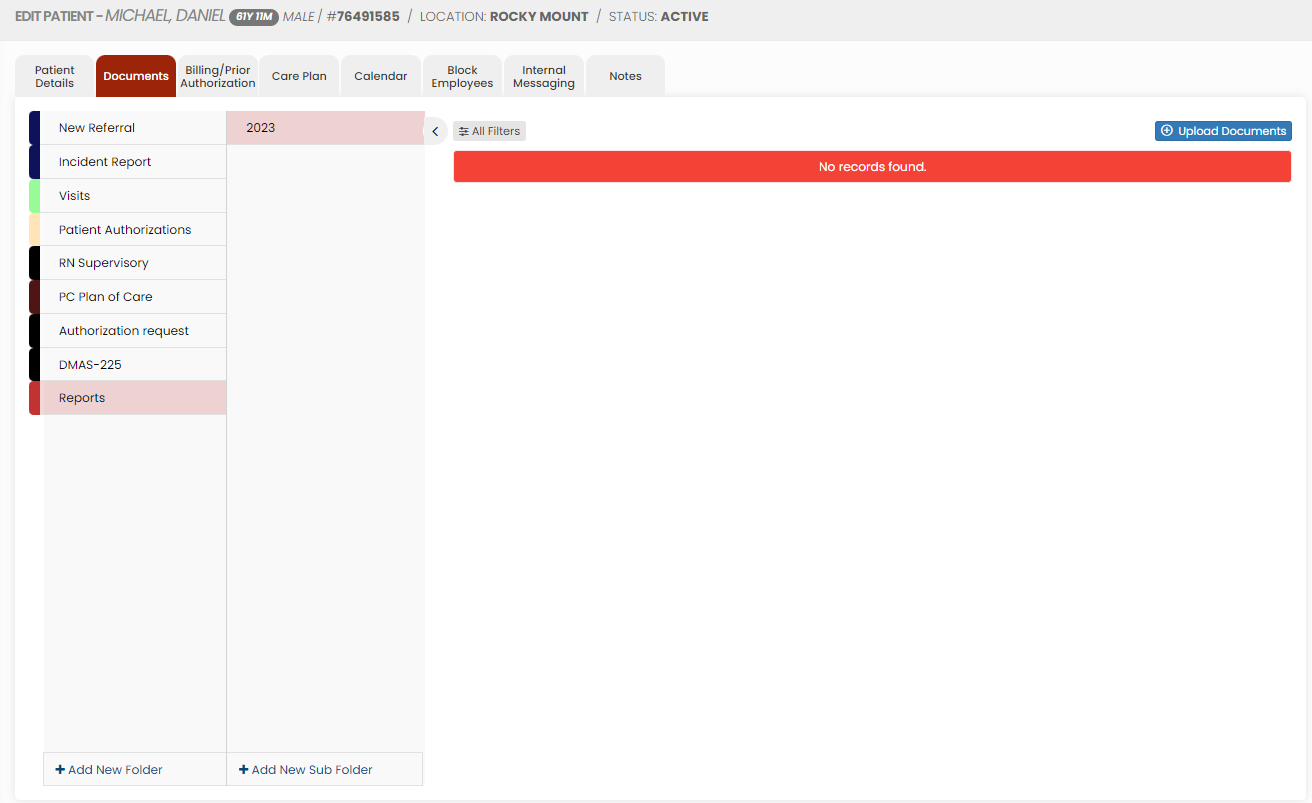
The Sub folder 2023 is now added under folder name Reports to upload the required documents of the Patient.

