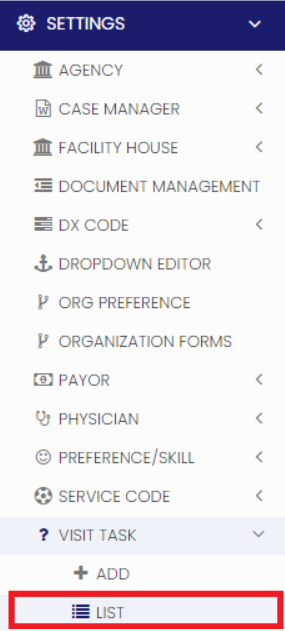
Settings
Settings refer to configurable options that users can adjust to personalize the software for their needs. These settings include Document Management, Dx code, Payor, Physician, Service code, Visit task etc.,
- Agency
- Case Manager
- Facility House
- Document Management
- Dx Code
- Dropdown Editor
- Org Preference
- Organization Forms
- Payor
- Physician
- Preference / Skills
- Service Code
- Visit Task
- Note Sentence
- Email Template
- Notification Configuration
- Virtual Visit Terms and Conditions
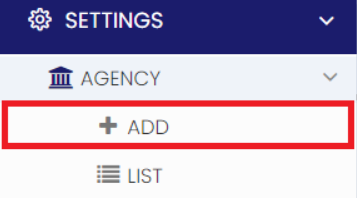
Agency
An agency is an organization that provides a wide range of medical and non-medical services to individuals in their own homes. These agencies offer personalized care for patients to receive quality care while maintaining their independence.
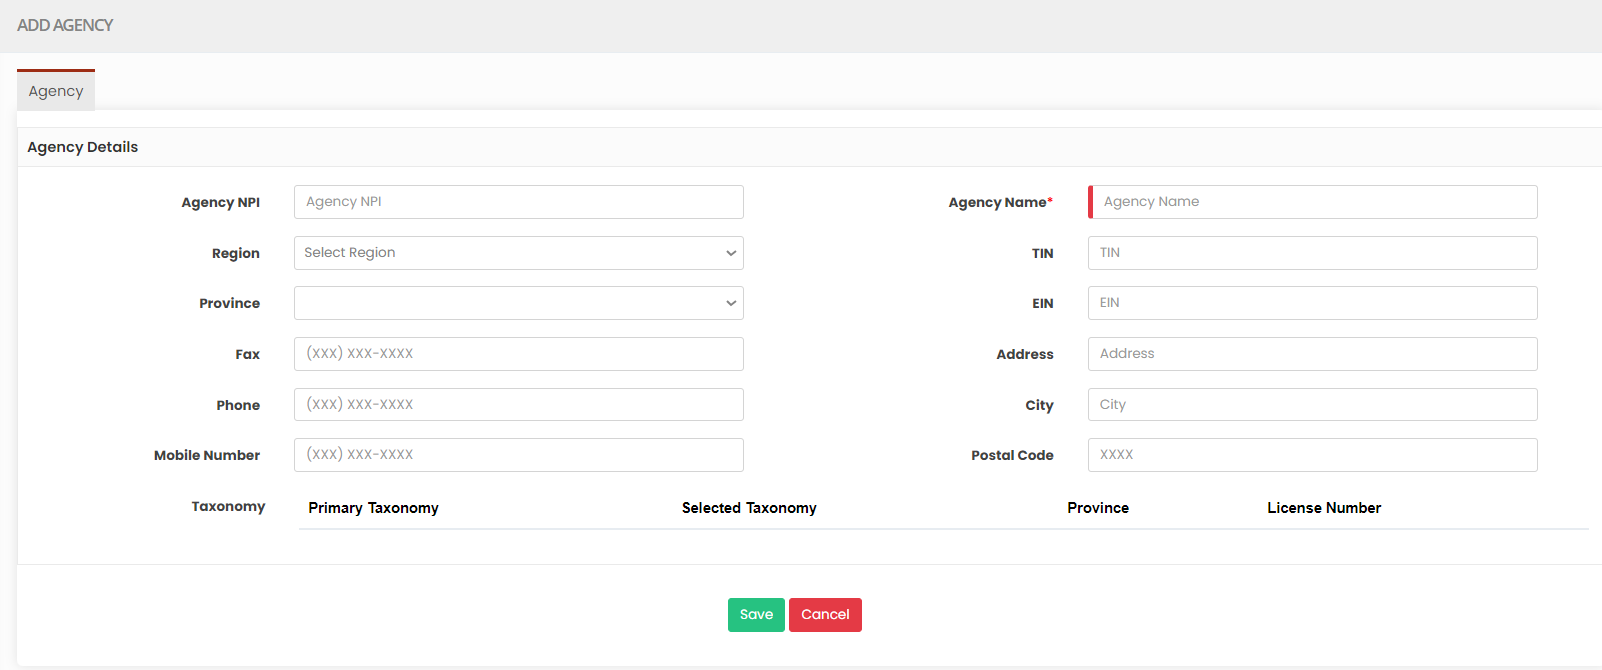
Adding Agency
Note: All Fields marked with * are mandatory and must be filled out, otherwise the system will generate an error indicating that the required information is missing.
Settings >> Agency >> +Add option
Locate the +Add option under Agency Tab.
Now, update the required information in Agency Details and Click Save option.
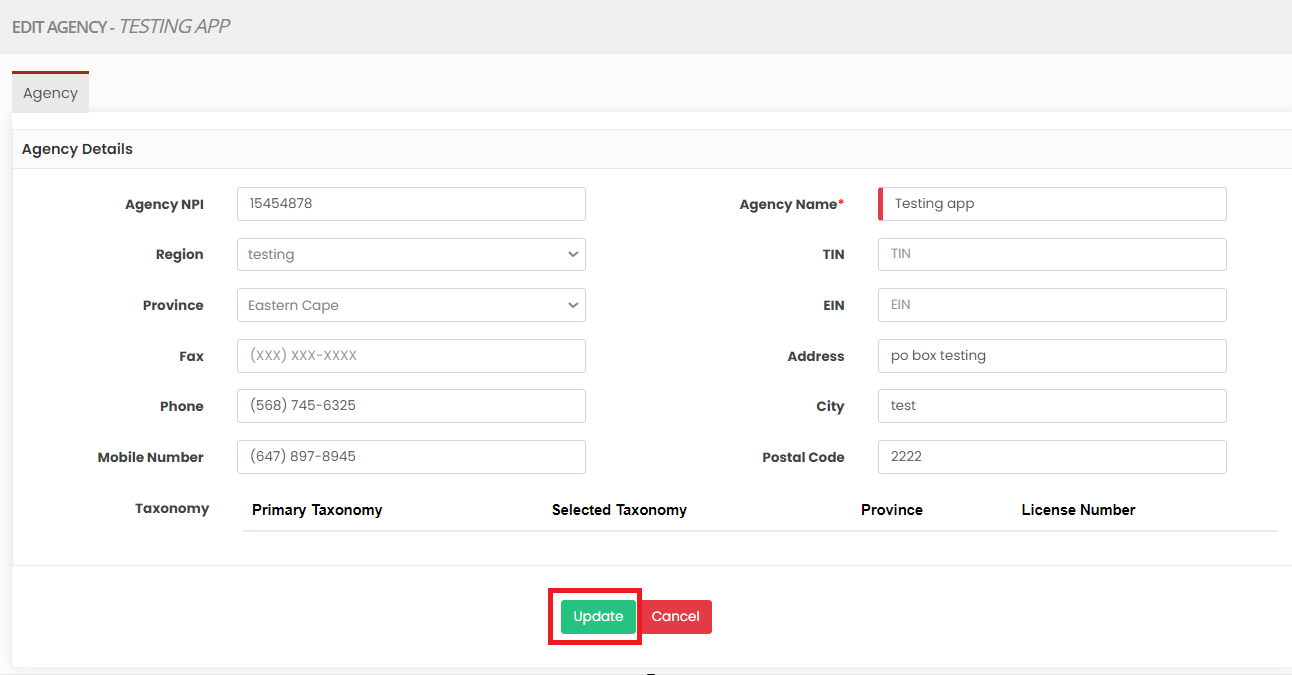
Editing Agency
Settings >> Agency >> List
Locate list option under Agency Tab.
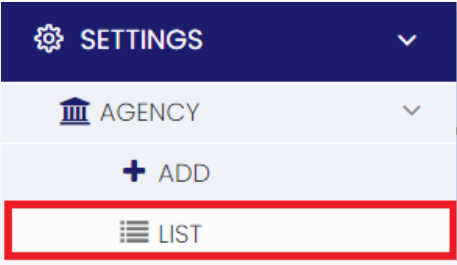
Select the Agency from List and Click Edit option on the right side of the screen.
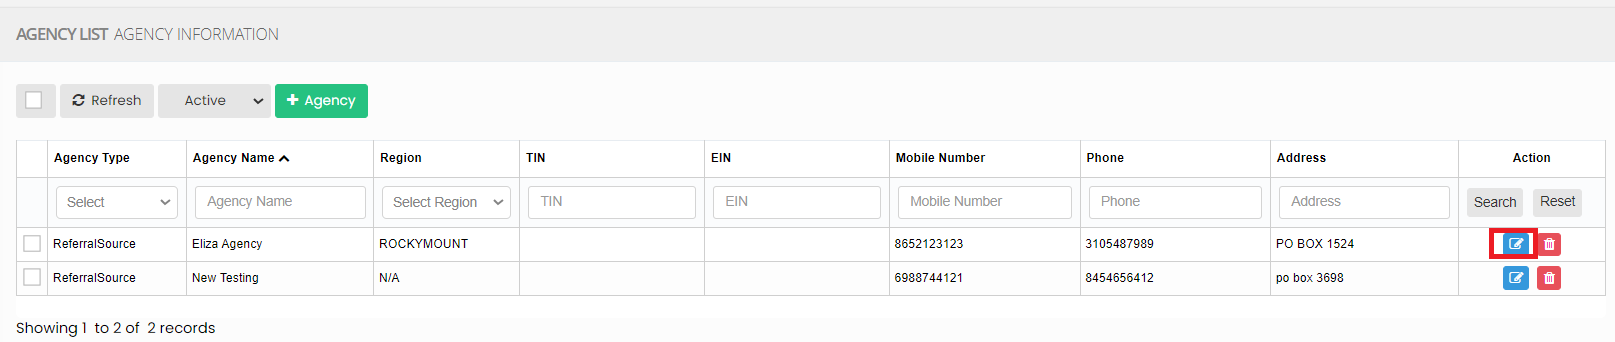
Now Edit the required information and Click Update option.
Delete Agency
Settings >> Agency >> List
Select the Agency from the list using the check box and click Delete or Disable Selection option on the screen.

Now, the Agency gets deleted and we can view the Agency under Deleted list.

The user can also Restore the deleted Agency by using the option Active on the right side of the screen.

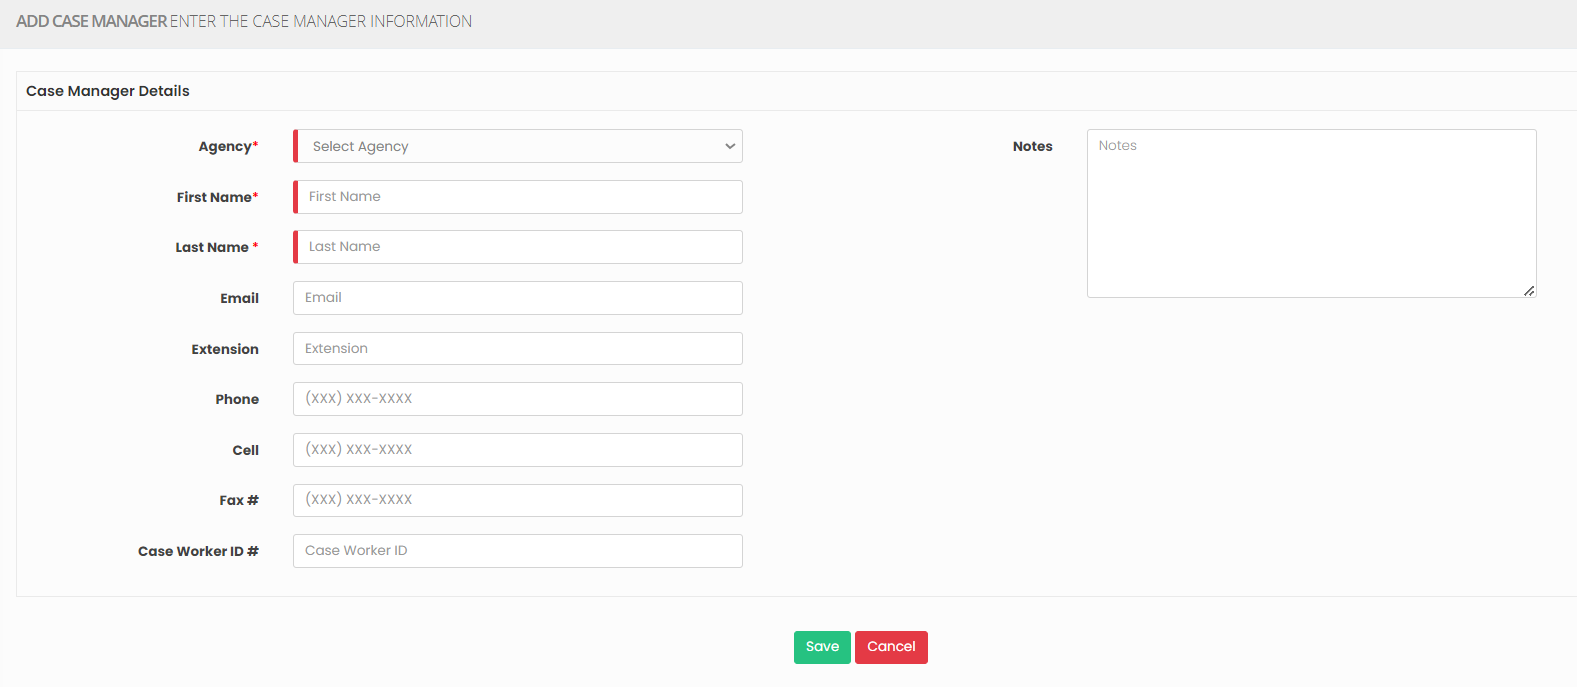
Case Manager
A case manager plays a crucial role in coordinating and managing the care of patients in their own homes. They assess the patient's needs, create care plans, coordinate with healthcare providers, ensure necessary services are provided, and monitor the patient's progress, all while focusing on maintaining the patient's comfort and well-being in a home setting.
Adding Case Manager
Note: All Fields marked with * are mandatory and must be filled out, otherwise the system will generate an error indicating that the required information is missing.
Settings >> Case Manager >> +Add option
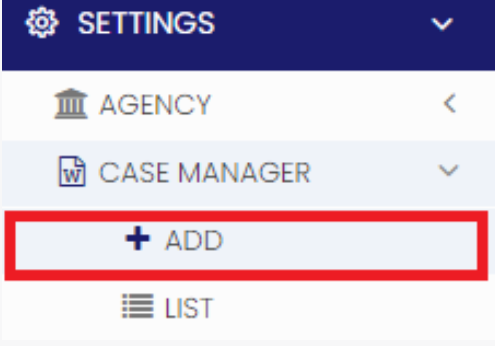
Update the required fields in Case Manager details and Click Save option.
Editing Case Manager
For Editing the Case Manager information, follow these steps:
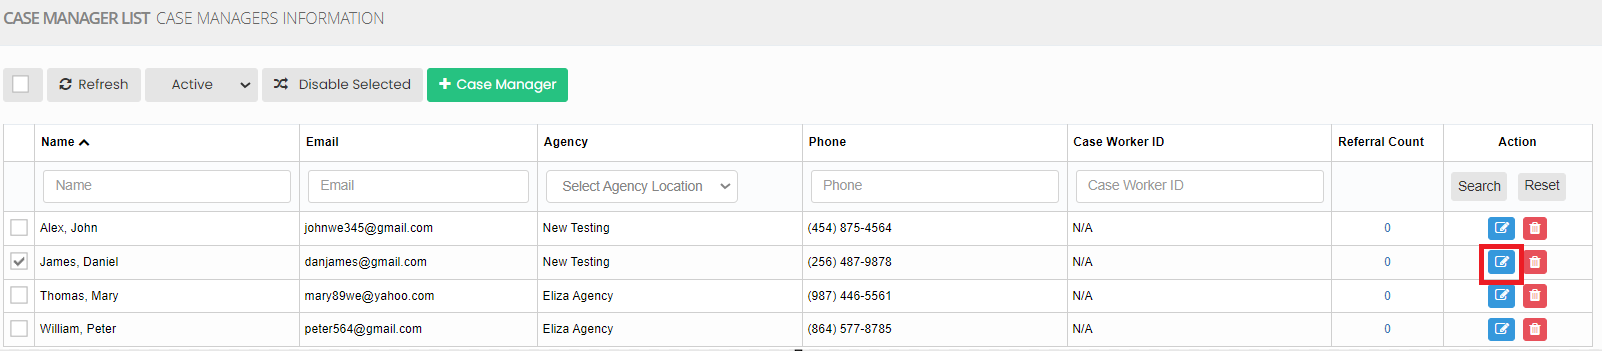
Settings >> Case Manager >> List
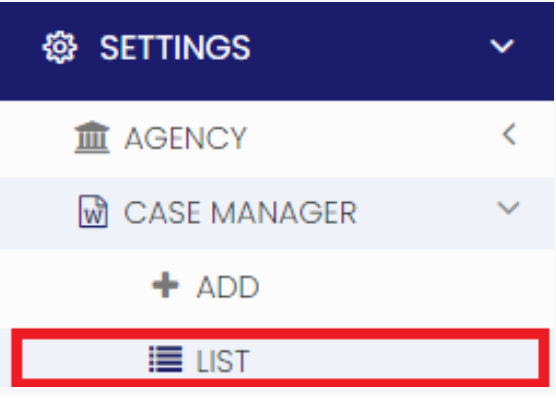
Select the Case Manager from List and Click Edit option on the right side of the screen.
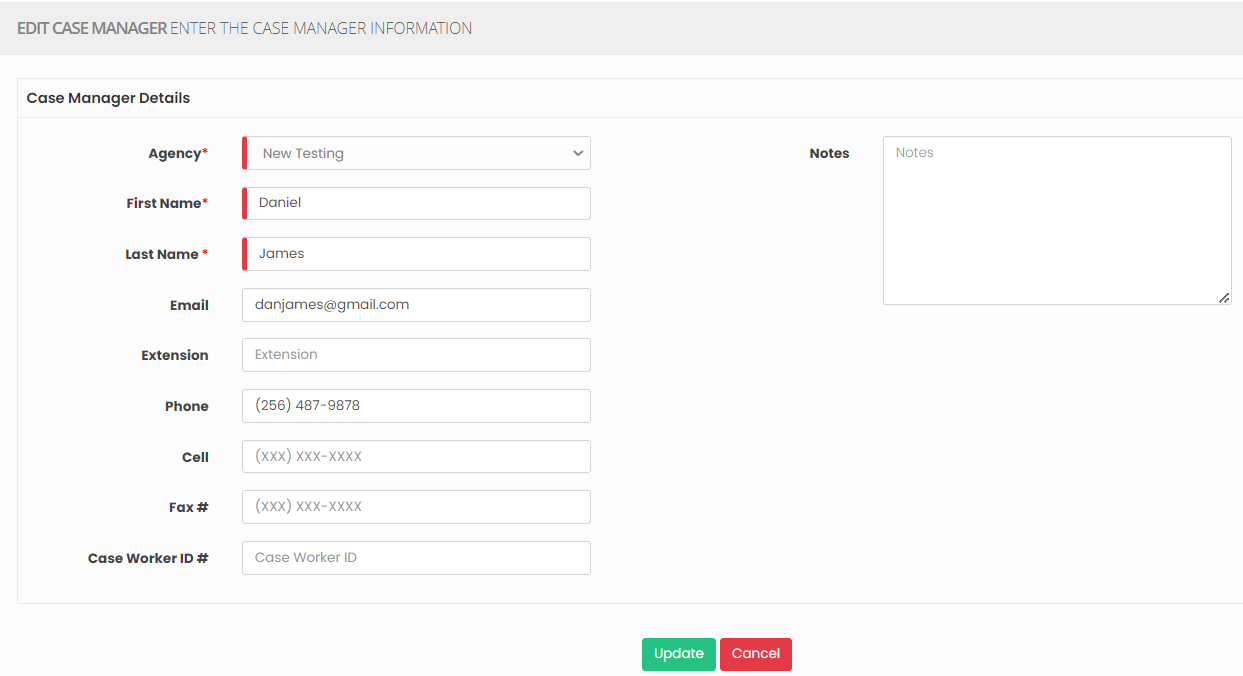
Now, edit the required information and click update option.
Delete Case Manager
Settings >> Case Manager >> List
Select the Case Manager from the list using the check box and click Delete or Disable Selection option on the screen.

Now, the Case Manager details gets deleted and we can view the Case Manager under Deleted list.

The user can also Restore the deleted Case Manager details by using the option Active on the right side of the screen.

Facility House
A facility house in home care refers to a residential care setting for individuals requiring assistance with daily living. It offers a safe environment with support for activities, medical services, and social interaction.
Note: All Fields marked with * are mandatory and must be filled out, otherwise the system will generate an error indicating that the required information is missing.
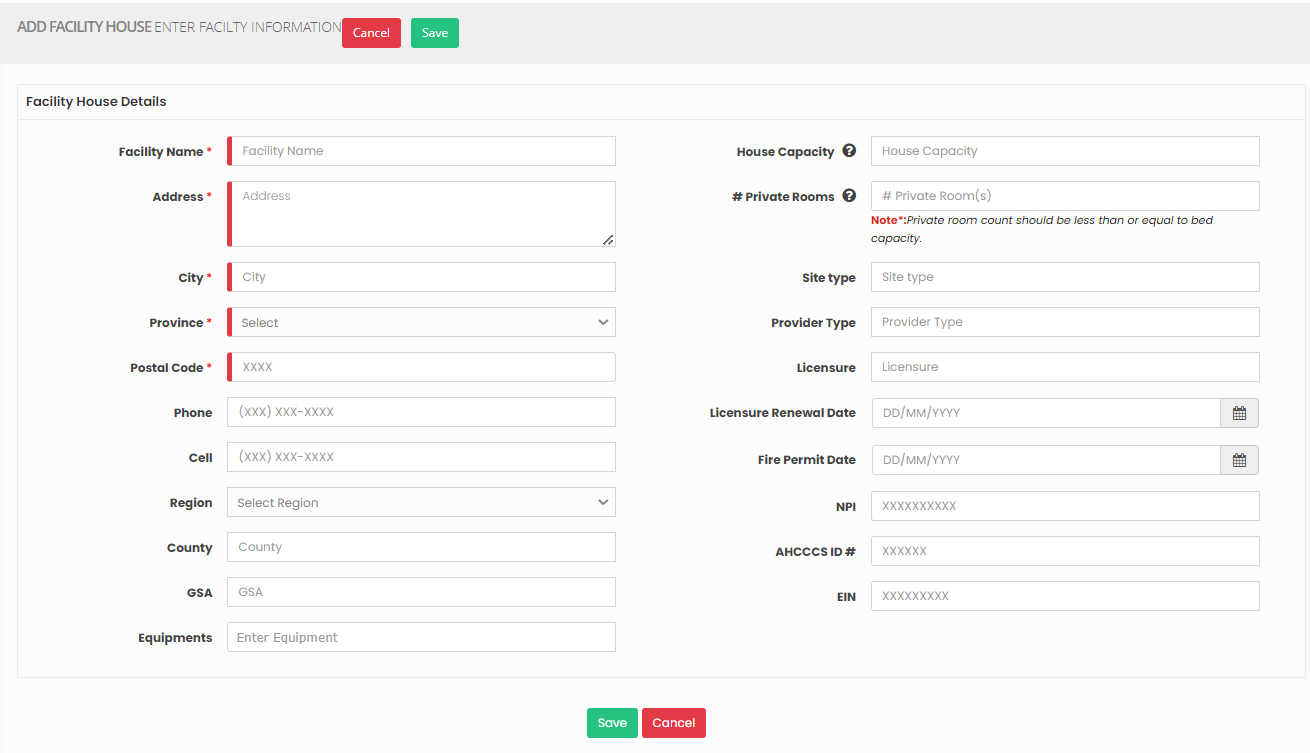
Adding Facility House
The Facility house can be added in the system under the feature Settings.
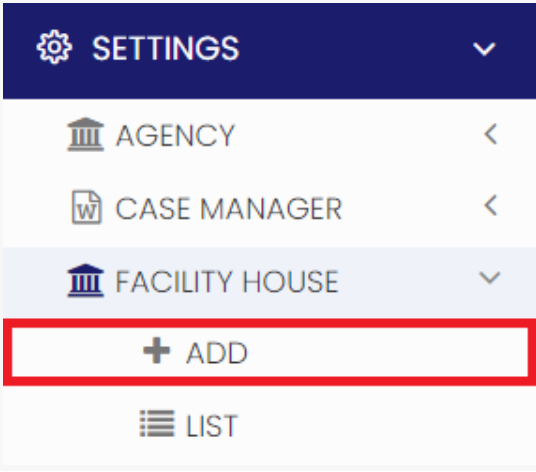
Settings >> Facility House >> +Add option
Update the Facility House Details in the required fields and Click Save option.
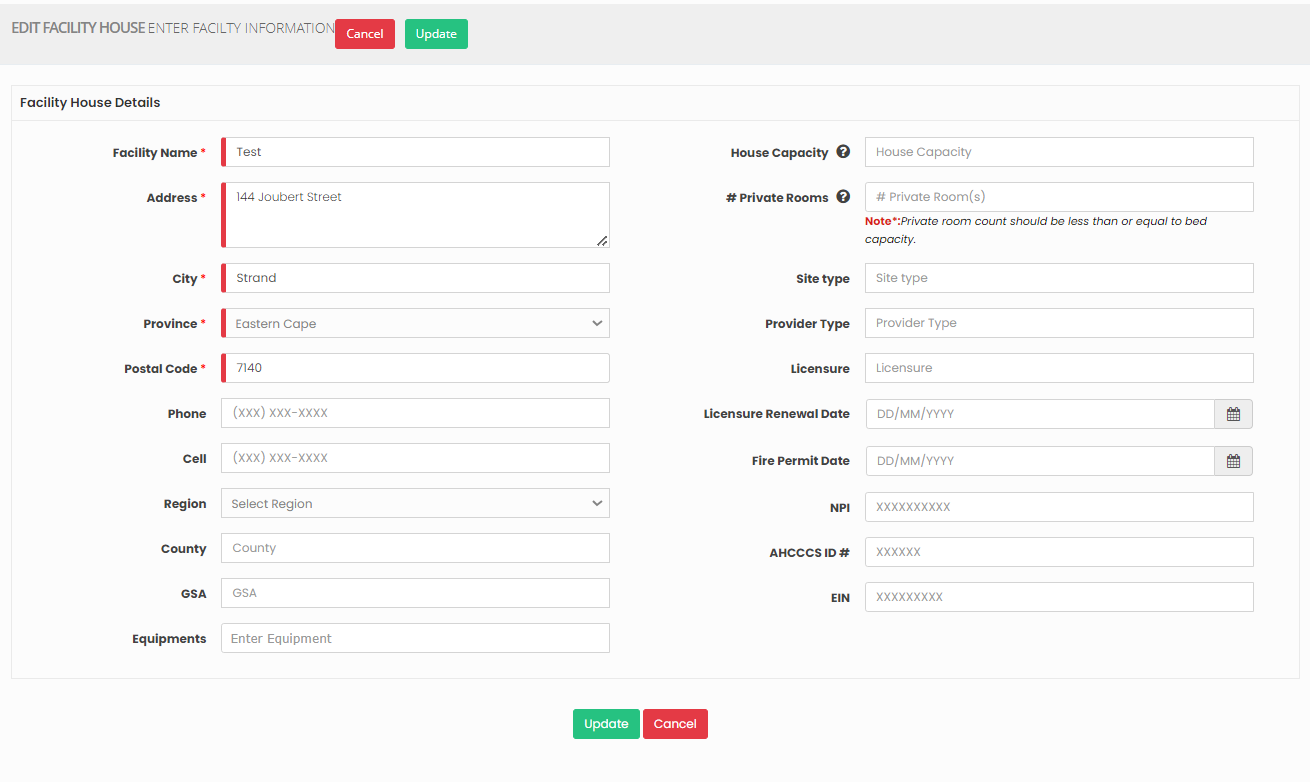
Editing Facility House
The facility house details can be edited by using the option Edit on the right side of the screen in Facility House List.
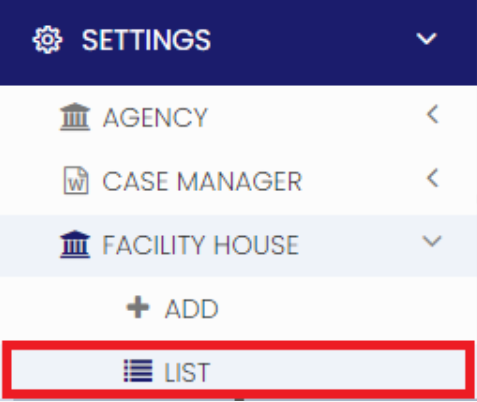
Settings >> Facility House >> List
The user can edit the required information in the Facility House Details and Click Update option.
Delete Facility House
Settings >> Facility House >> List
Select the Facility House from the list using the check box and click Delete or Disable Selection option on the screen.

Now, the Facility House gets deleted and we can view the Facility House details under Deleted list.

The user can also Restore the deleted Facility House details by using the option Active on the right side of the screen.

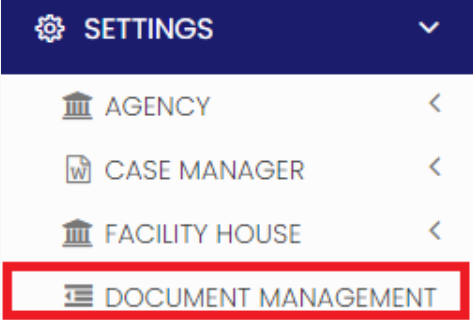
Document Management
Document management in home health care involves efficiently organizing and storing patient records, treatment plans, and related documents to ensure high-quality care.
Note: All Fields marked with * are mandatory and must be filled out, otherwise the system will generate an error indicating that the required information is missing.
Adding New Folder
Settings >> Document Management
For Adding new Folder, select the User type Referral/ Employee and update the required information in Edit Document management screen and click the option Show To All - Yes/No. When the user select the option Yes, then the Folder will be added to all the Client / Employee in the system. If the user select No option, then the Folder will be added only to the particular Client / Employee selected under the Assignee field.
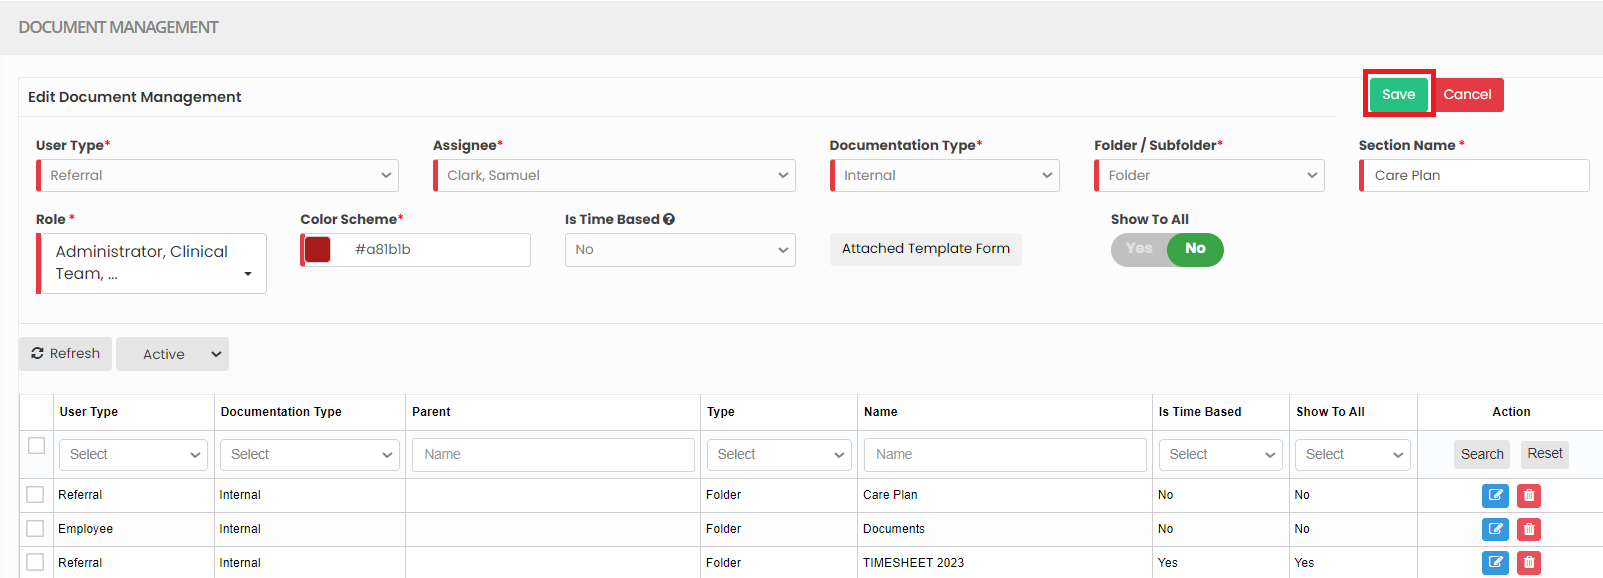
Editing Folder
Settings >> Document Management
Select the Folder from List and click Edit option on the right side of the screen.
Edit the required information and click Save option.

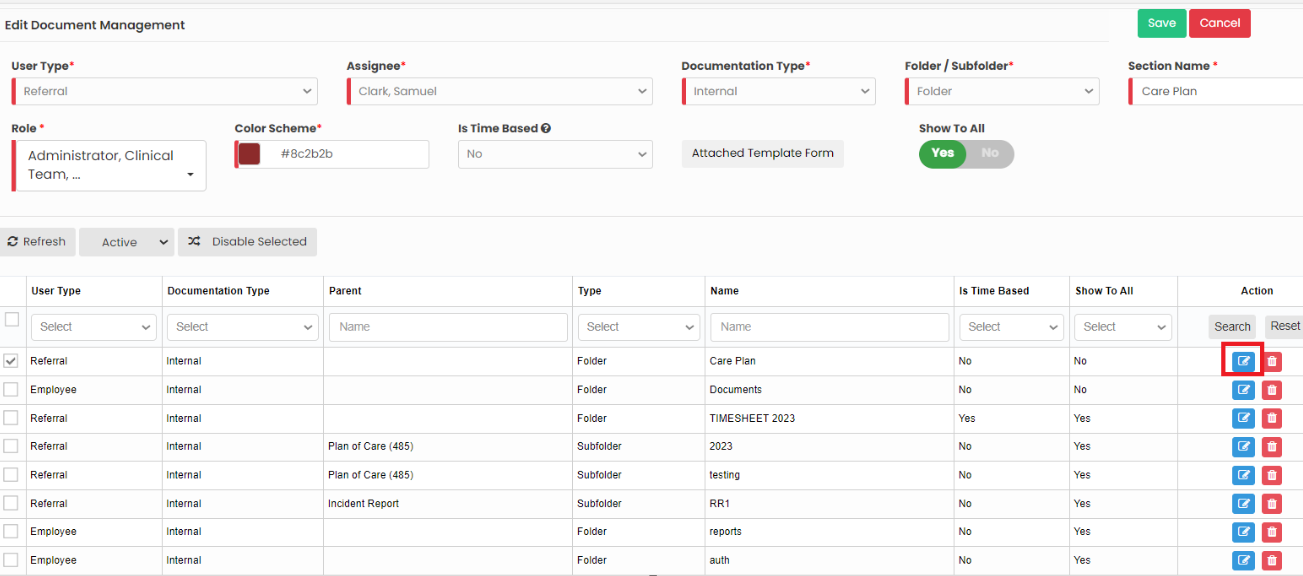
Adding New Sub-Folder
Settings >> Document Management
For Adding new Sub-Folder, select the user type Referral/ Employee, select the Folder name in which the sub folder has to be added and update the required information in Edit Document management screen and click the option Show To All - Yes/No. When the user select the option Yes, then the Folder will be added to all the Client / Employee in the system. If the user select No option, then the Folder will be added only to the particular Client / Employee selected under the Assignee field.

Editing Sub-Folder
Settings >> Document Management
Select the Sub-Folder from List and click Edit option on the right side of the screen.
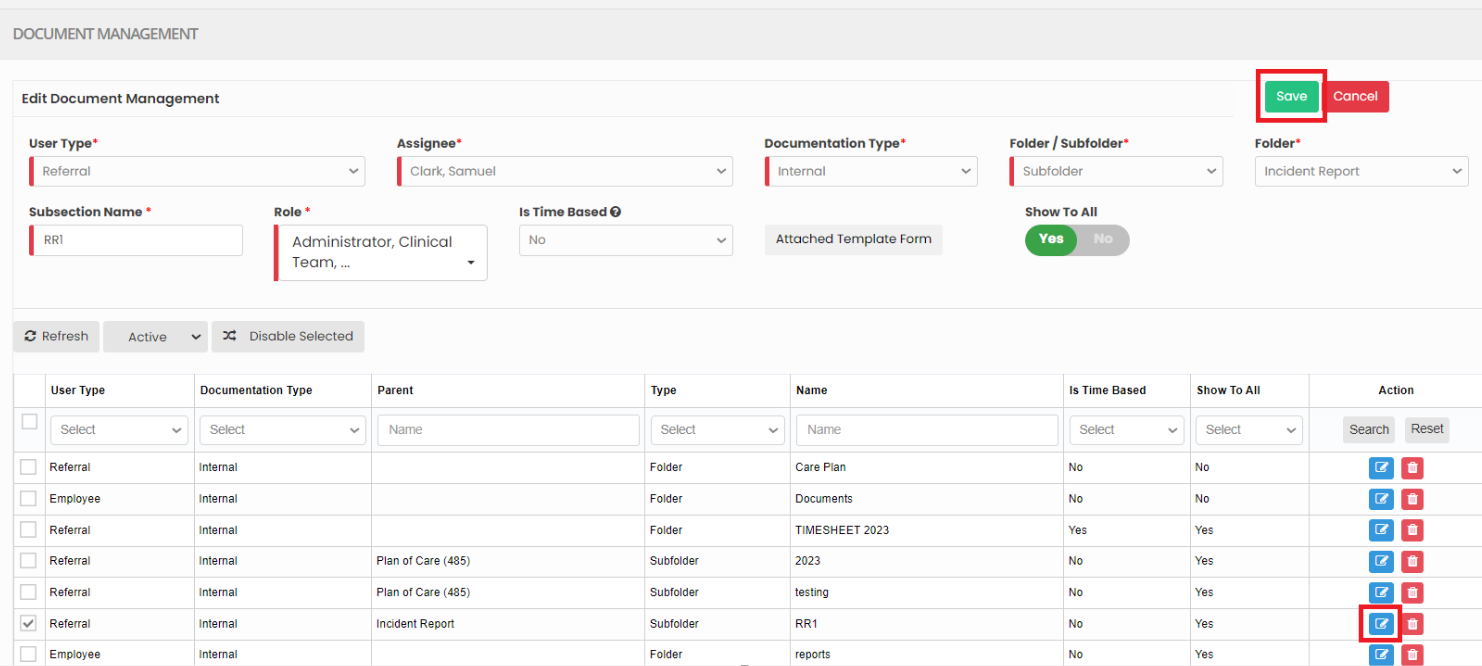
Edit the required information and click Save option.

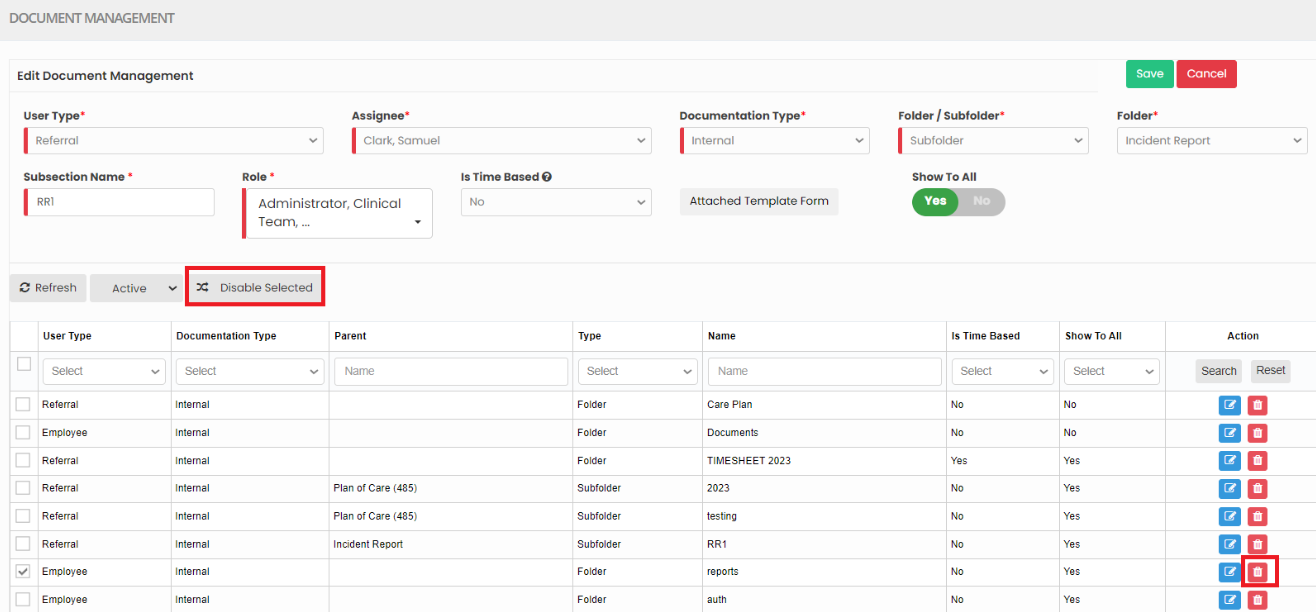
Deleting Folder / Sub-Folder
Settings >> Document Management
For deleting Folder / Sub-Folder in Document Management screen, select the Folder / Sub-folder from List by using the check box of the Folder / Sub-Folder and click Delete option or Disable Selected option on the screen.
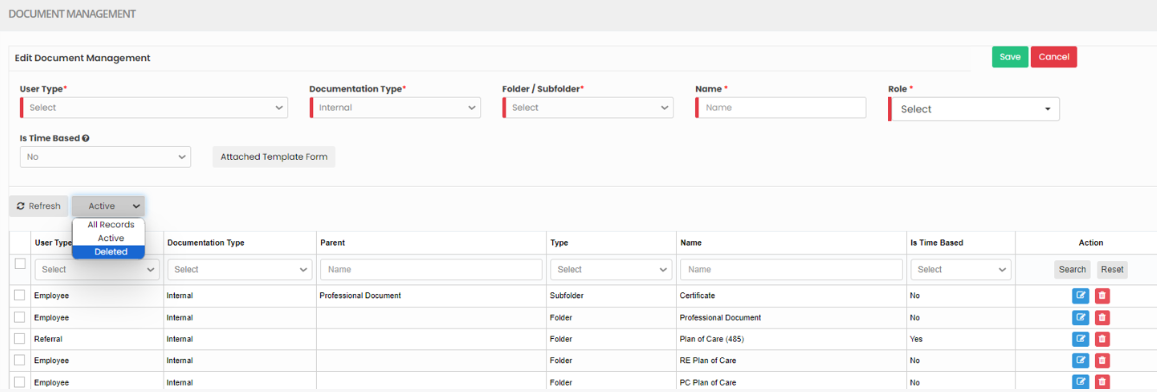
Restore Deleted Folder / Sub-Folder
Settings >> Document Management
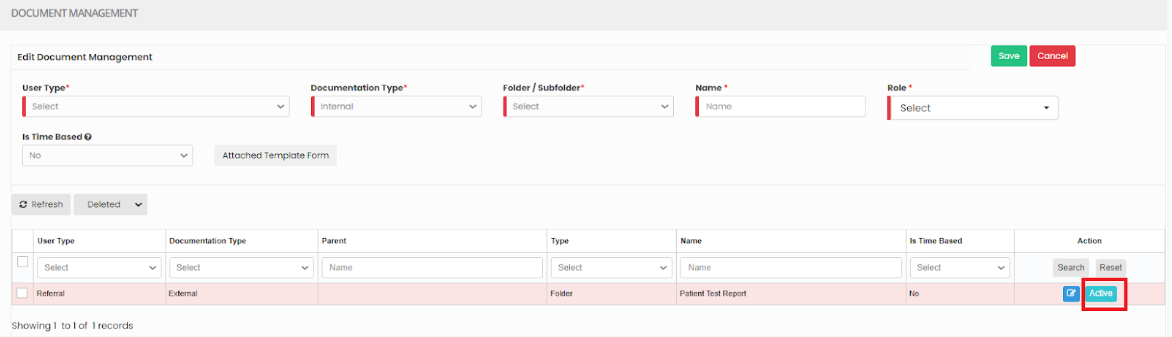
The Deleted folder can be viewed by using the dropdown option Deleted after the Refresh option in the screen.
Now the Deleted folder can also be restored by using the option Active on the right side of the screen.
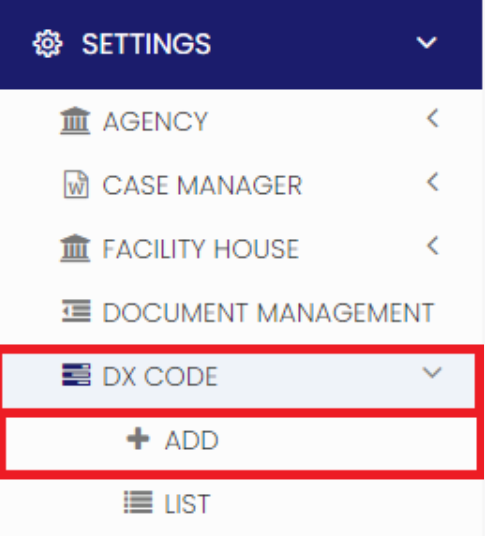
Dx Code
Diagnosis codes (Dx Code), typically using the ICD-10 system, are vital in home health care for billing, care planning, communication, and quality reporting. They ensure accurate reimbursement, guide treatment plans, facilitate information sharing among healthcare providers, and help monitor patient outcomes, improving the overall quality of home health services.
Note: All Fields marked with * are mandatory and must be filled out, otherwise the system will generate an error indicating that the required information is missing.
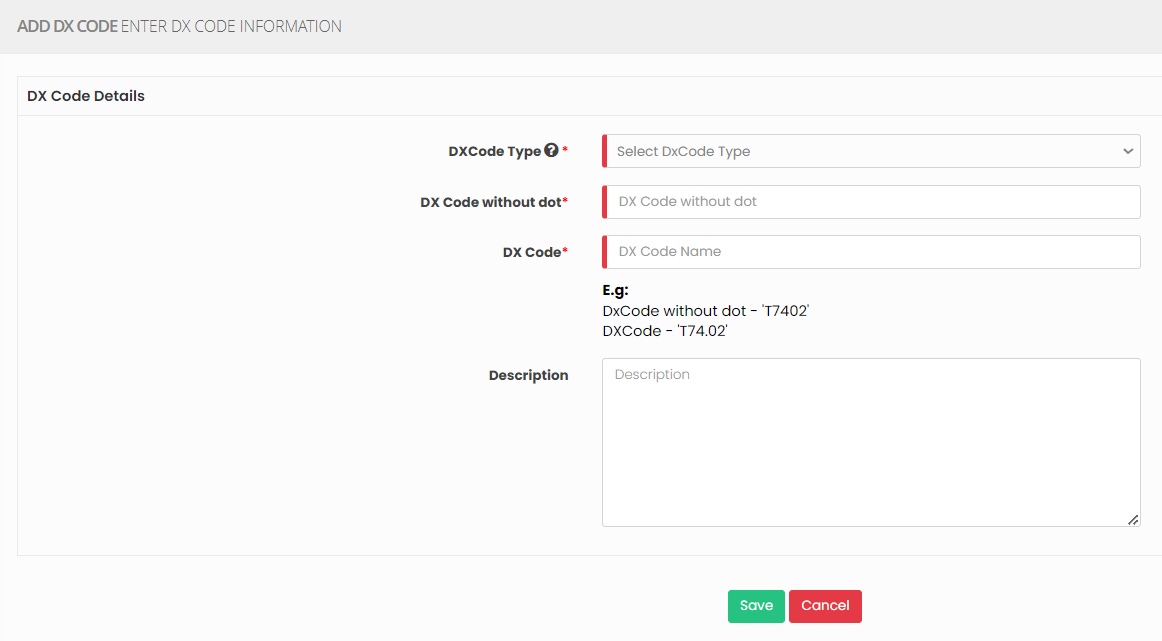
Adding Dx Code
Settings >> DX Code >> + Add option
Update the required information in DX Code details and Click Save
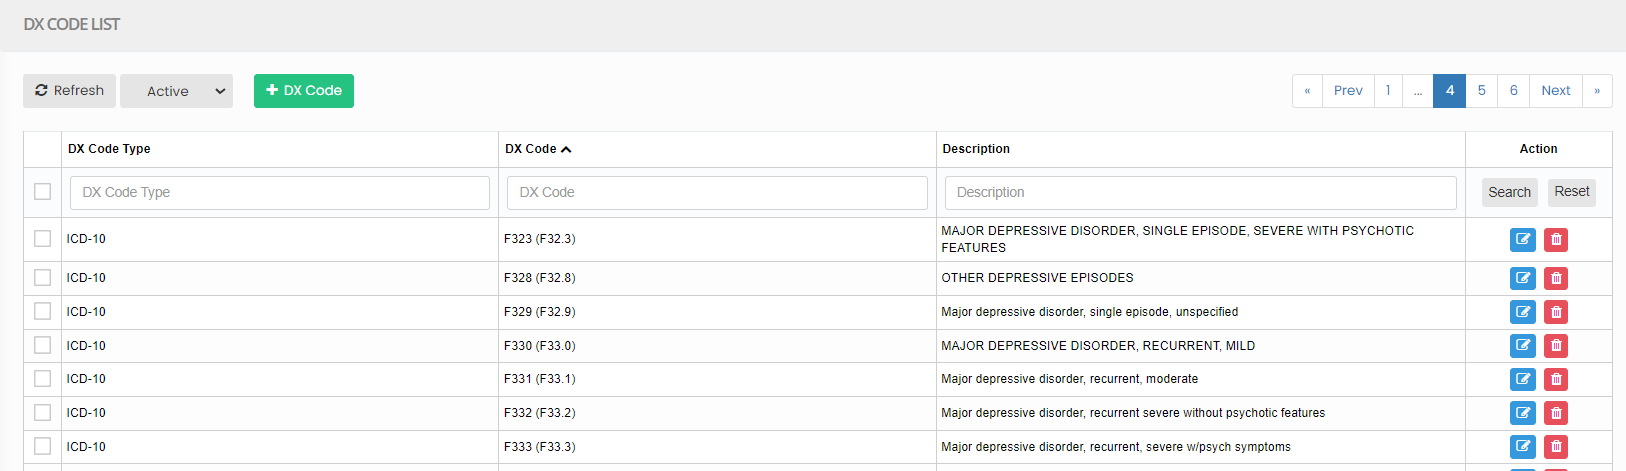
View Dx code List
The list of Dx code can be viewed by using the option List under Dx code.
Settings >> DX Code >> List
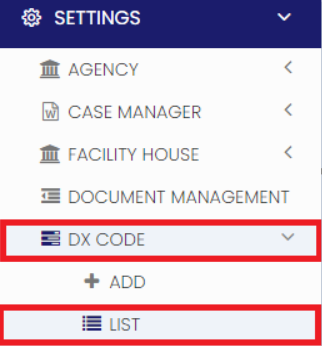
Enter the Dx code and click search option to view the required DX code in the system.
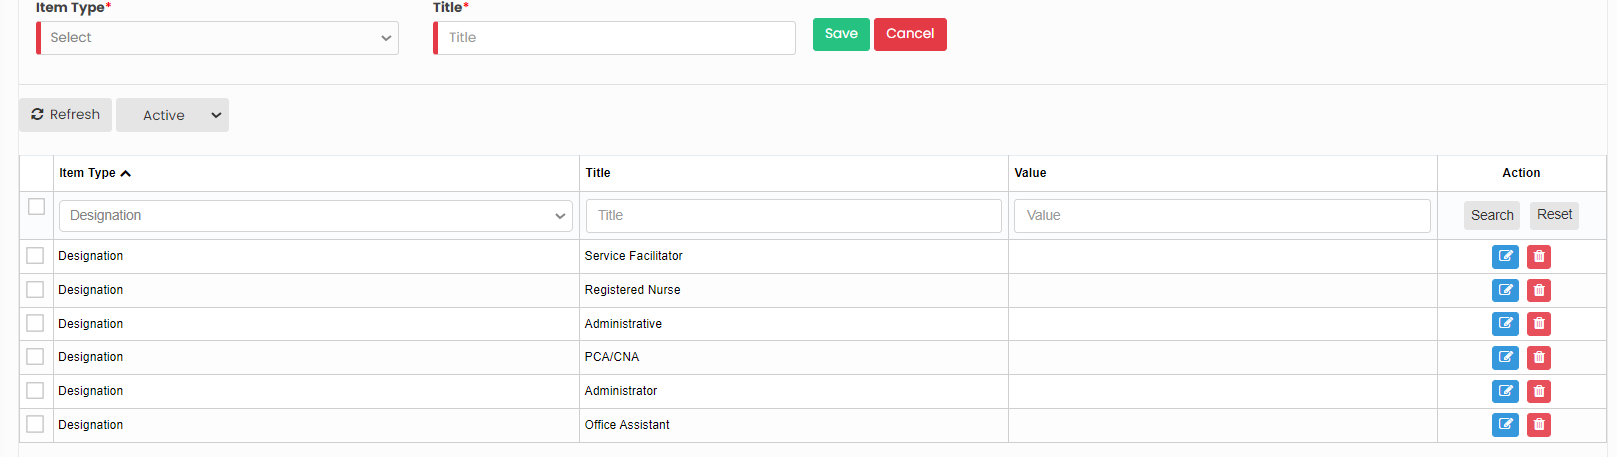
Dropdown Editor
A "drop-down editor" typically refers to a tools for creating and editing dropdown lists. It allows users to specify options within a dropdown menu, often used for user input or selection within web applications.
Adding Title
Settings >> Dropdown Editor
Select the Item Type for which the Title is to be added and Click Save option.
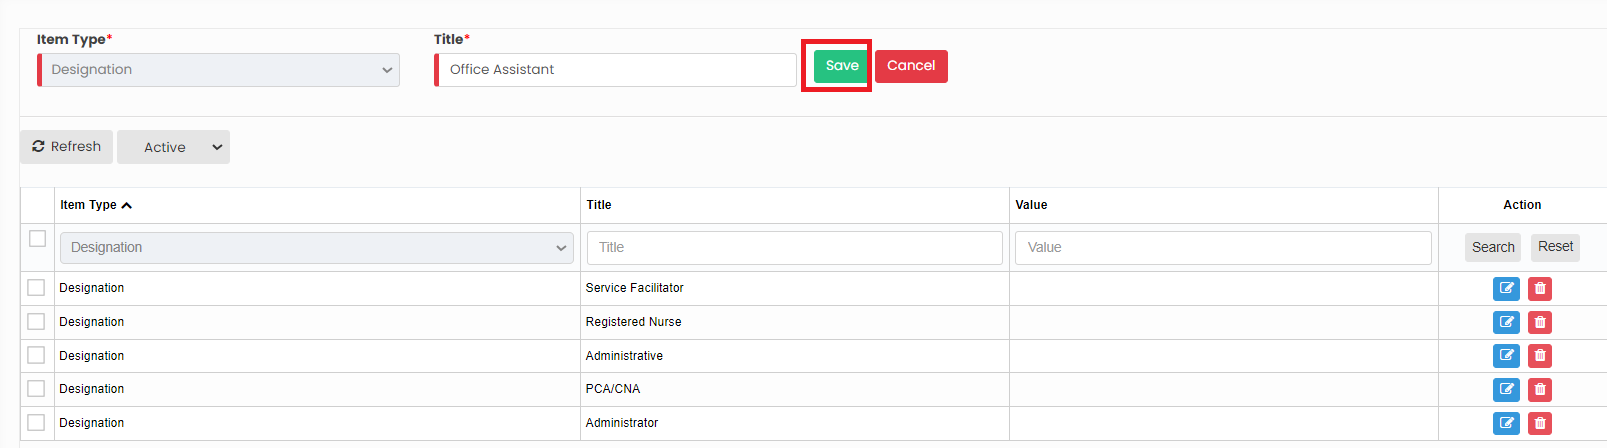
Now, the required information is added under Item type Designation. Similarly we can add the Title for the required Item Type.
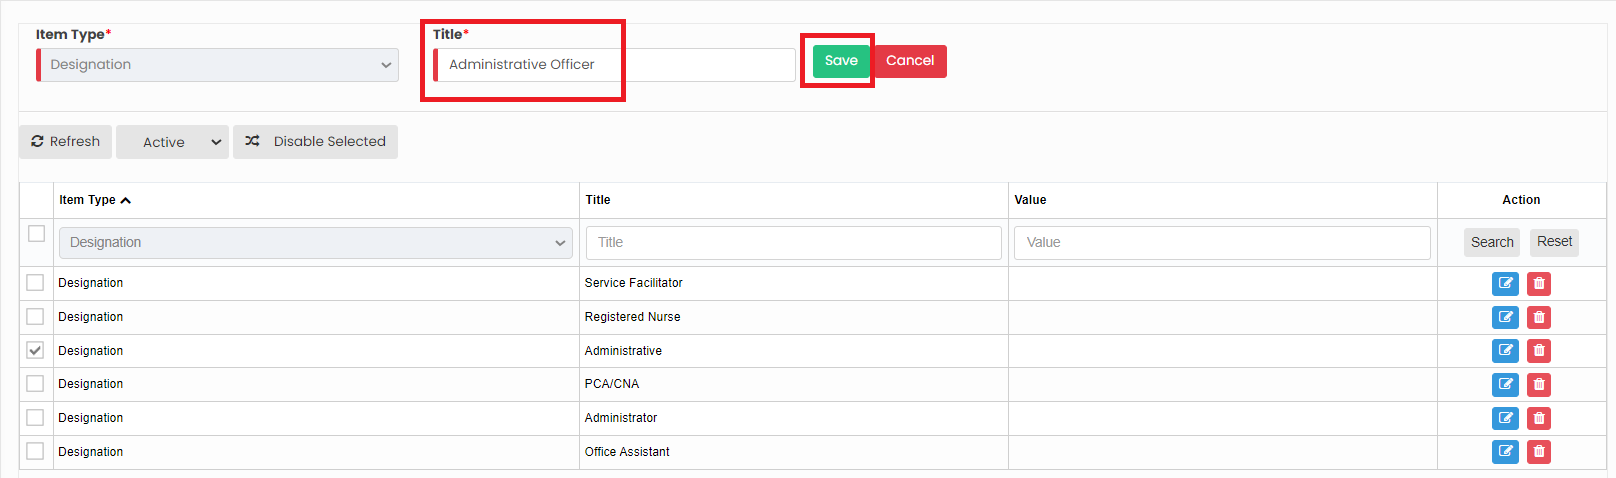
Editing Title
Settings >> Dropdown Editor
Select the Item Type and Click Edit option on the right side of the screen.
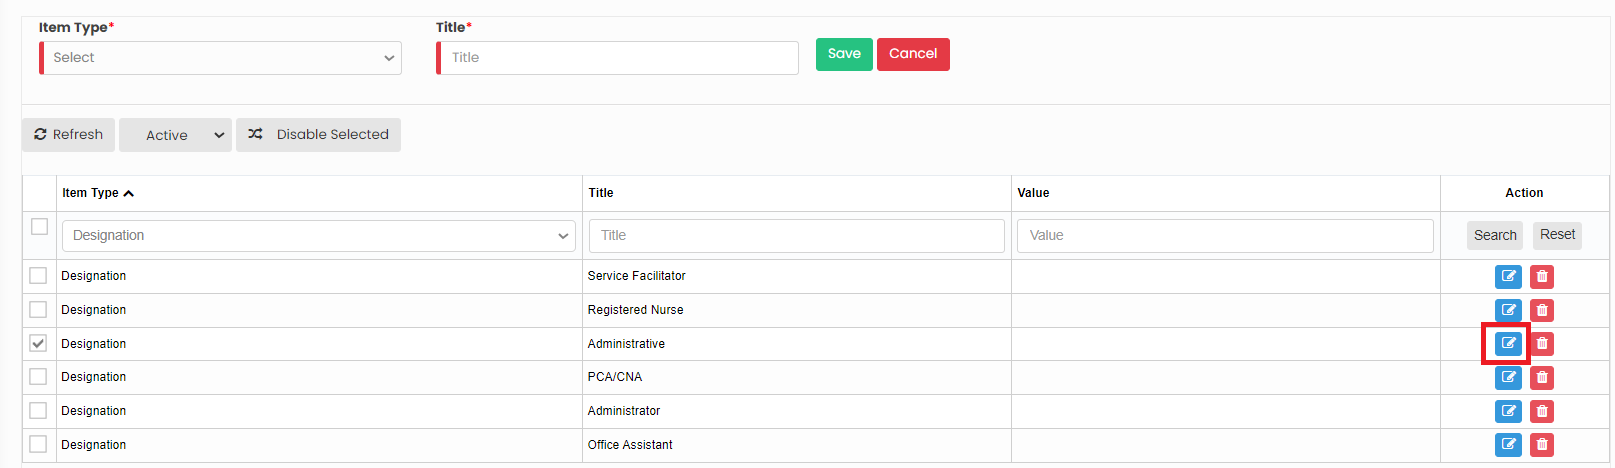
Now, after editing the Title for the required Item type, Click Save option. Similarly we can edit the Title information for all the Item type in the system.
Delete Item type
Settings >> Dropdown Editor
Select the Item type from the List using the check box and click Delete option or Disable selected option in the screen.
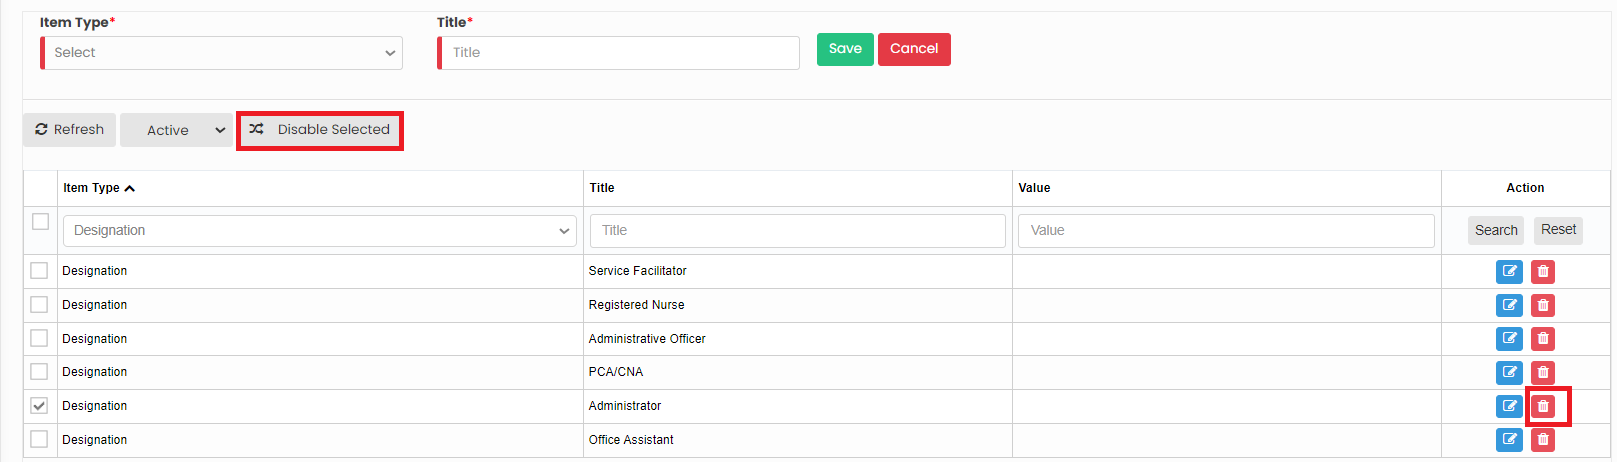
Now, the required item type has been deleted and we can view them under Deleted list.

The deleted Item Type can also be restored by using the option Active on the right side of the screen.

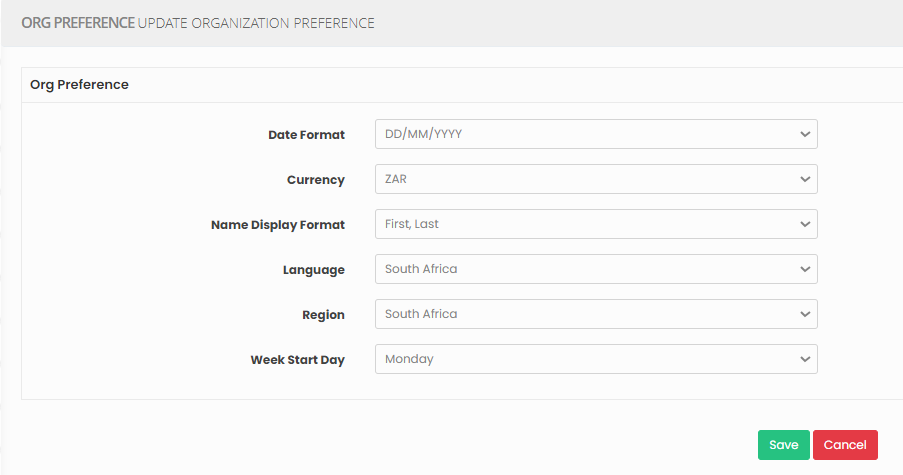
Org Preference
Organization Preference refers to the choice that the home healthcare agency prefer for their Organization in the system.
Org Preference Details
Settings >> Org Preference
Update the Organization Preference details in the system and Click Save option.
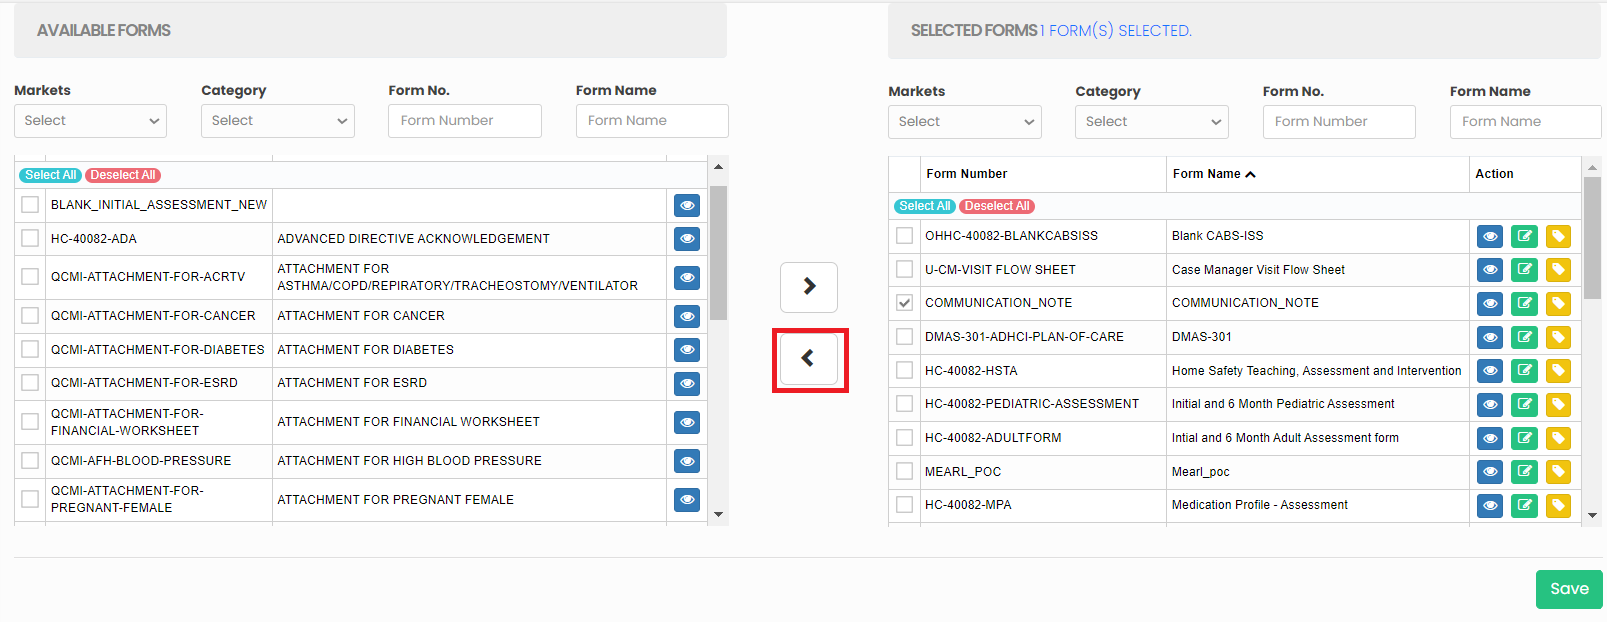
Organization Forms
Organization Forms includes the list of forms Available in the system and can be selected as per the requirement of the user.
Select Organization Forms
Settings >> Organization Forms
The user can select the required forms from the available forms in the system and click Save option.
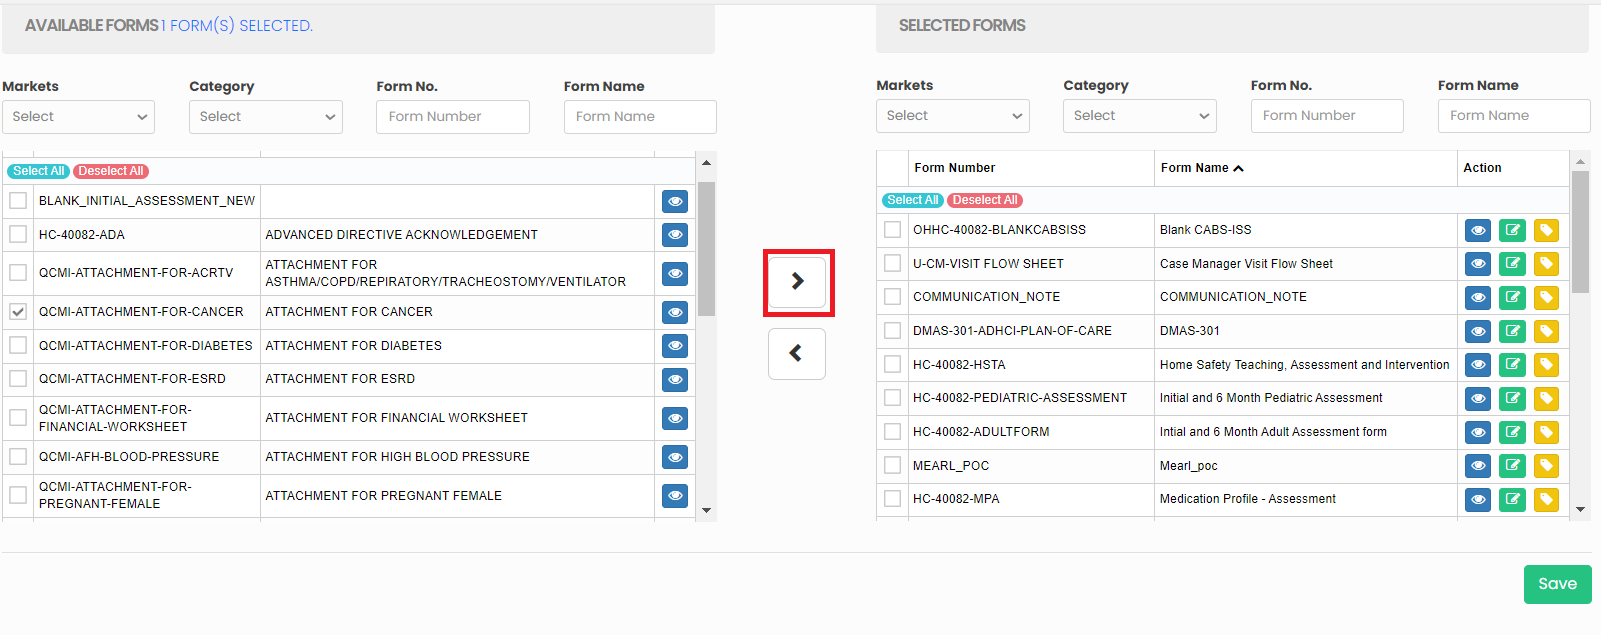
Also, the selected forms can be sent to available forms list in the system.
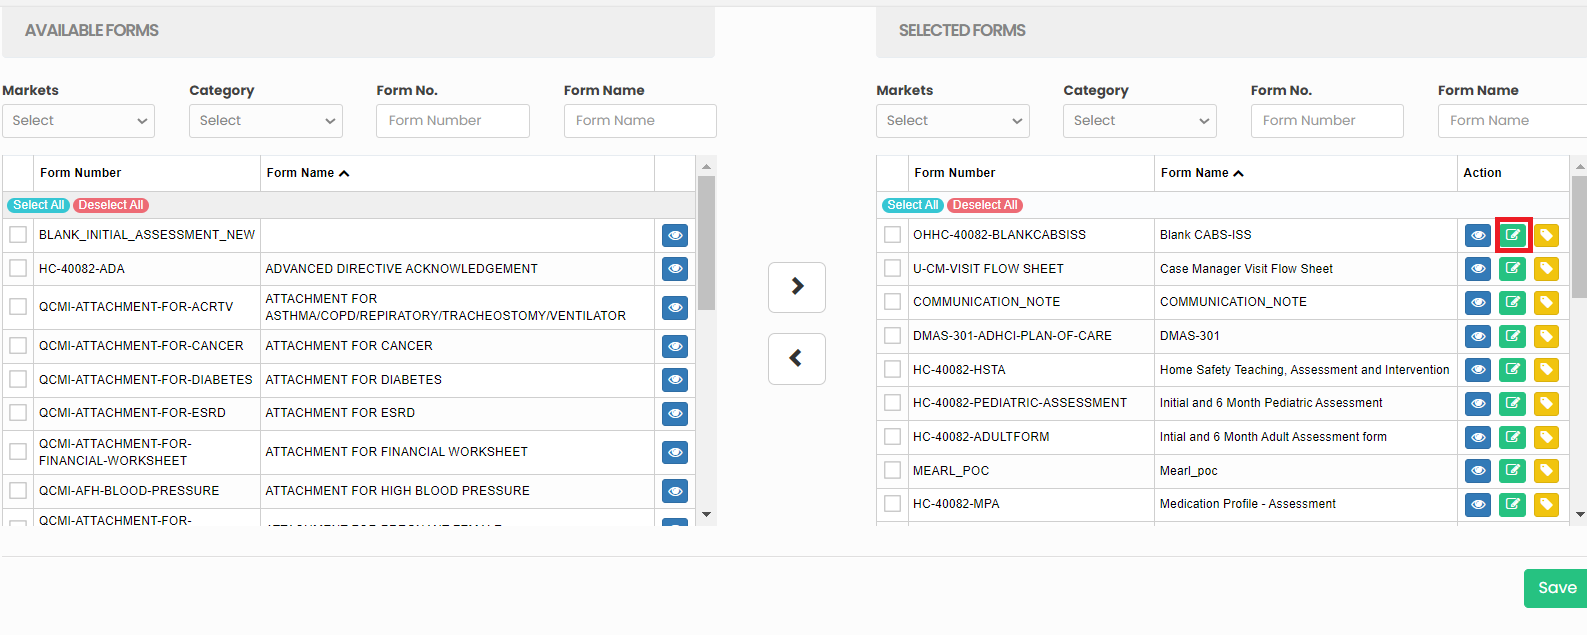
Edit Form Name
Settings >> Organization Forms
The selected form names can be edited by using the edit option on the right side of the screen. Edit the form name and click Save option.
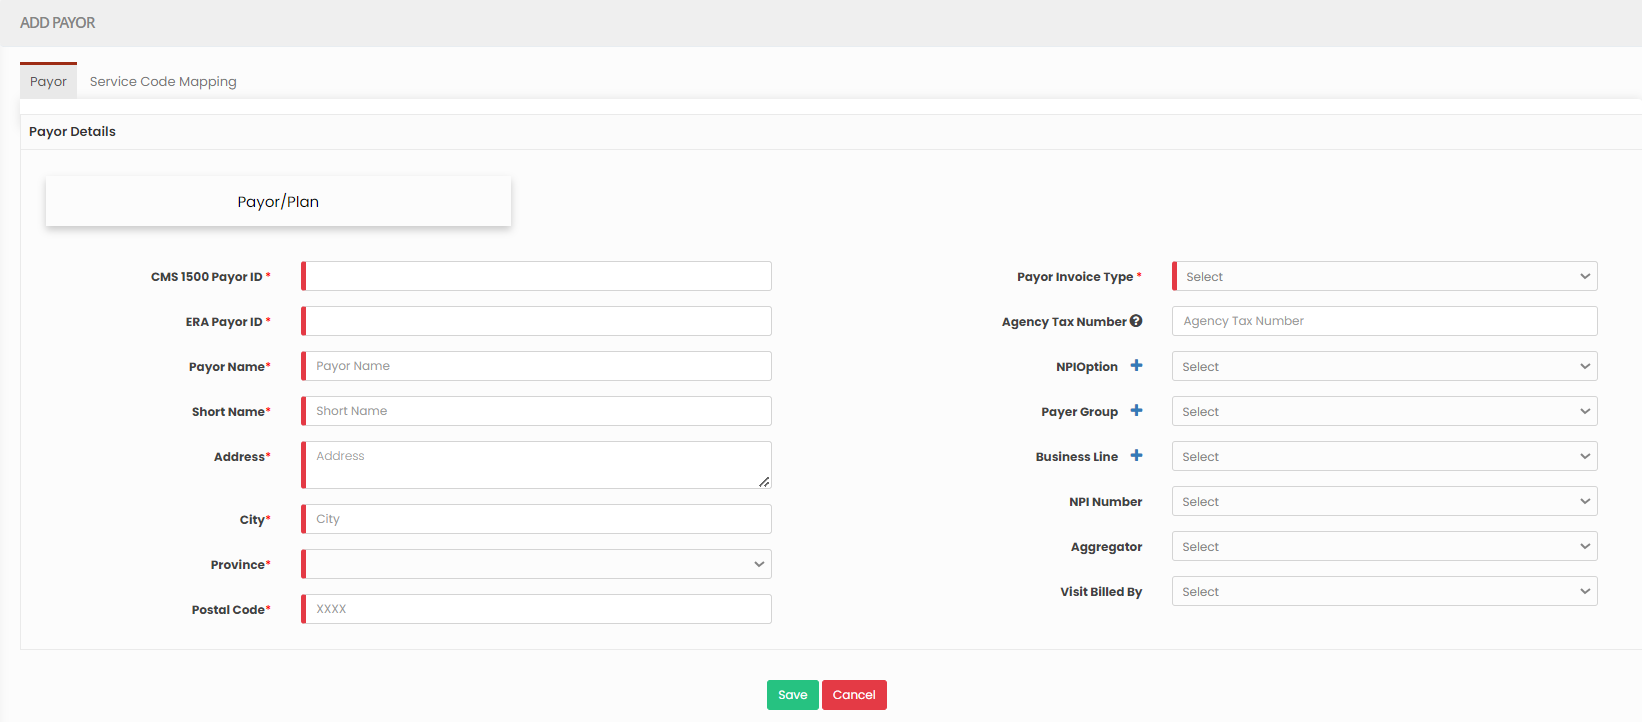
Payor
In home healthcare, a "payor" is the entity responsible for covering costs. Payors can include health insurance companies, Medicare, Medicaid, private pay and managed care organizations.
Note: All Fields marked with * are mandatory and must be filled out, otherwise the system will generate an error indicating
that the required information is missing.
Adding Payor Details
Settings >> Payor >> +Add option

The user can update the required information in Payer Details and Click Save option.
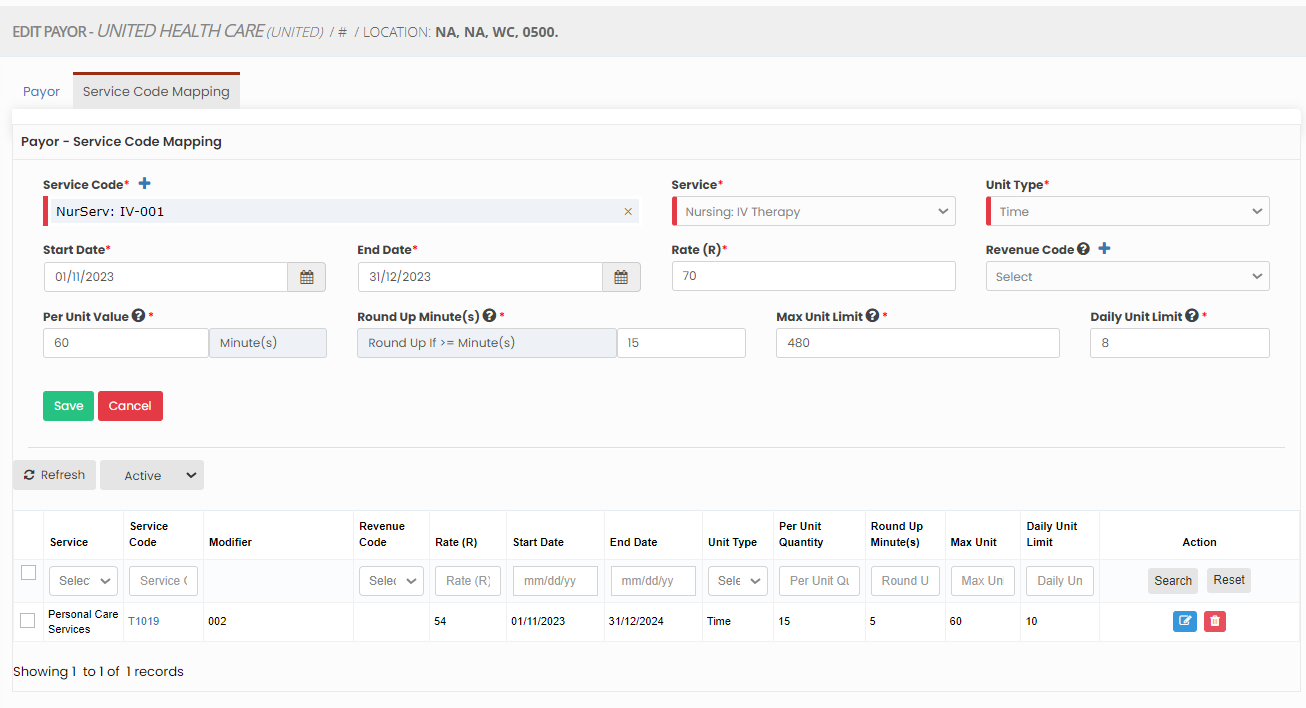
Service Code Mapping
The new changes in Service code mapping are in progress within the application.
Select the Service code from the List and update the required information of the Service and click Save option. The updated Service code can be viewed at the bottom of the screen.
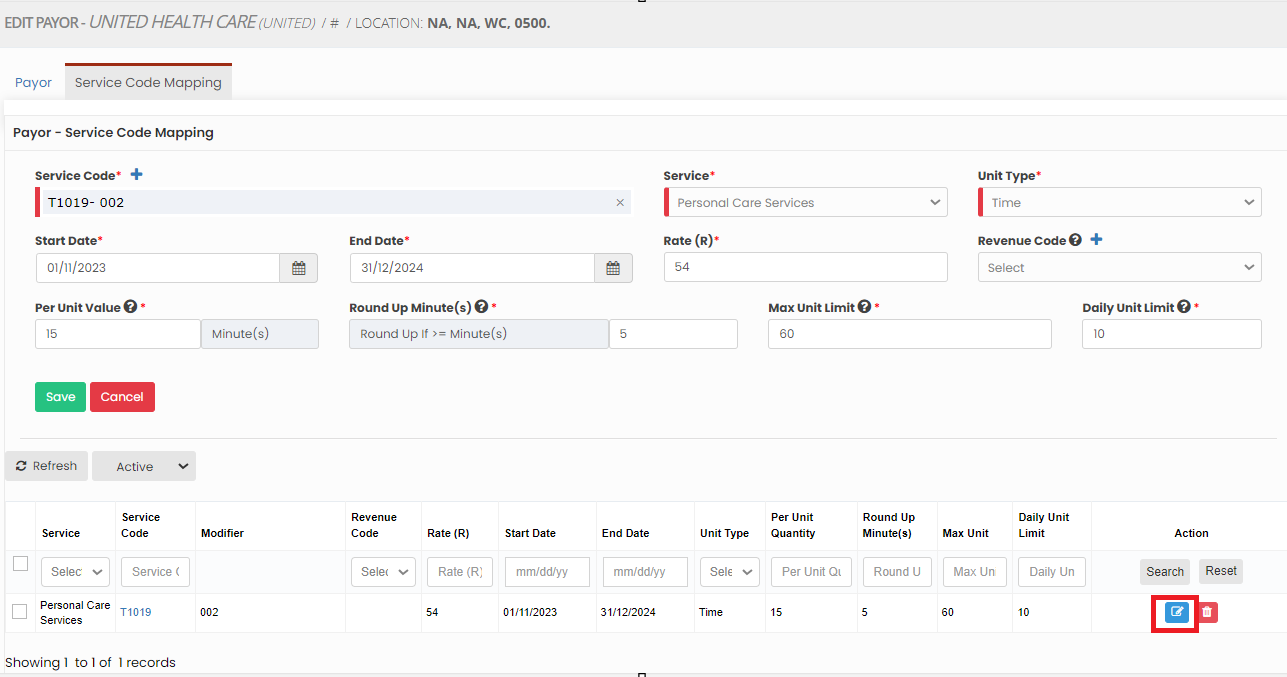
Edit Service code Mapping
The user can make changes in the added service code mapping by using the Edit option. Update the required changes and click Save option.
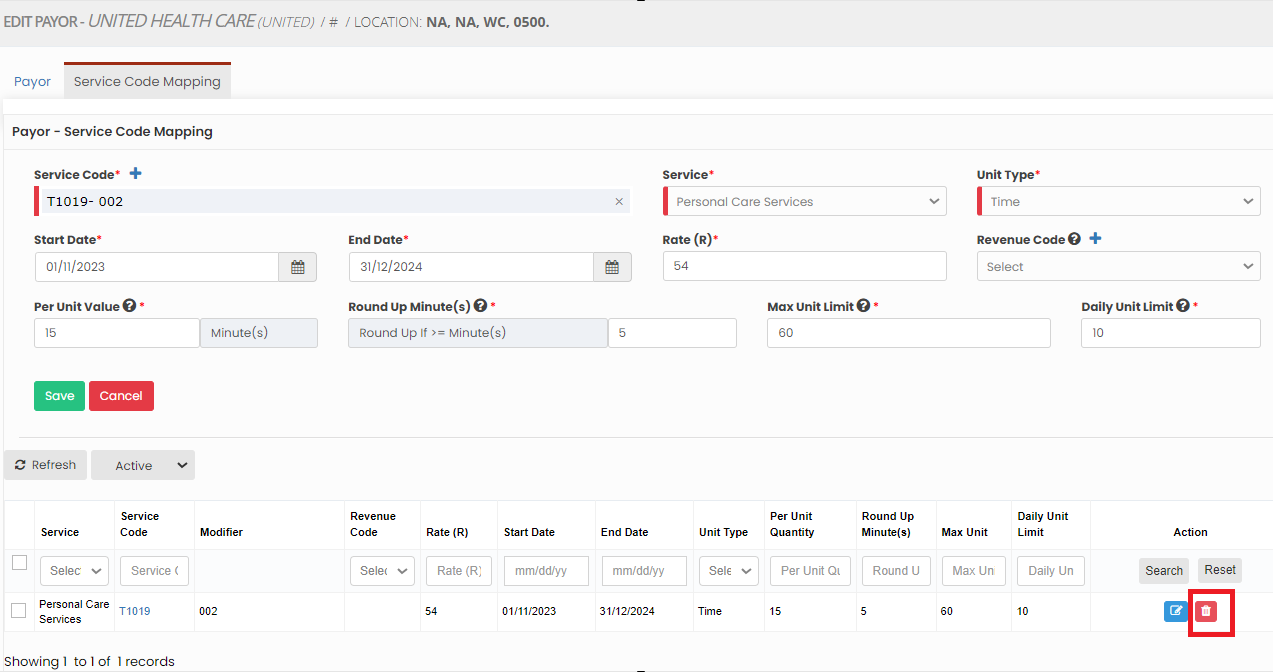
Delete Service Code Mapping
The user can Delete the added Service Code Mapping by using the option Delete on the right side of the screen.
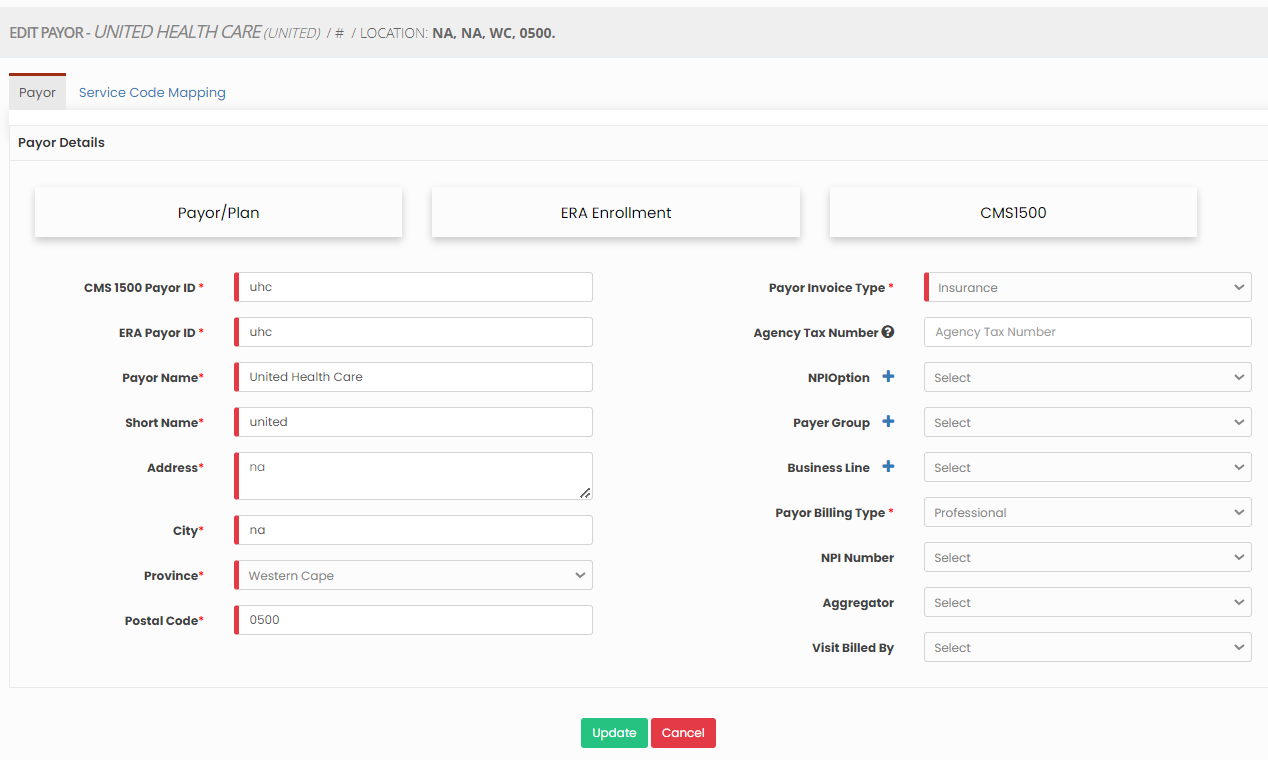
Editing Payor Details
Settings >> Payor >> List
Select the Payor from the List using the Edit option.

Now, edit the required information in Payor Details and Click Update.
Delete Payor
Settings >> Payor >> List
Select the payor from list using the check box and click Delete or Disable Selected option in the screen.

Now, the payor gets deleted and we can view the payor under Deleted list.

The user can also Restore the deleted payor by using the option Active on the right side of the screen.

Physician
A physician refers to a licensed medical doctor who plays a critical role in overseeing and providing medical care to patients within the comfort of their own homes. These physicians diagnose, prescribe treatment plans, and monitor the health and well-being of patients, ensuring personalized and comprehensive medical support.
Adding Physician
Note: All Fields marked with * are mandatory and must be filled out, otherwise the system will generate an error indicating that the required information is missing.
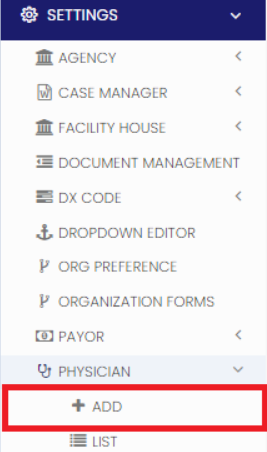
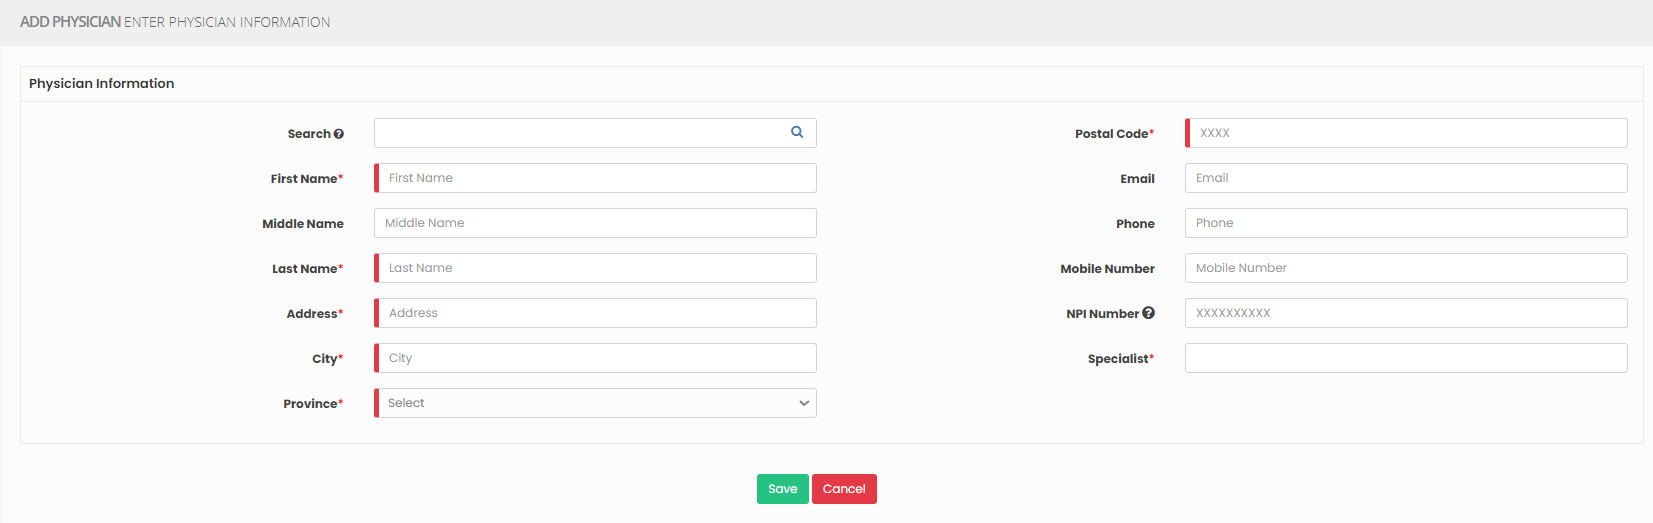
Settings >> Physician >> +Add option
The user can update the required Physician details and click Save option.
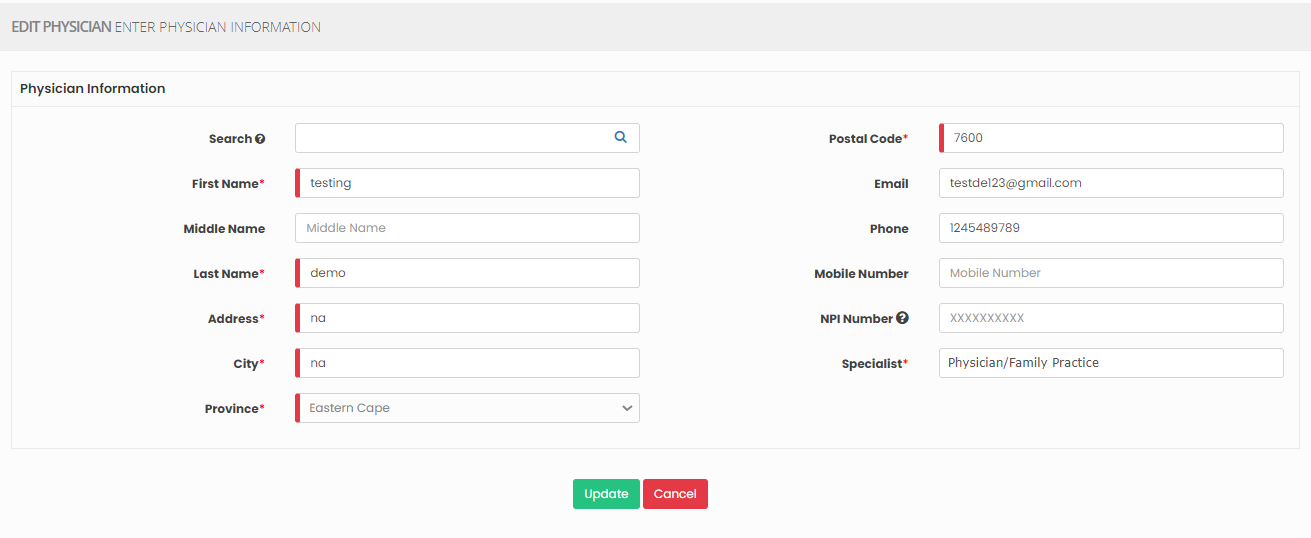
Editing Physician
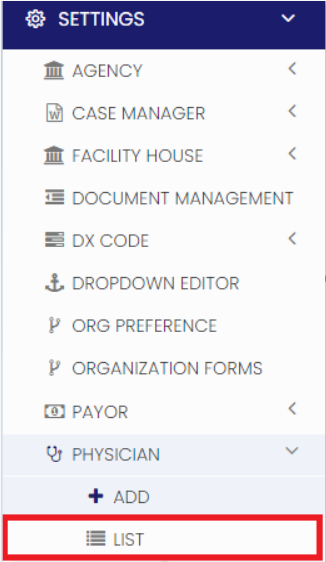
Settings >> Physician >> List
Select the Physician from the list and Click the Edit option.

Now, Edit the required information and Click Update.
Delete Physician
Settings >> Physician >> List
Select the physician from list using the check box and click Delete or Disable Selected option in the screen.

Now, the physician gets deleted and we can view the physician under Deleted list.

The user can also restore the deleted physician by using the option Active on the right side of the screen.

Preference / Skills
Preference refers to the specific choices and desires of patients regarding the type of care, treatment, and services they wish to receive in their home.
Skills refer to the specialized abilities, expertise, and competencies possessed by healthcare professionals who provide care and treatment to patients in their homes.
Note: All Fields marked with * are mandatory and must be filled out, otherwise the system will generate an error indicating that the required information is missing.
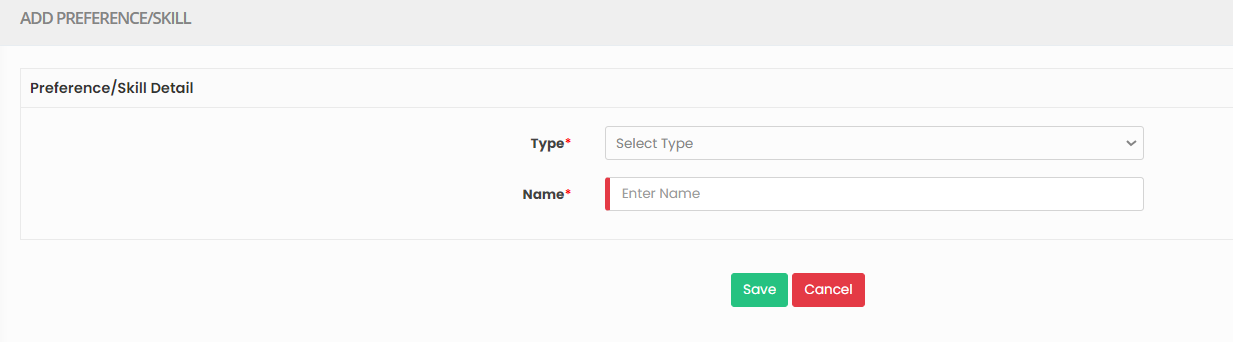
Adding Preference / Skills
Settings >> Preference / Skill >> +Add option
Select the Type and update the Name. Click Save to Add Preference / Skill detail
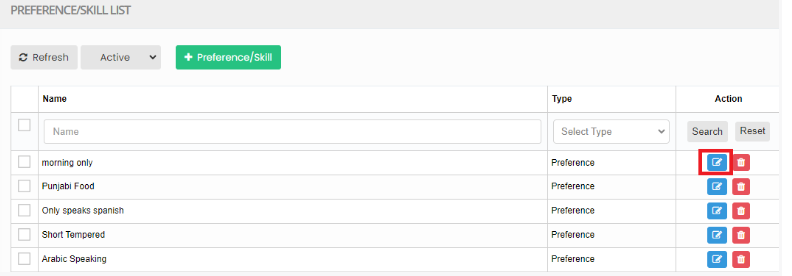
Editing Preference / Skill
Settings >> Preference / Skill >> List
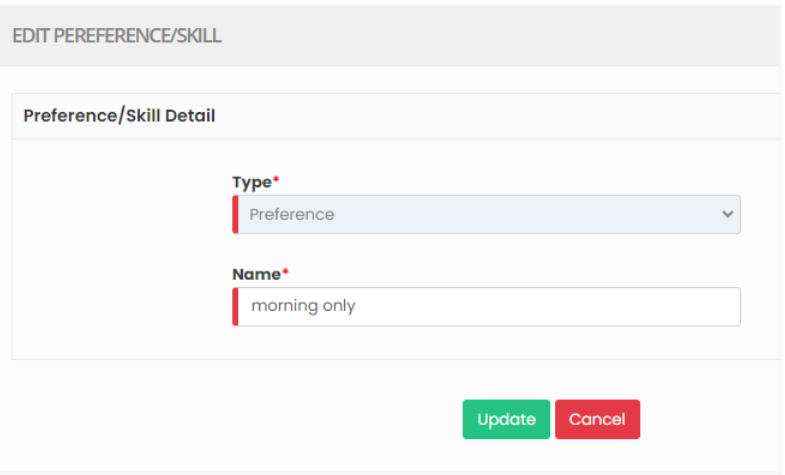
Select the Preference from List and Click Edit option on the right side of the screen.
Now, Edit the required information and Click Update option
Delete Preference / Skills
Settings >> Preference / Skill >> List
Select the physician from list using the check box and click Delete or Disable Selected option in the screen.
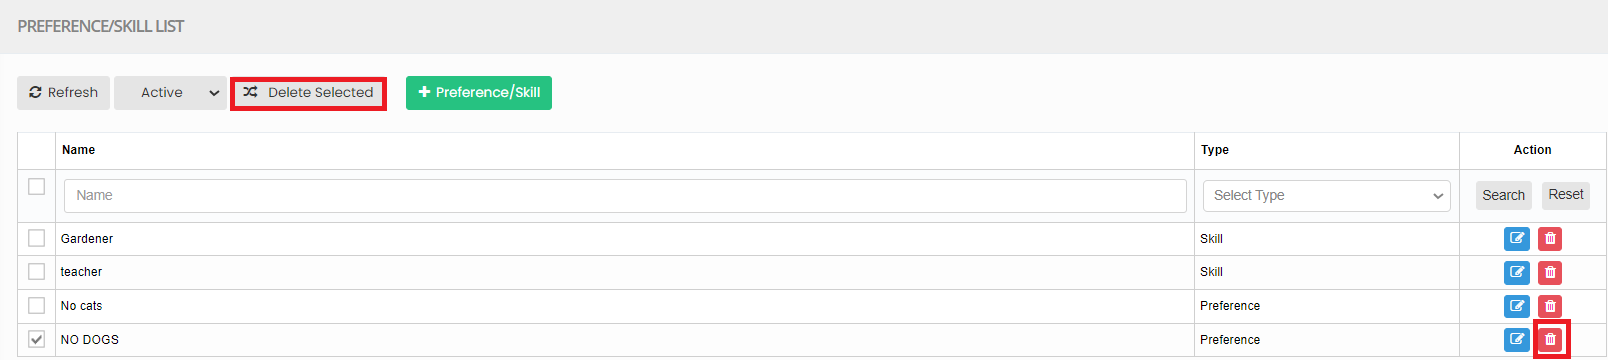
Now, the Preference / Skills gets deleted and we can view the details under Deleted list.

The user can also Restore the deleted Preference by using the option Active on the right side of the screen.

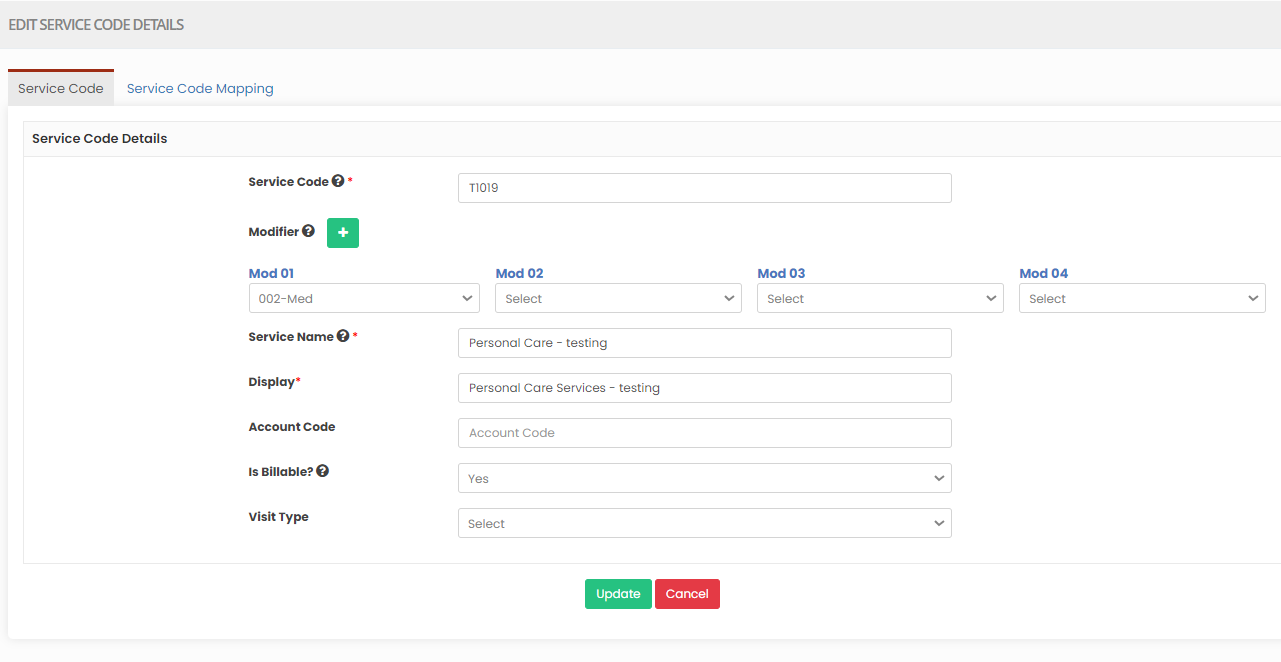
Service Code
A service code is a standardized alphanumeric or numeric code used for billing and documentation. It categorizes and identifies specific procedures, services, and equipment provided to patients. Service codes help ensure accurate billing, reimbursement, and compliance with healthcare regulations in the field.
Adding Service Code
New changes in Service code are in progress within the Application
Note: All Fields marked with * are mandatory and must be filled out, otherwise the system will generate an error indicating that the required information is missing.
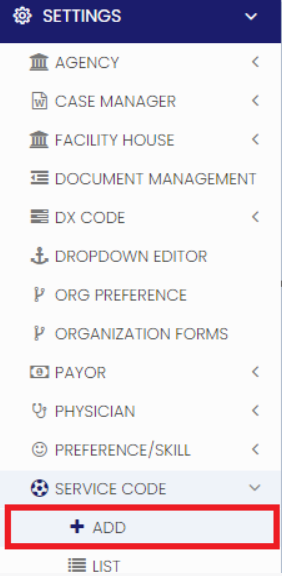
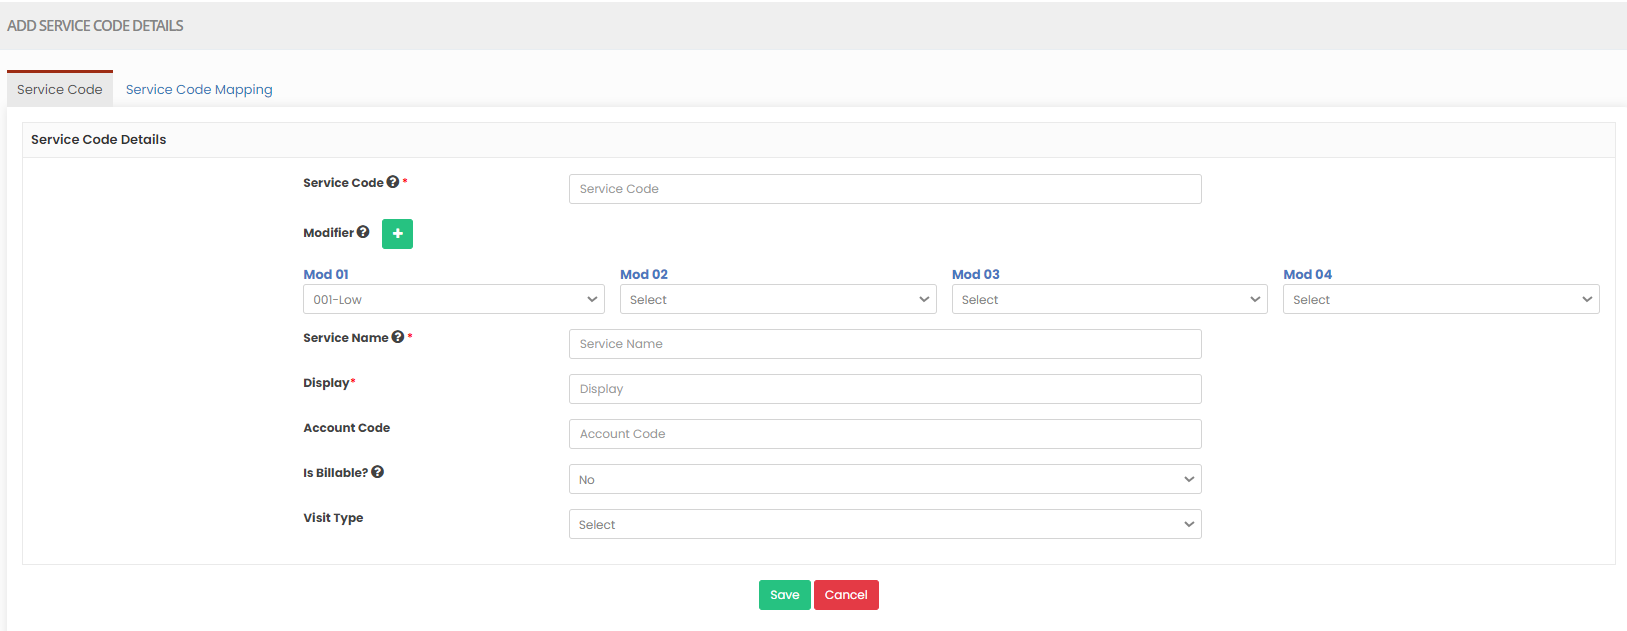
Settings >> Service Code >> + Add option
The user can update the Service code details in the required field and Click Save option.
Editing Service Code
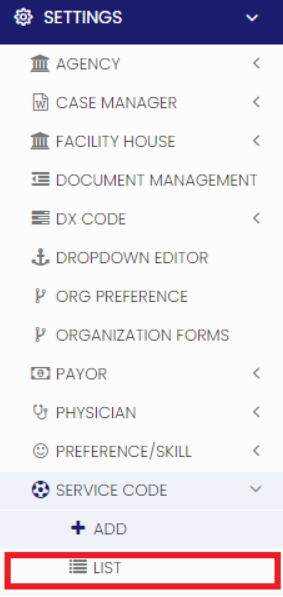
Settings >> Service Code >> List
Select the service code from the list and click Edit option on the right side of the screen.

Now, Edit the required information and click update option.
Delete Service Code
Settings << Service Code << List
Select the Service Code from list and click Delete option on the right side of the screen.

Service Code Mapping
The Service Code Mapping can be done for the payor added in the system. Click + Service code mapping option. Select the payor, enter the required fields under Payor - Service code Mapping and click Save Option.
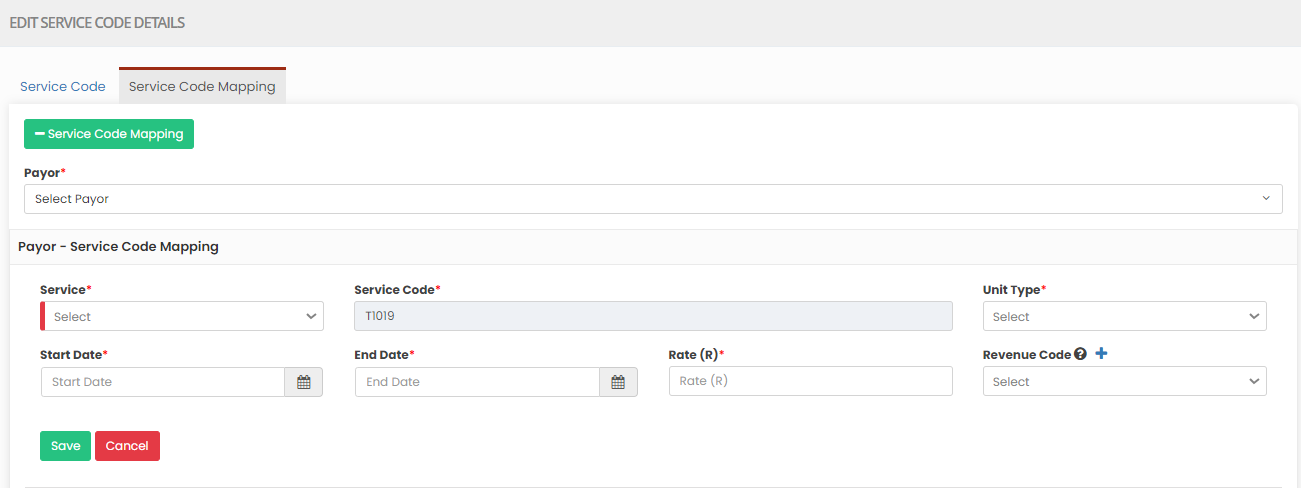
Edit Service code Mapping
The user can make changes in the added service code mapping by using the Edit option. Update the required changes and click Save option.
Delete Service Code Mapping
The user can Delete the added Service Code Mapping by using the option Delete on the right side of the screen.
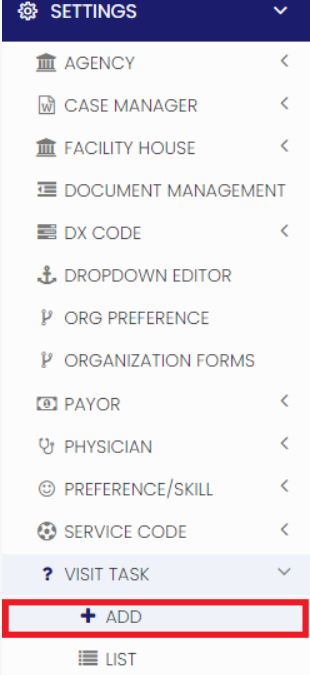
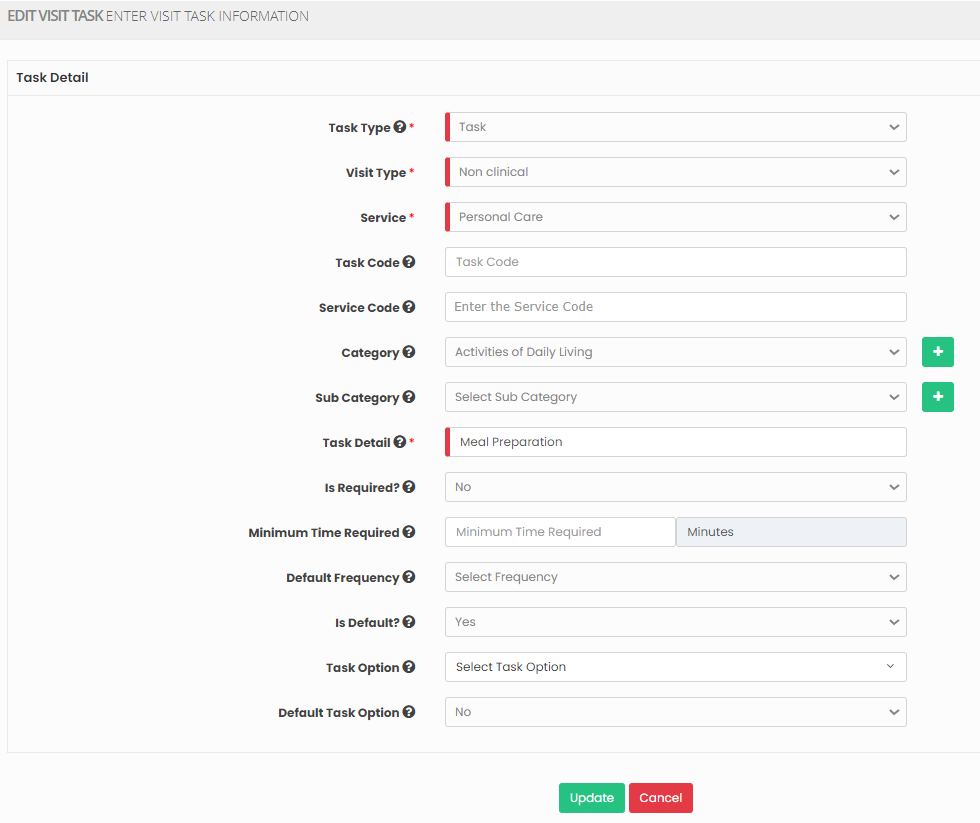
Visit Task
A Visit Task refers to a specific set of responsibilities and activities performed by a healthcare professional during a patient's home visit.
Note: All Fields marked with * are mandatory and must be filled out, otherwise the system will generate an error indicating that the required information is missing.
Adding Visit Task
Settings >> Visit Task >> +Add option
The user can update the task details in the required fields and Click Save option. The required fields are used for billing and the other fields are optional.
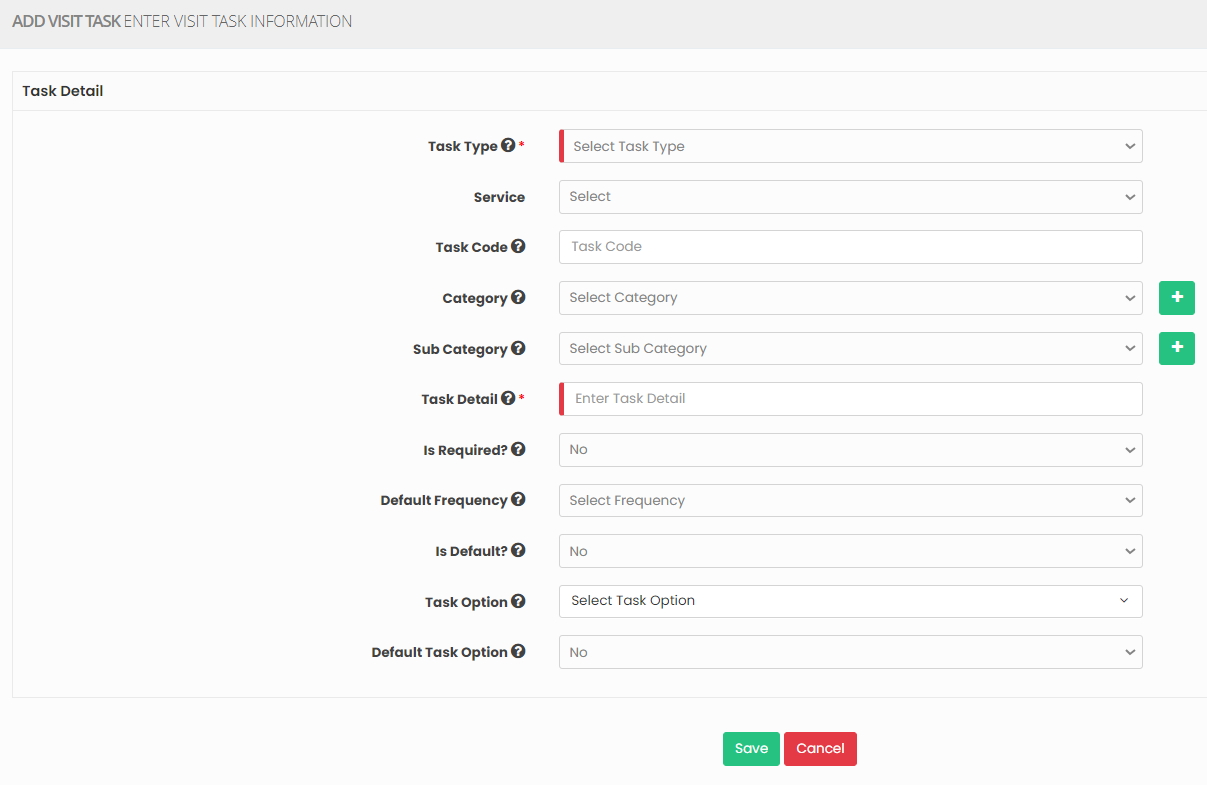
Task Type
- Task
- Conclusion
Task - The option Task in Task Type refers to the Task activity performed by the employee at the time of visit.
Conclusion - This task appears on Visit Survey in EVV app as a conclusion. The Task Type Conclusion will have the options Yes or No and to update the comments regarding the Task.
Editing Visit Task
Settings >> Visit Task >> List
Select the task from the list using the checkbox and Click Edit option on the right side of the screen.

Now, Edit the required information and Click Update option.
Delete Visit Task
Settings >> Visit Task >> List
Select the Visit Task from list using the check box and click Delete or Disable Selected option in the screen.

Now, the Visit Task gets deleted and we can view the Visit Task under Deleted list.

The user can also Restore the deleted Visit Task by using the option Active on the right side of the screen.

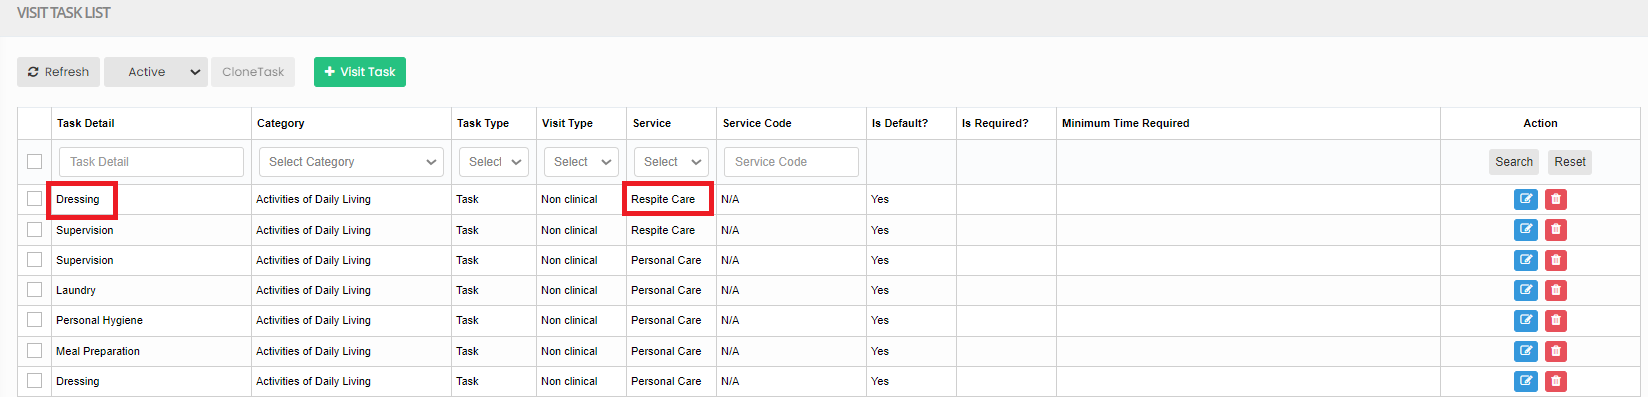
Clone Task
Settings >> Visit Task >> List
The user can create the same Visit Task details for different service code by using the option Clone Task.
Select the Visit Task and click Clone Task on the screen.
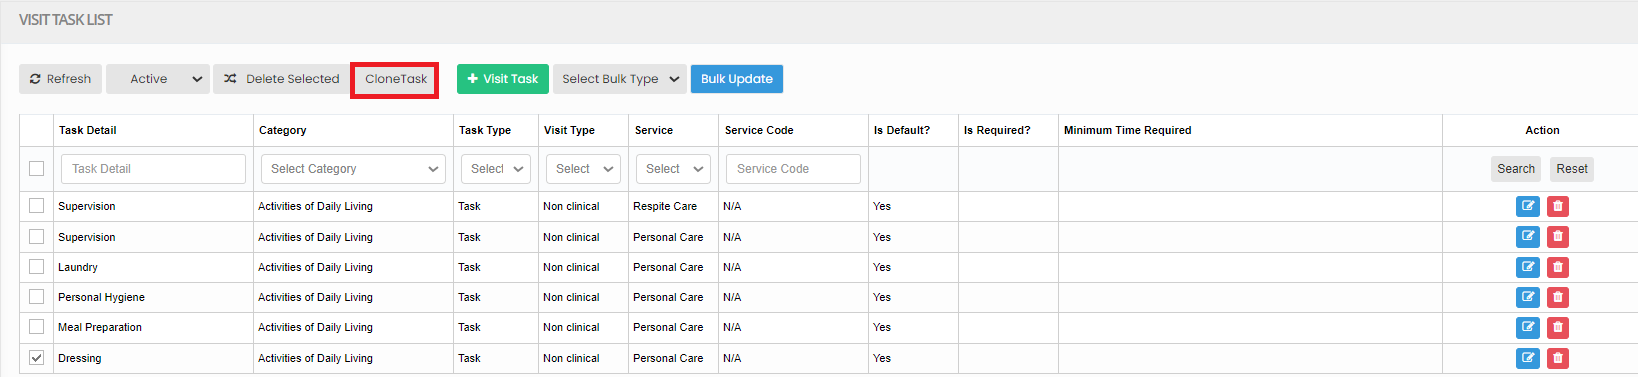
Now, the clone task screen appears. Select the Target service from the List and click Clone option.
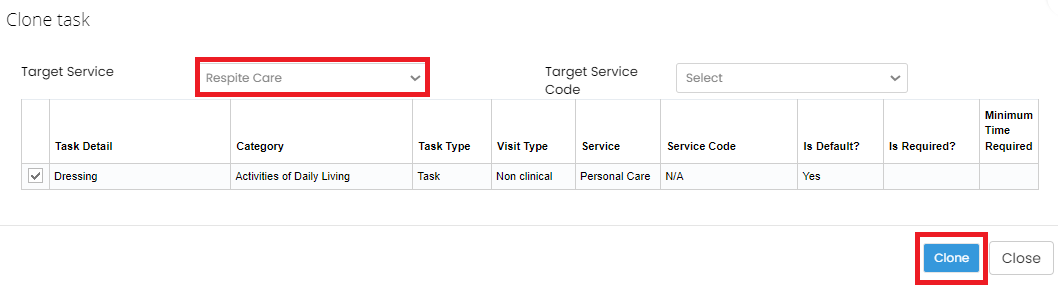
Now the new Visit task is created with Service name Respite Care in the List.
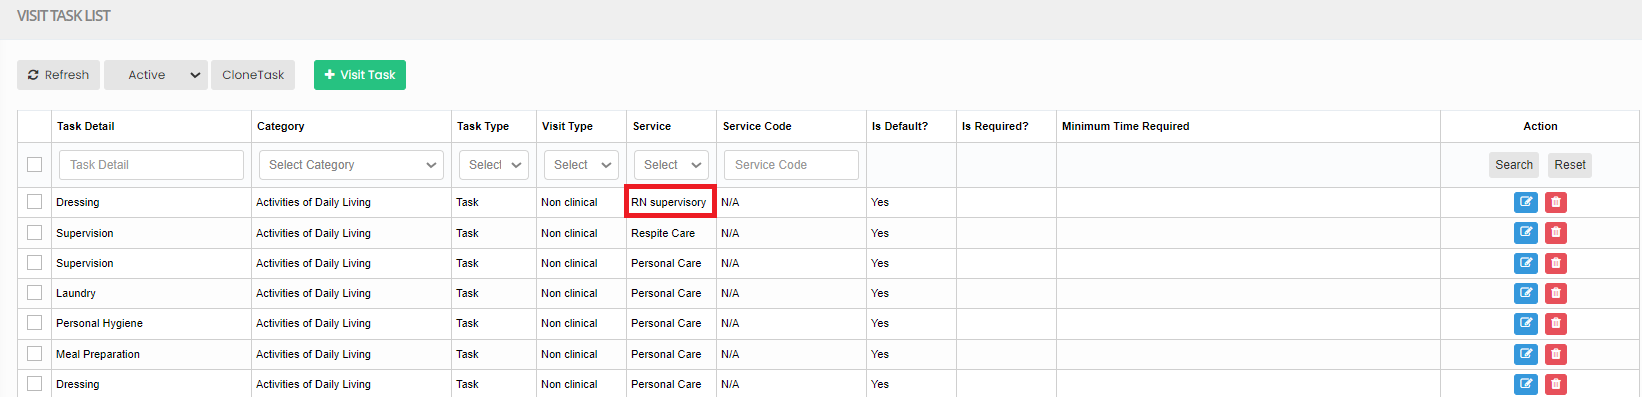
Bulk Update
Settings >> Visit Task >> List
The user can Bulk update the Task details like Visit Type, Task Type, Care Type and Service Code by using the option Bulk Update.
Select the Visit Task by using the check box and click Select Bulk Type option.
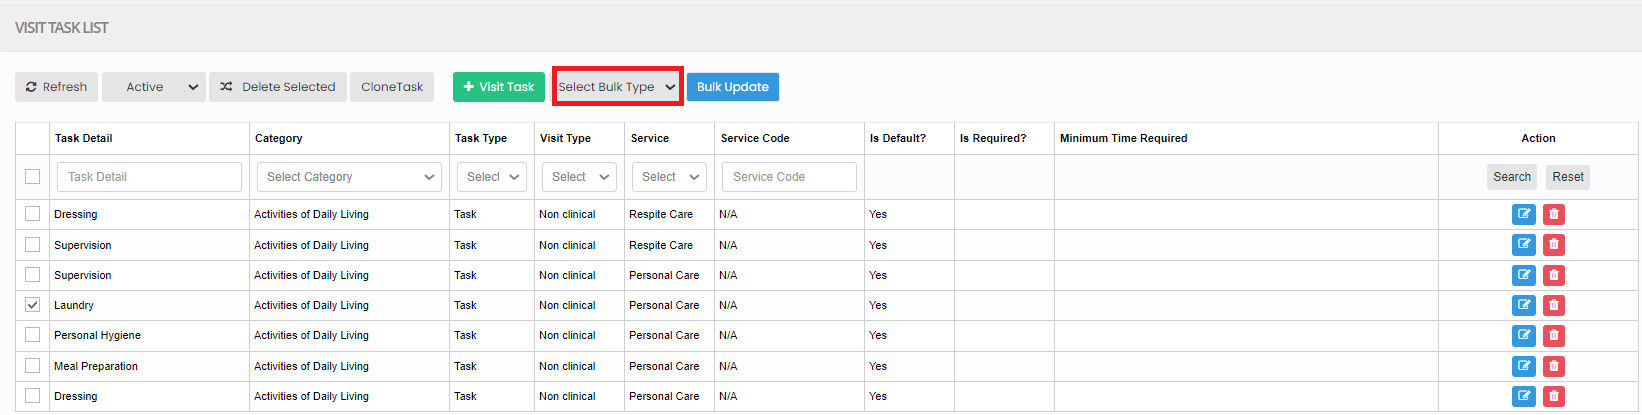
Now, select the Category from the list and the related options and then click Bulk Update option.
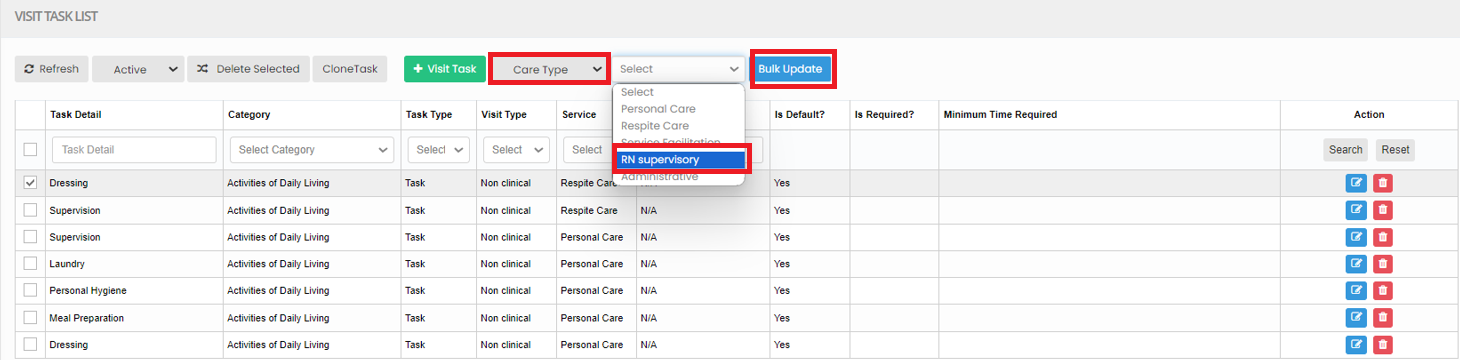
The required Category has been added in the list.
Note Sentence
A Note Sentence is a brief message, serving to convey information, reminders, or thoughts.
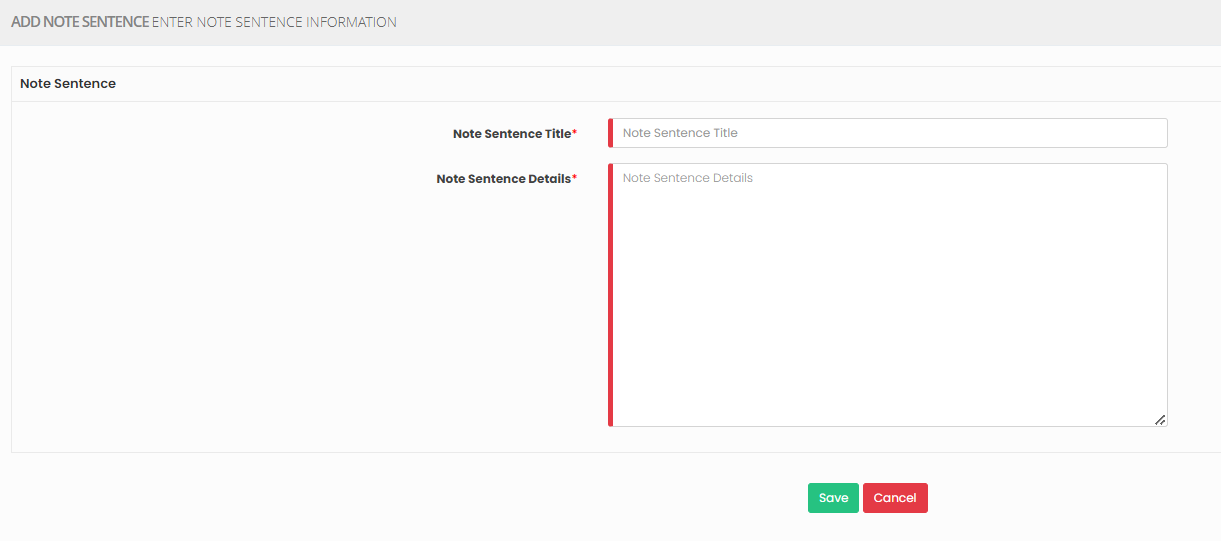
Adding Note Sentence
Note: All Fields marked with * are mandatory and must be filled out, otherwise the system will generate an error indicating that the required information is missing.
Settings >> Note Sentence >> Add
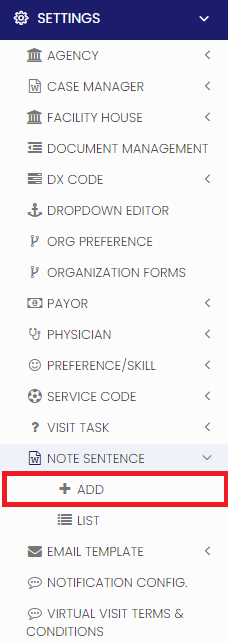
The user can add the Note Sentence Title and Note Sentence Details in the system and click Save option.
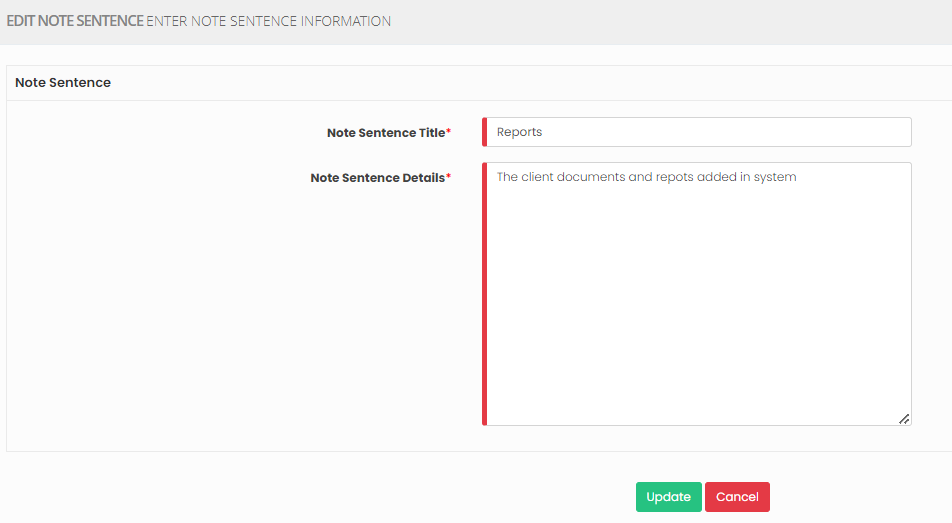
Editing Note Sentence
Settings >> Note Sentence >> List

Select the note sentence and click edit option on the right side of the screen.

Now, enter the required information and click update option.
Delete Note Sentence
Settings >> Note Sentence >> List
Select the Note Sentence by using the check box and click Delete option or Disabled Selected on the screen.

Now, the Note Sentence gets deleted and we can view the Note Sentence under Deleted list.

The user can also Restore the deleted Note Sentence by using the option Active on the right side of the screen.

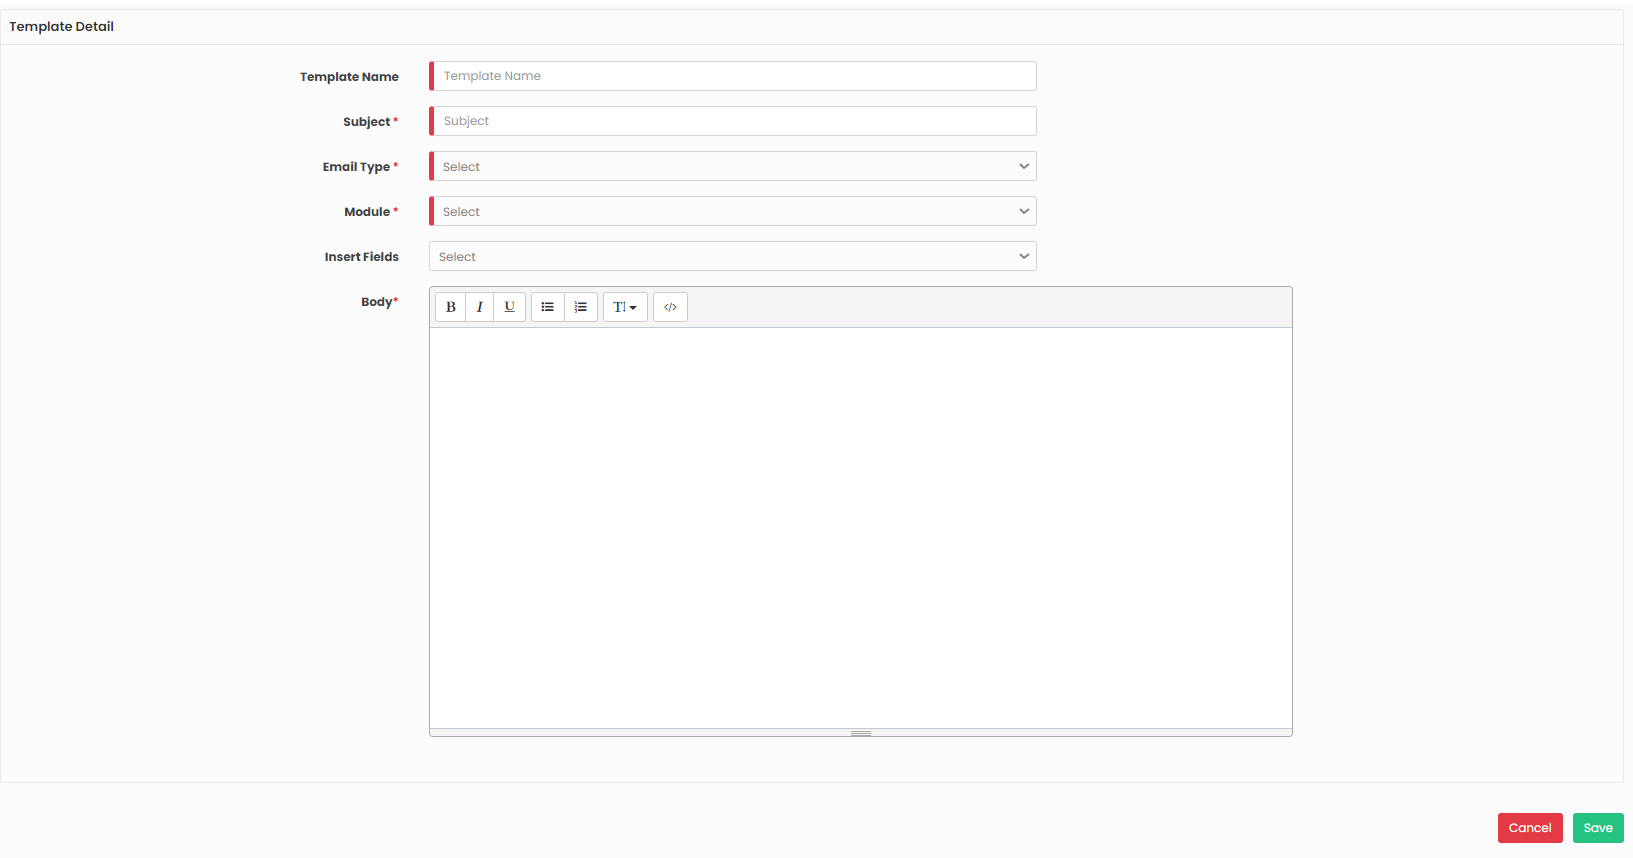
Email Template
An email template is a pre-designed message format for efficient and consistent email communication. Templates save time and maintain professionalism in various email contexts, such as marketing campaigns and customer support.
Adding Email Template
Note: All Fields marked with * are mandatory and must be filled out, otherwise the system will generate an error indicating that the required information is missing.
Settings << Email Template << Add
Enter the Template Name and the required fields in Template Detail Screen and click Save.
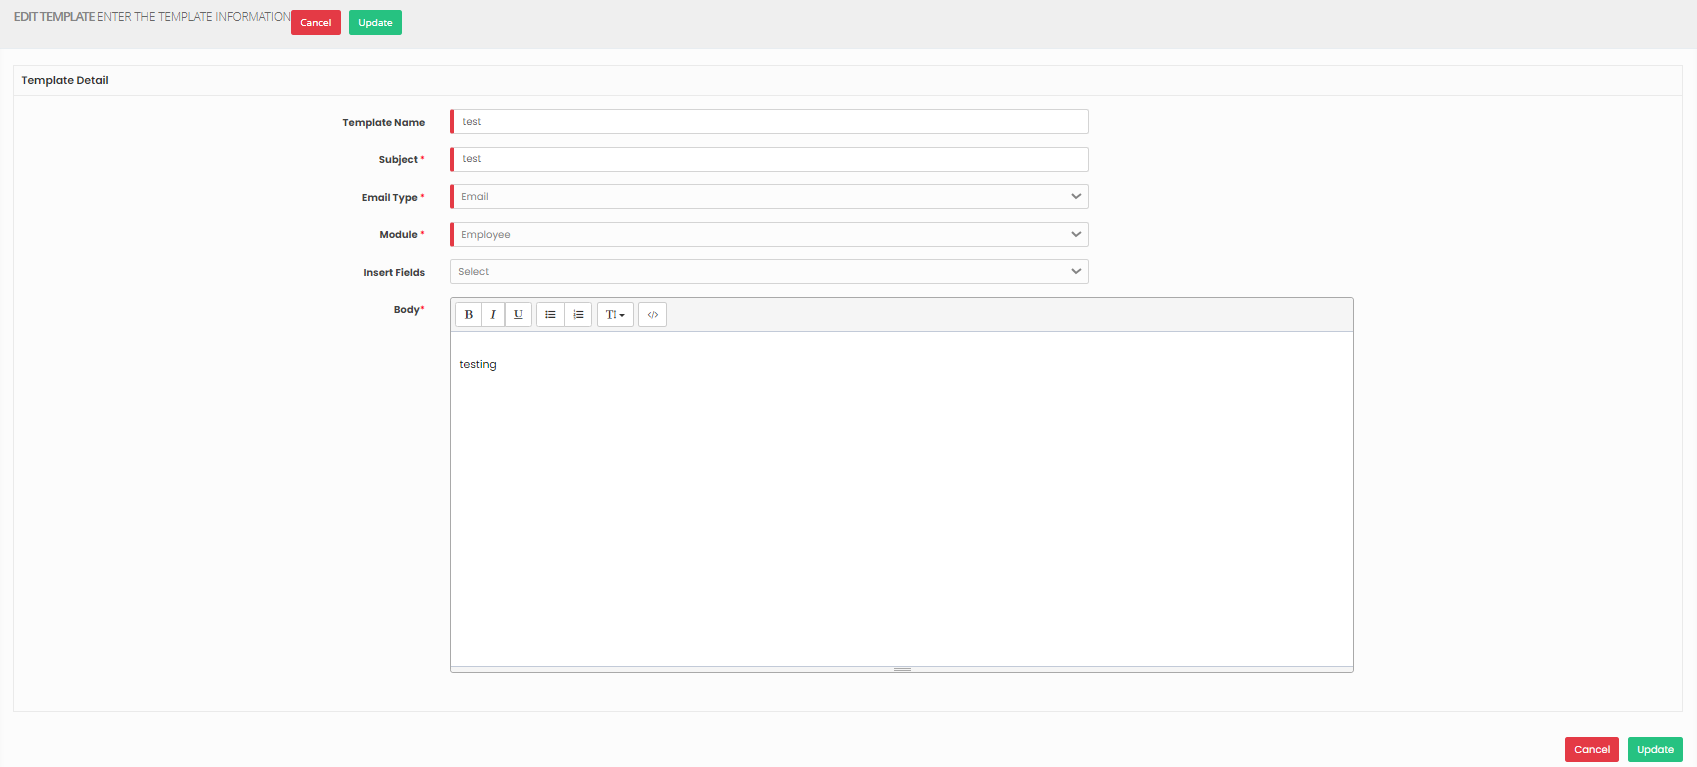
Edit Email Template
Settings << Email Template << List
From the List of Email Template, click the Edit option on the right side of the screen. Enter the required information in Template Detail screen and click Update option.
Delete Email Template
Settings << Email Template << List
To Delete the Email Template, Click Delete option on the right side of Template Details screen.

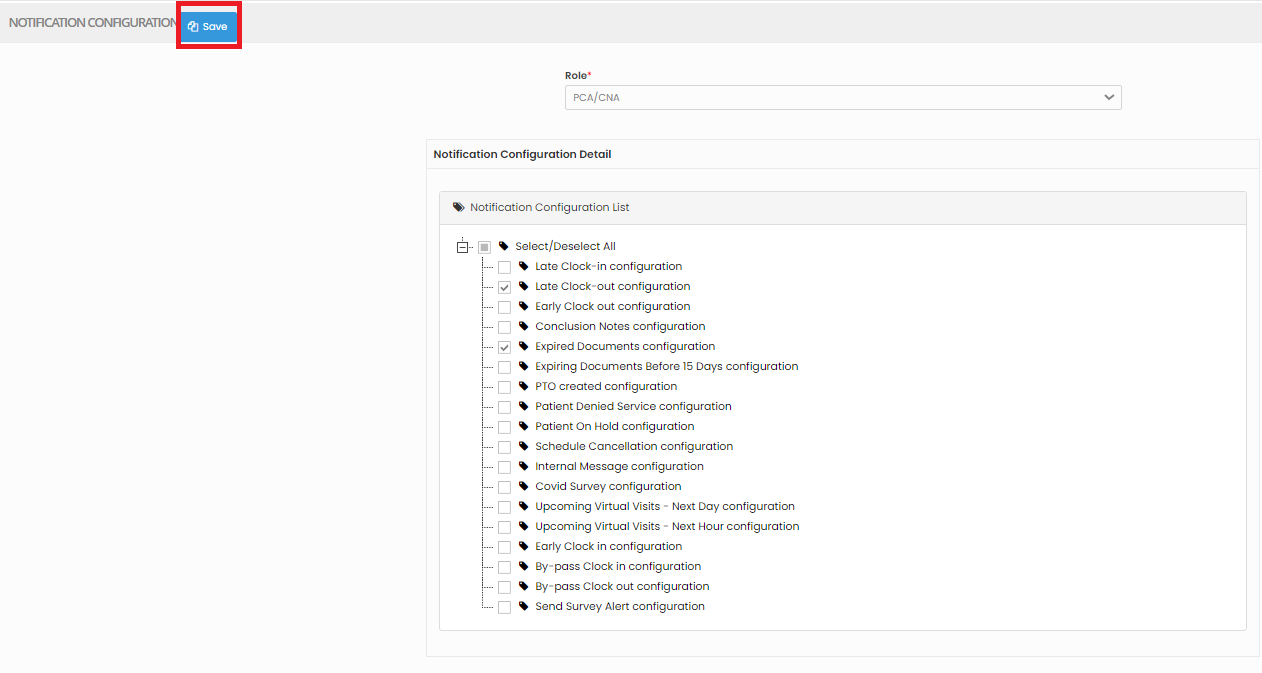
Notification Configuration
Notification configuration defines how alerts or messages are generated and delivered within a system.
Updating Notification Configuration
Note: All Fields marked with * are mandatory and must be filled out, otherwise the system will generate an error indicating that the required information is missing.
Settings >> Notification Configuration
Select the Role, check the Notification Configuration from the list and click Save option.
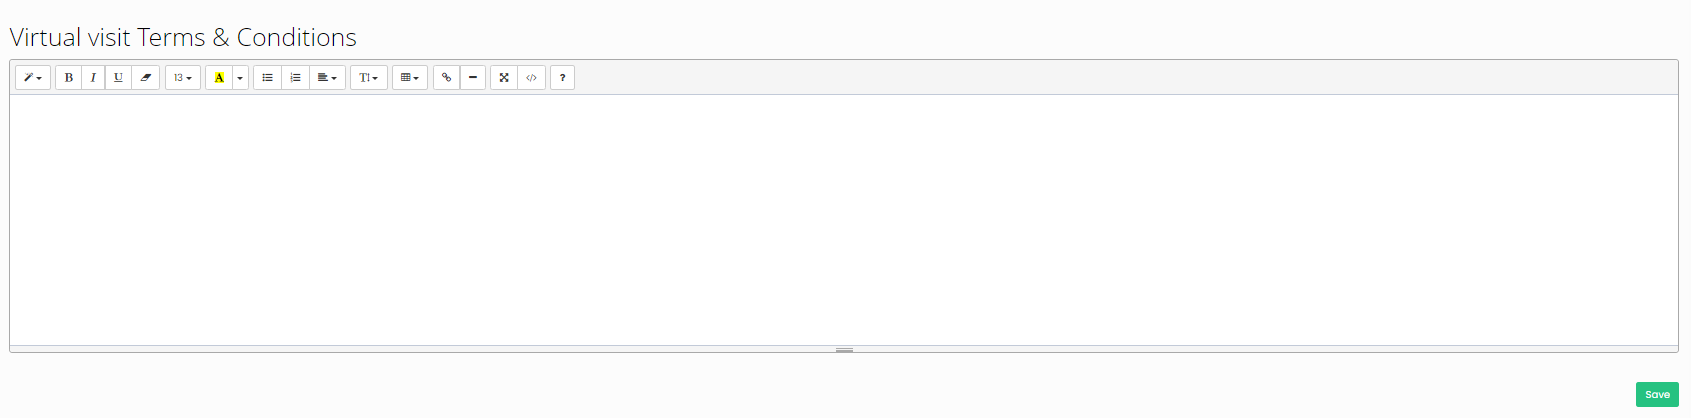
Virtual Visit Terms and Conditions
Virtual visit terms and conditions are legal agreements governing rules and responsibilities for online interactions. Patient and providers should read and understand these terms before participating in virtual visits to ensure a clear and secure experience.
Adding Virtual Visit Terms and Conditions
Settings << Virtual Visit Terms and Conditions
Update the Terms and Conditions of the Virtual Visit and Click Save option.