Employee
Our system allows for the secure and centralized storage of all employee information and documents. Accessible only to authorized personnel, this feature ensures data confidentiality and compliance with data protection regulations.
- New Employee
- Employee Document
- Employee Schedule
- Employee Personal Time Off, Calendar & Notes
- Employee Certificate, Checklist and Preferences
- Employee List
New Employee
A new employee in home health care is a recently hired individual who provides healthcare services in a patient's home. Their role includes assisting with daily tasks, medication administration, and health monitoring.
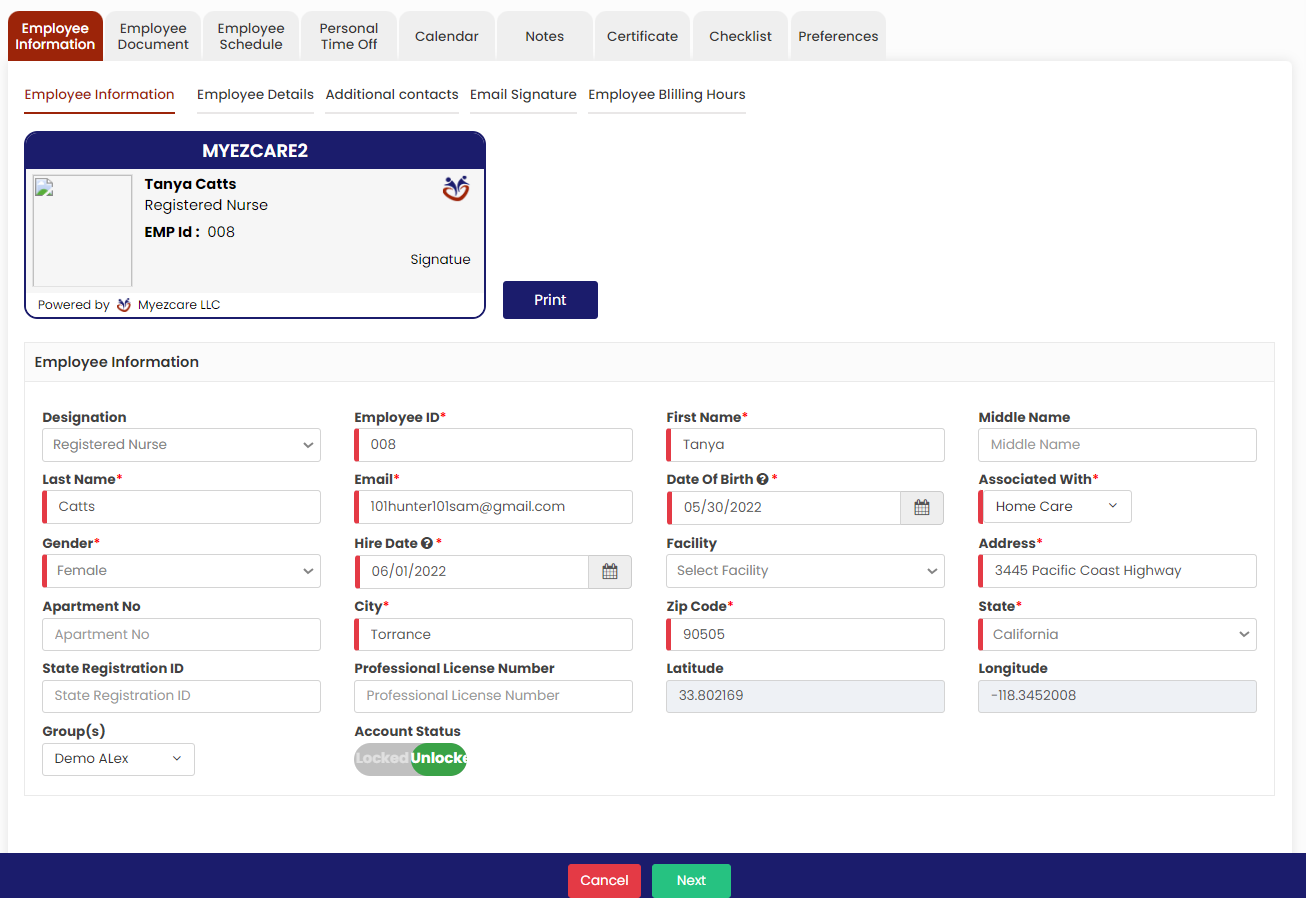
Adding Employee Information
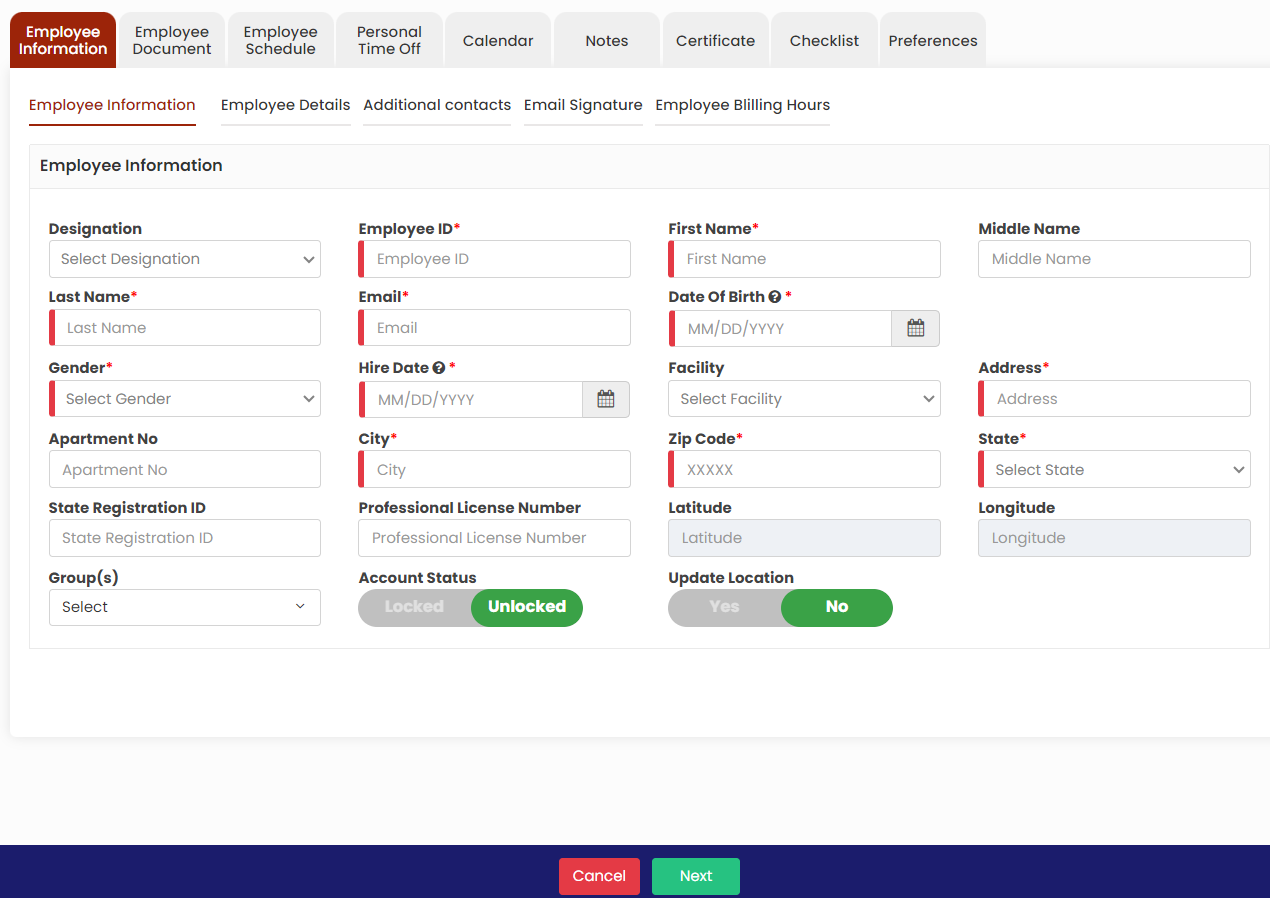
Note: All Fields marked with * are mandatory and must be filled out, otherwise the system will generate an error indicating that the required information is missing.
- Locate the +Add option under Employee Tab.
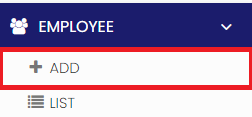
2. Click +Add option to update the Employee Information. Enter the Employee information in the required field and Click Next option.
If the Employee Account has been locked due to Invalid password in the mobile app for more than 3 times, then the user can unlock the Employee Account using the option "Account Status".
Also, if the Patient is residing in a Big Apartment and the Employee having issues in clocking in the mobile app at patient's residence, we can provide the option Update Location as Yes, when it is set as Yes, the 'Employee can will get an option in the mobile to update the Location Coordinates and Clock-in for the visits. If the Visit gets completed, we can set the option Update Location as No in he system.
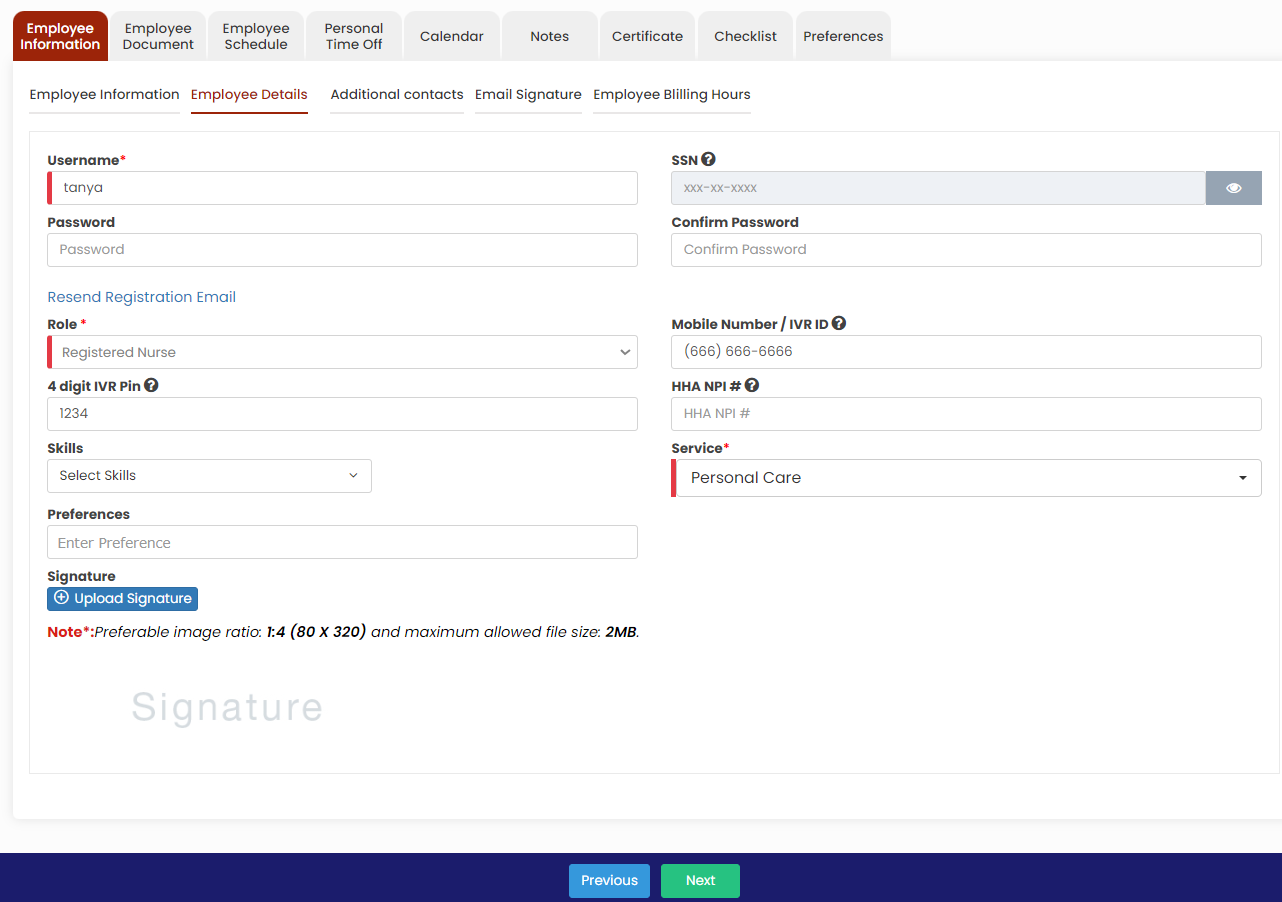
3. The Employee details screen appears. In Employee details, update the username with the format (first name initials and last name). Also enter the 4 digit IVR Pin which is used to login using Mobile Application for each employee. The user can add the signature of the Employee by using the option Upload Signature. After completing the required field, Click Next option.

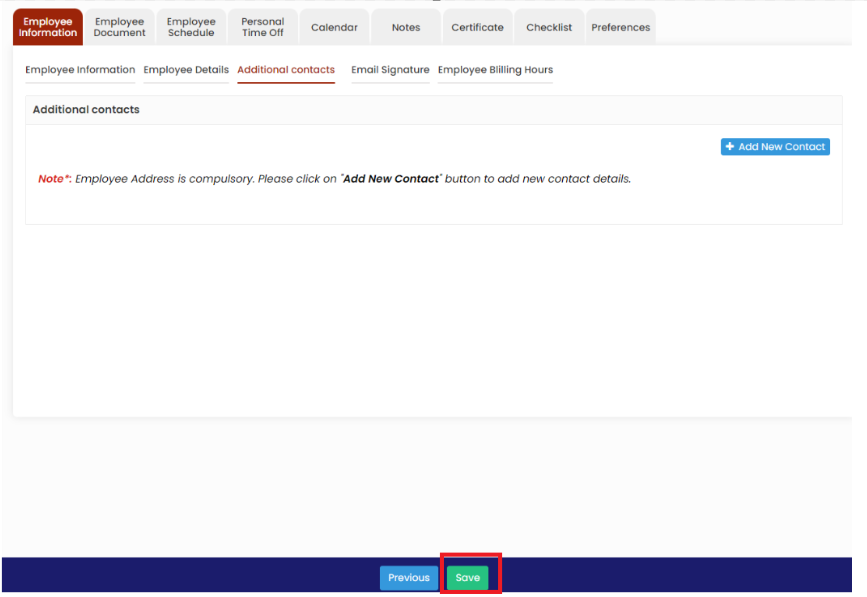
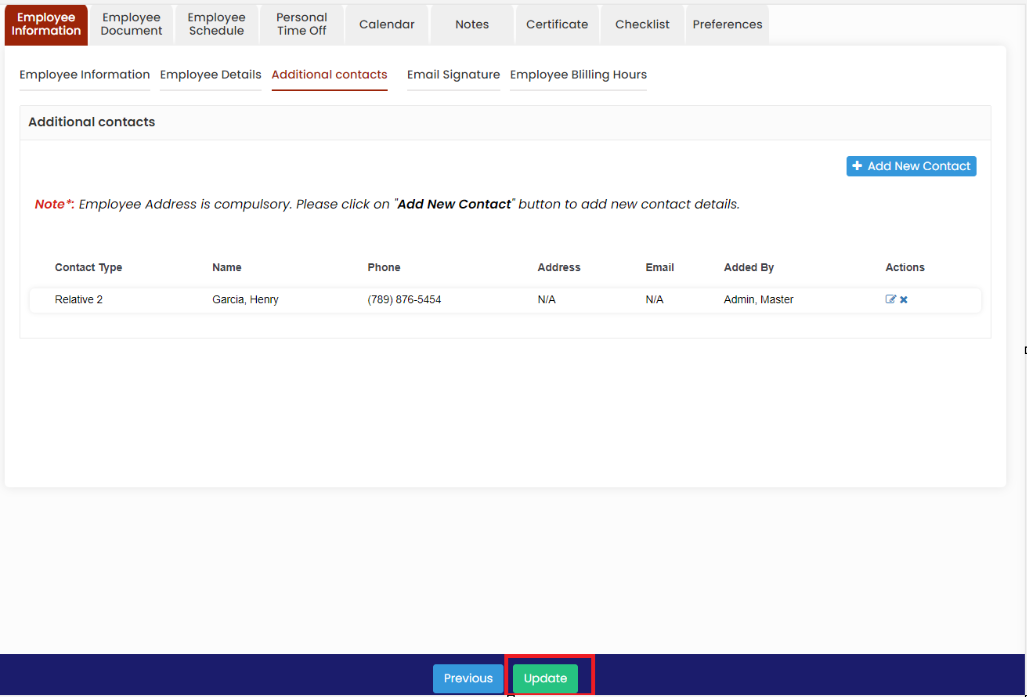
4. The Additional Contacts screen appears in which the user can update the additional contact details of the employee by using the +Add New Contact option and Click Save button.
Editing Employees Information
- Locate List option under Employee Tab.
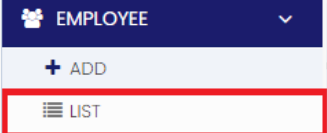
2. Select the Employee from the list to edit the information. Click the blue color Edit option under Action on the right side of the screen for editing the Employee information or click on the Employee name.
3. The following screen appears to edit the required information of the Employee.
Click Update option in Additional contact screen to update the information for the Employee.
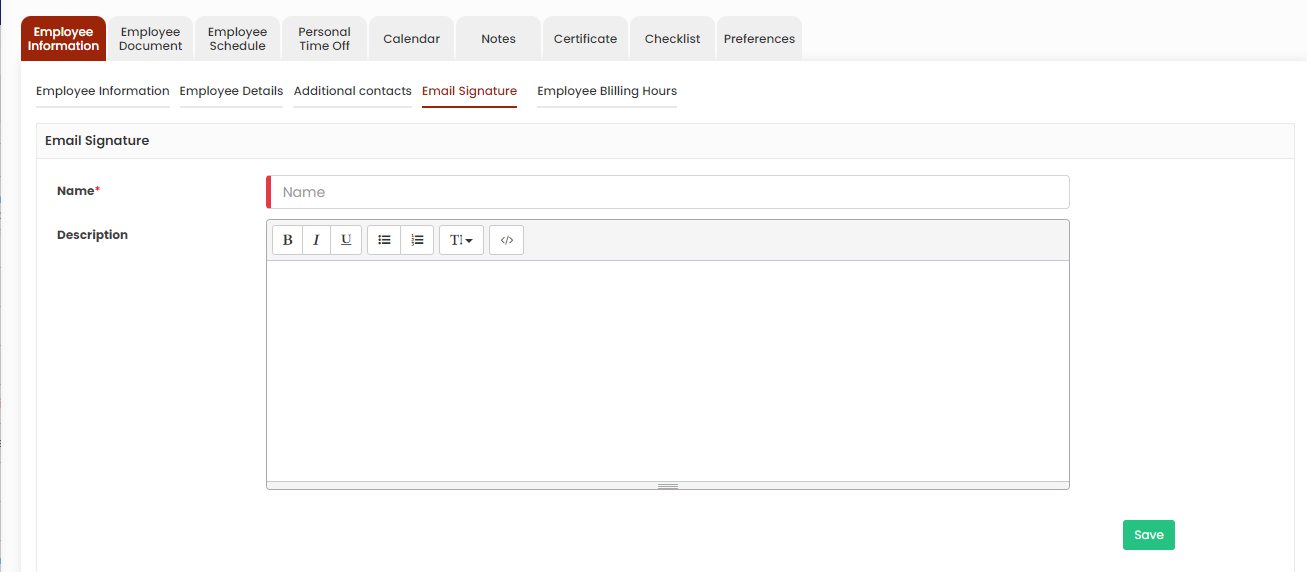
Email signature
The user can update the email signature by using the email signature option. Update the required information and Click Save option.
Employee Tab>>List>>Employee name>>Email signature
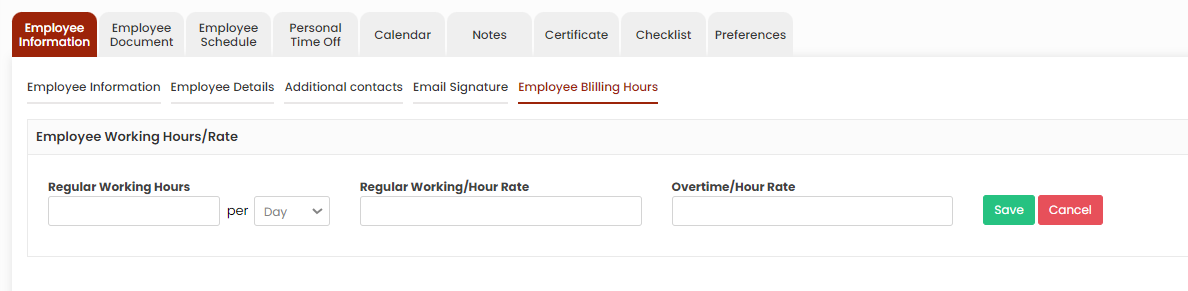
Employee Billing Hours
In Employee Billing Hours option, the user can update the Regular working hours, Regular Working / Hour Rate and Overtime Rate of the employee.
Employee Tab>>List>>Employee name>>Employee Billing Hours
Employee Document
The Employee documents may include certifications, employment contracts, and care plans, ensuring compliance with regulations and offering a comprehensive overview of the caregiver's qualifications and responsibilities.
Uploading Employee Document
The required documents of the Employee can be uploaded in the system by using the option Employee Document.
Employee Tab >> List >> Select Employee >> Employee Document
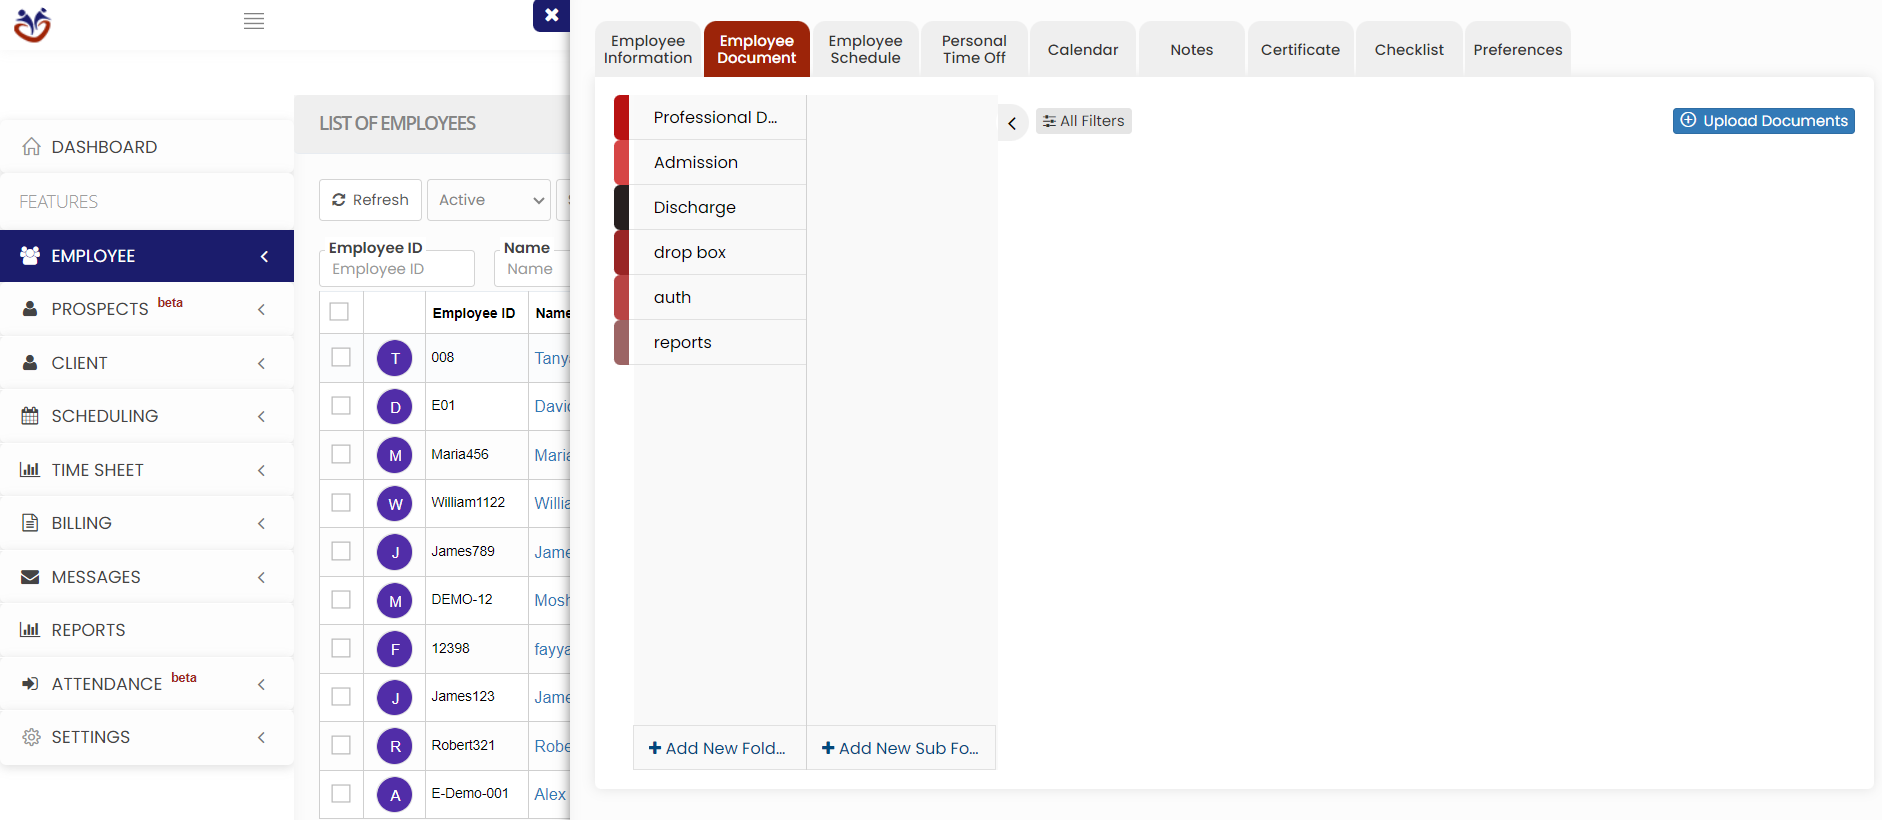
Select the type of document from the list and Click the Upload Documents option. The user can also Add New Folders and Subfolders to upload the documents.
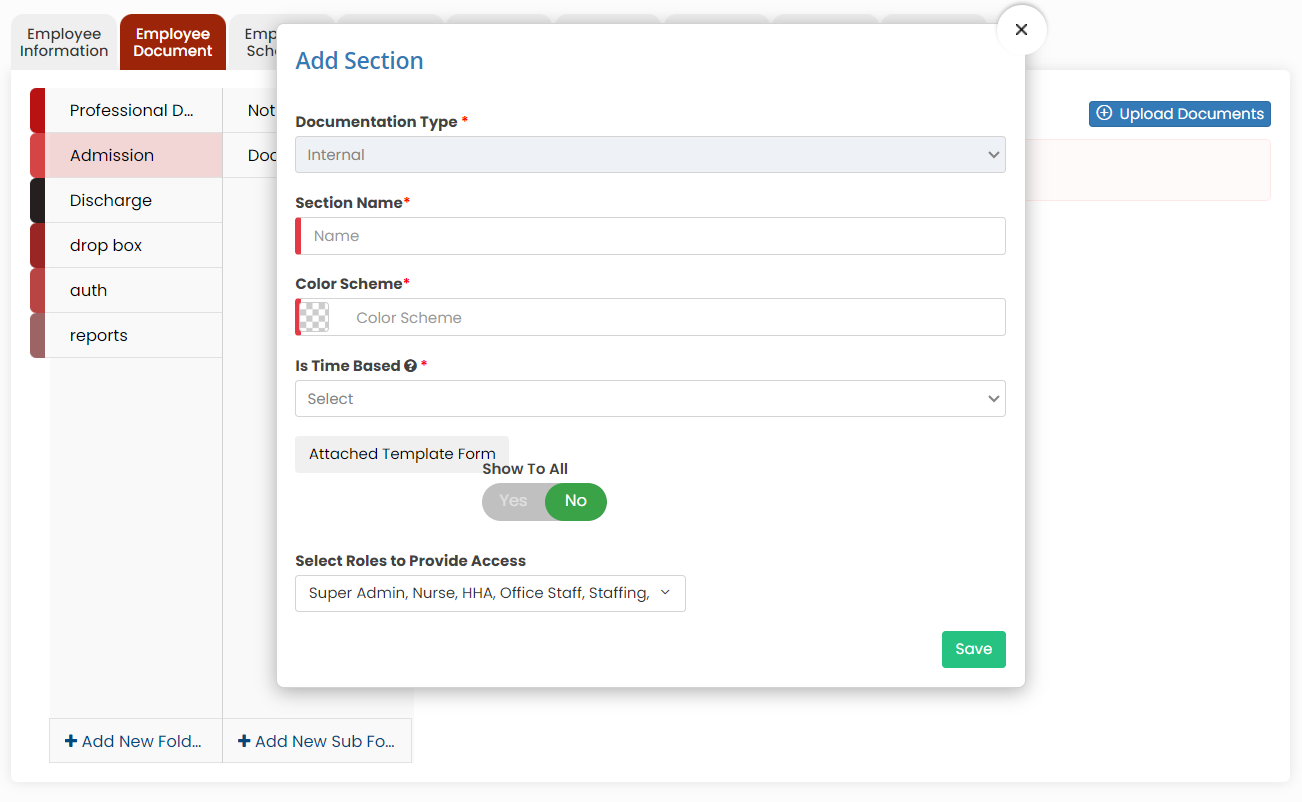
Adding New Folder in Employee document
Click + Add New Folder option in Employee document. The following screen appears, update the required information. Also in the option Show to All, if the user needs the folder name to be added for all the employee click Yes option. If the user wants the folder to be added only for the particular employee click No option and click Save.
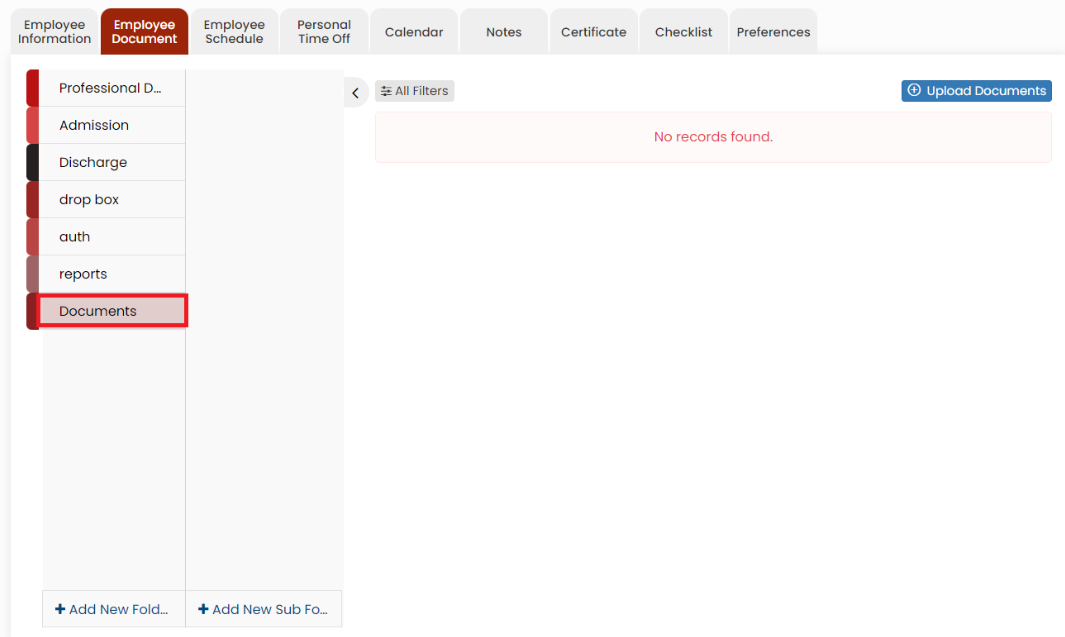
The folder Documents is added successfully to upload the required documents of the employee.
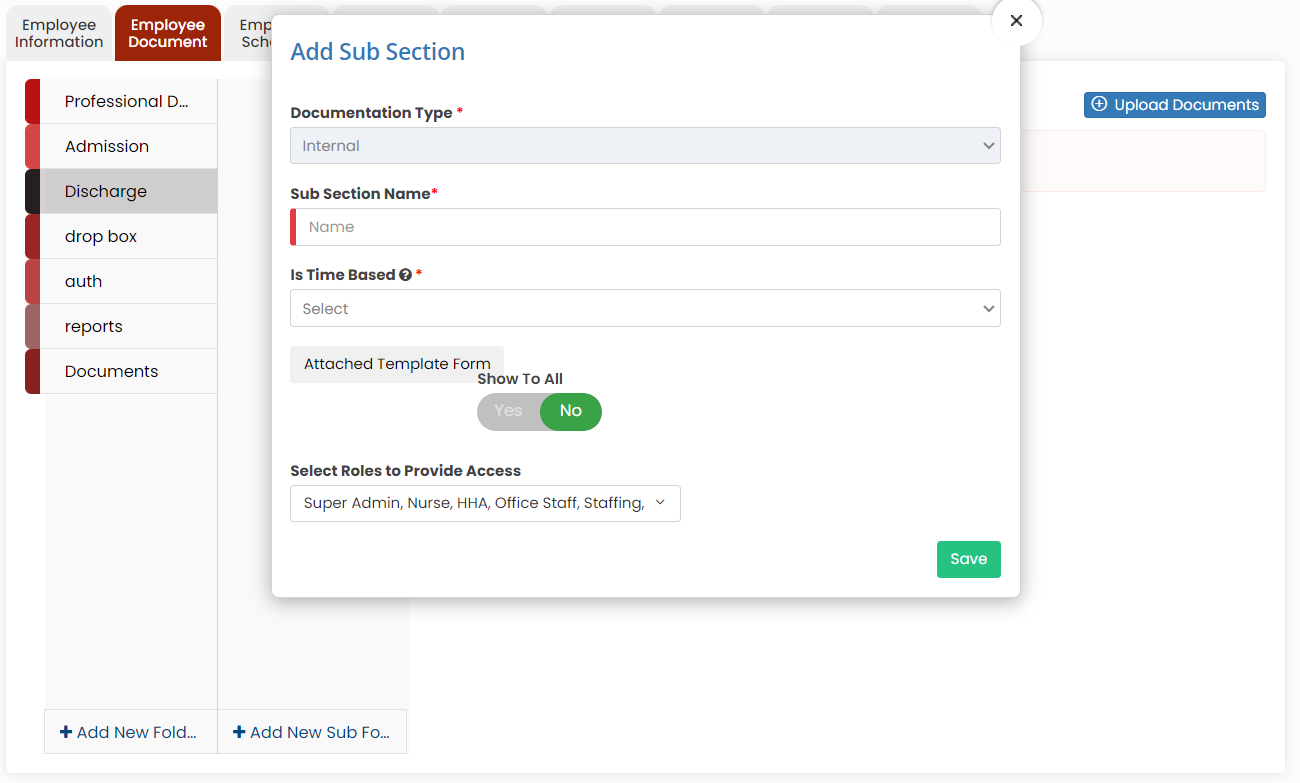
Adding New Sub Folder in Employee Document
Select the folder name and click the option +Add New Sub Folder option. The following screen appears, update the required information. Also in the option Show to All, if the user needs the Sub folder name to be added for all the employee click Yes option. If the user wants the folder to be added only for the particular employee click No option and click Save.
The Sub folder 2023 is now added under folder name Discharge to upload the required documents of the Employee.
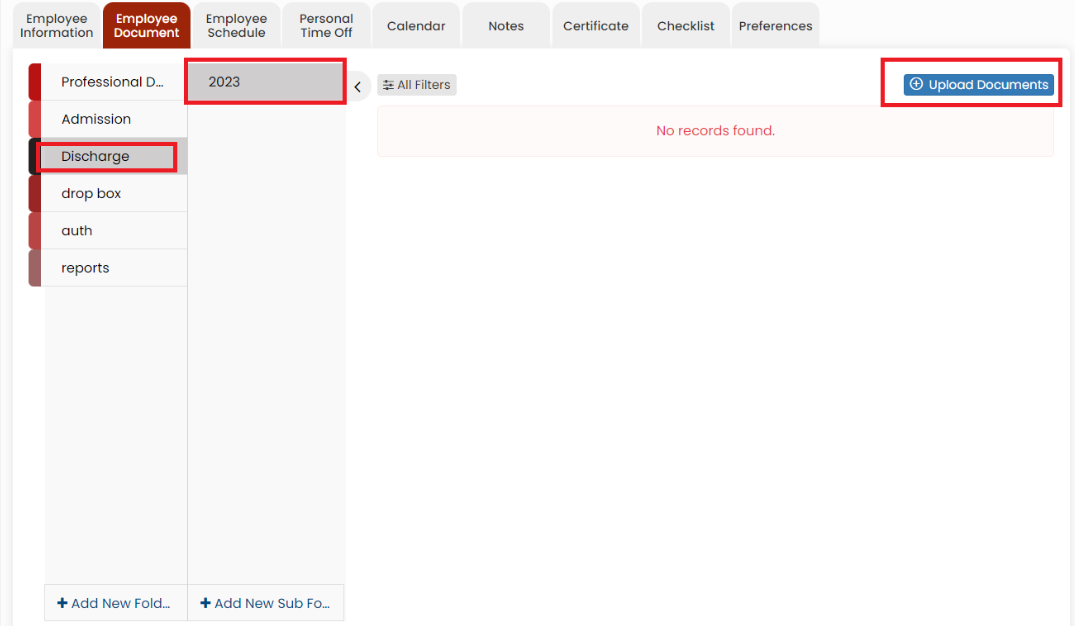
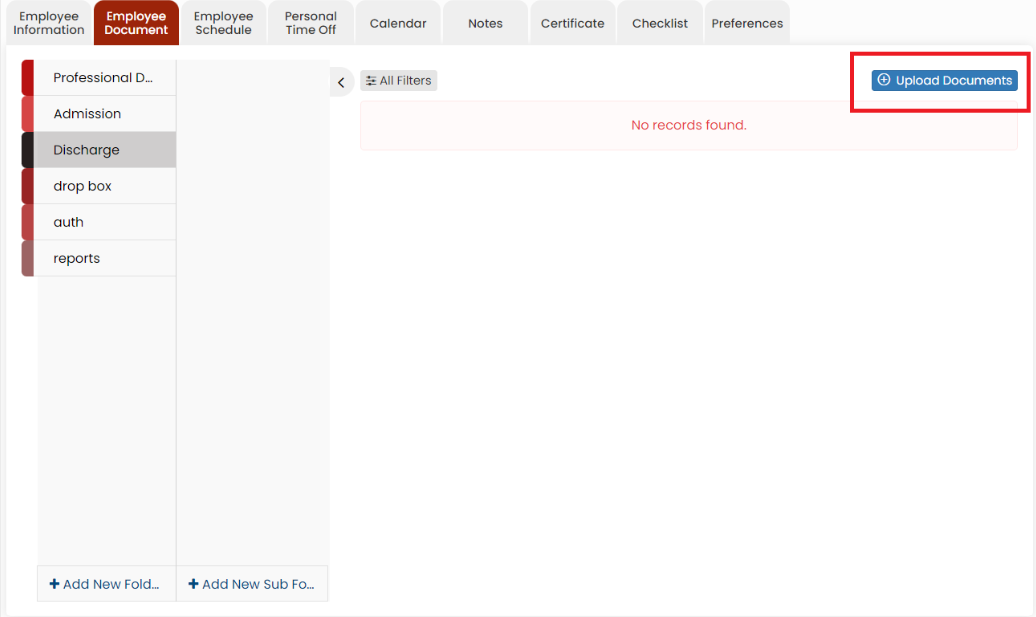
Uploading Documents
To upload the documents, select the folder name and click Upload documents.
When we click the option Upload Documents, the following screen appears,
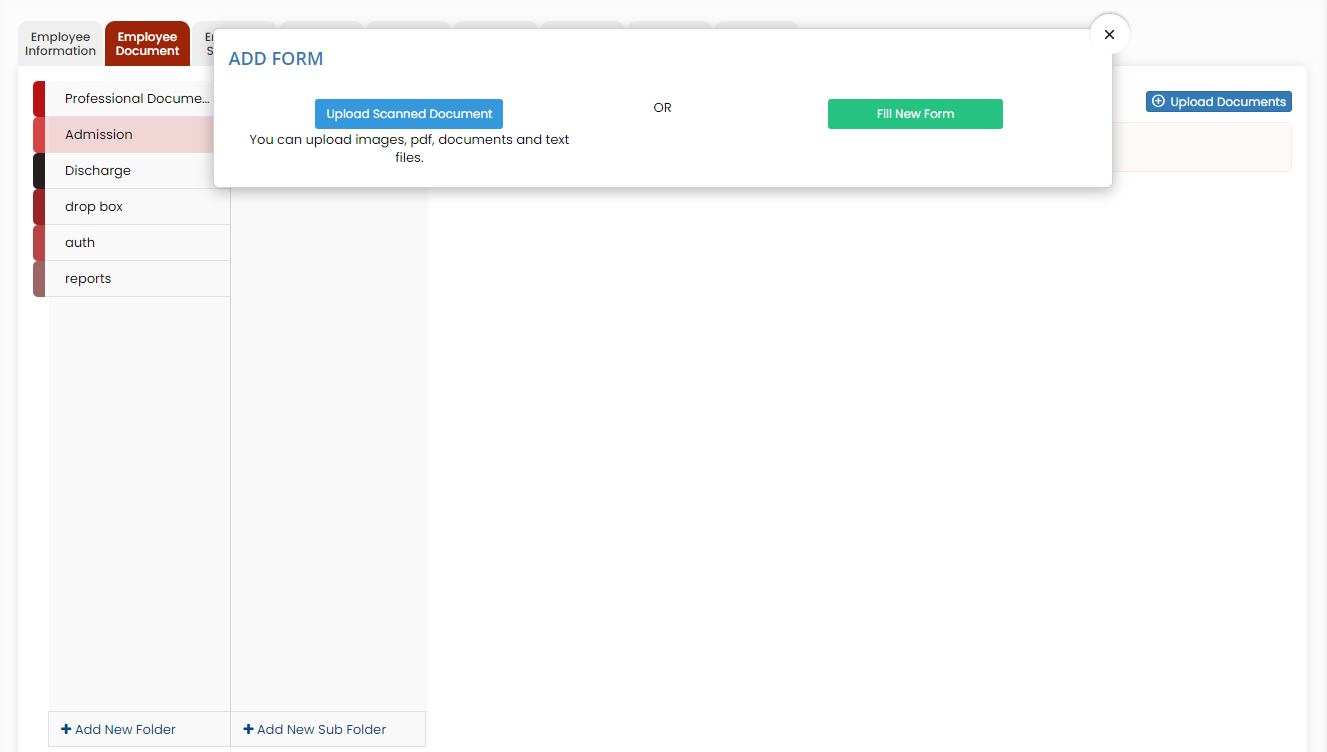
The Scanned documents can be uploaded using the option Upload Scanned Document option. The forms in the system can be uploaded using Fill New Form option.
For each scanned document under action we have the following options.
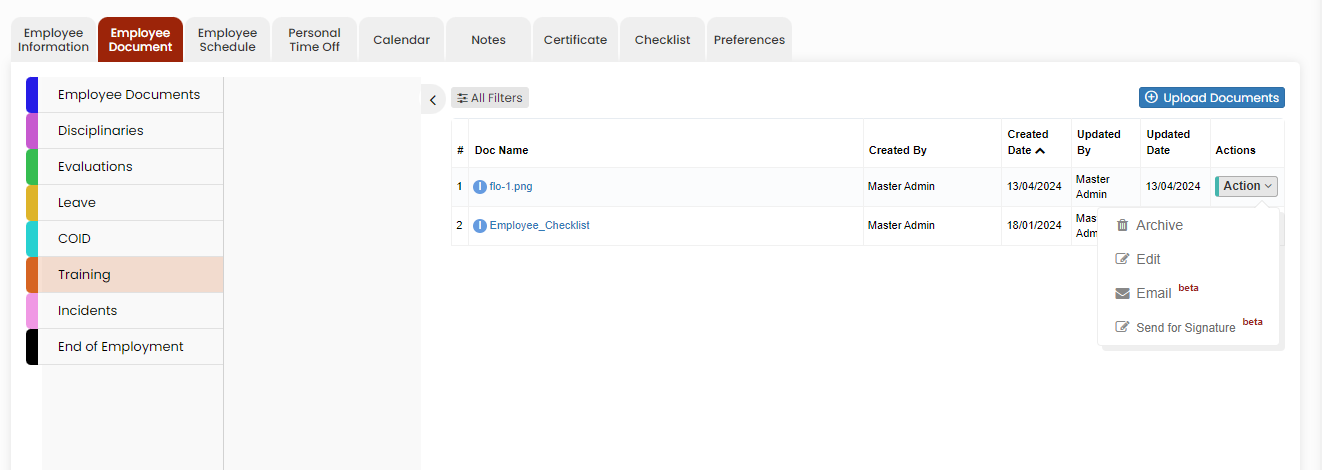
Archive option
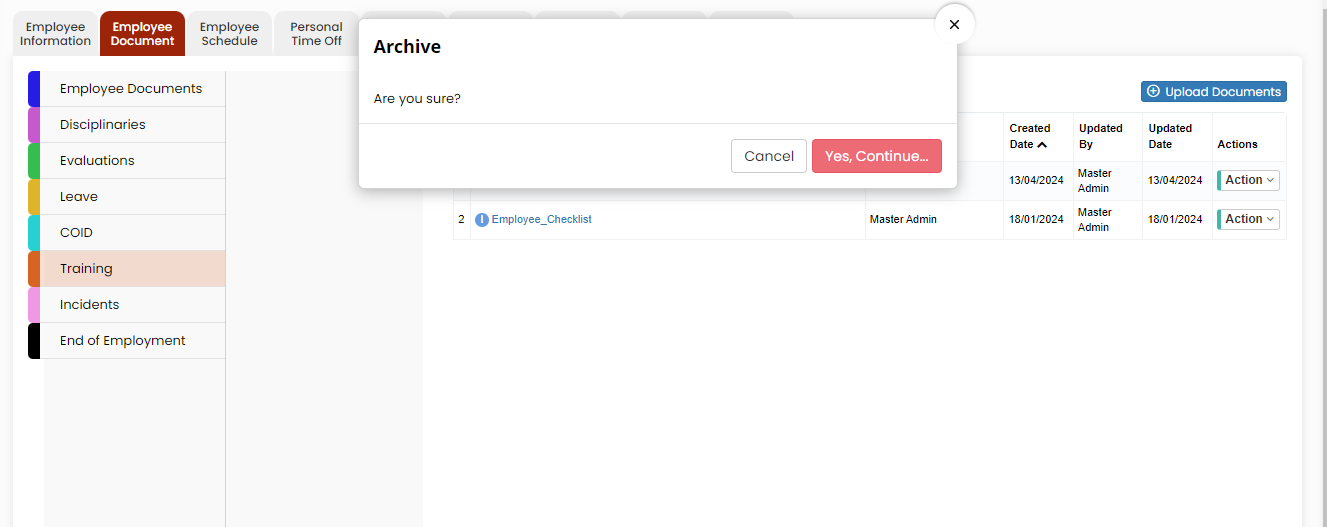
Click the option Archive to delete the uploaded scanned document. The following pop-up appears. Click Yes Continue option.
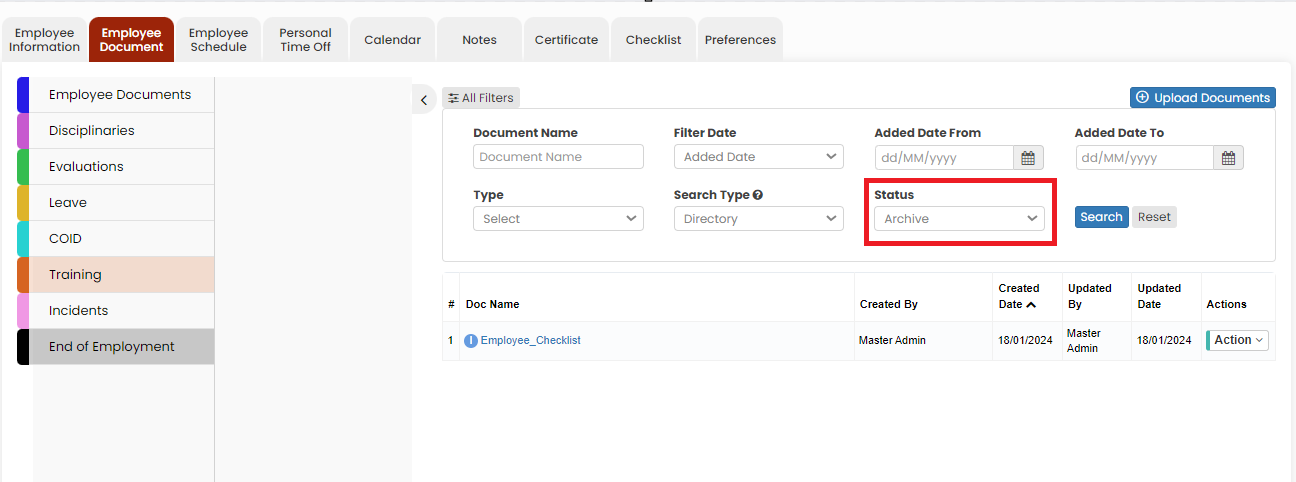
The document is now deleted from the Active documents list. To view the deleted document, Click All Filters option and select the Status Archive.
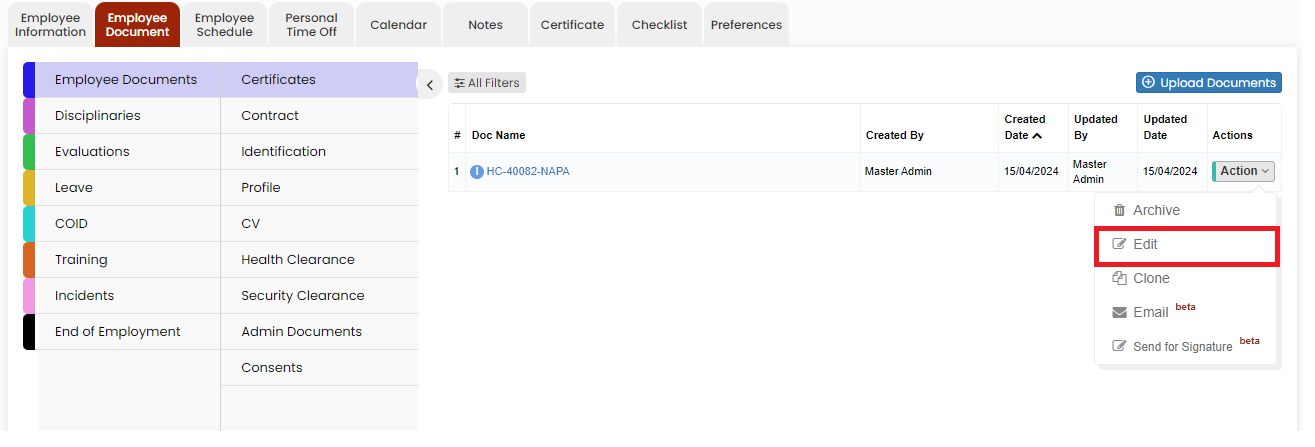
Edit Option
Click Edit option to edit the required information in the uploaded forms. Also we can edit the Document name of the uploaded scanned document using the Edit option.
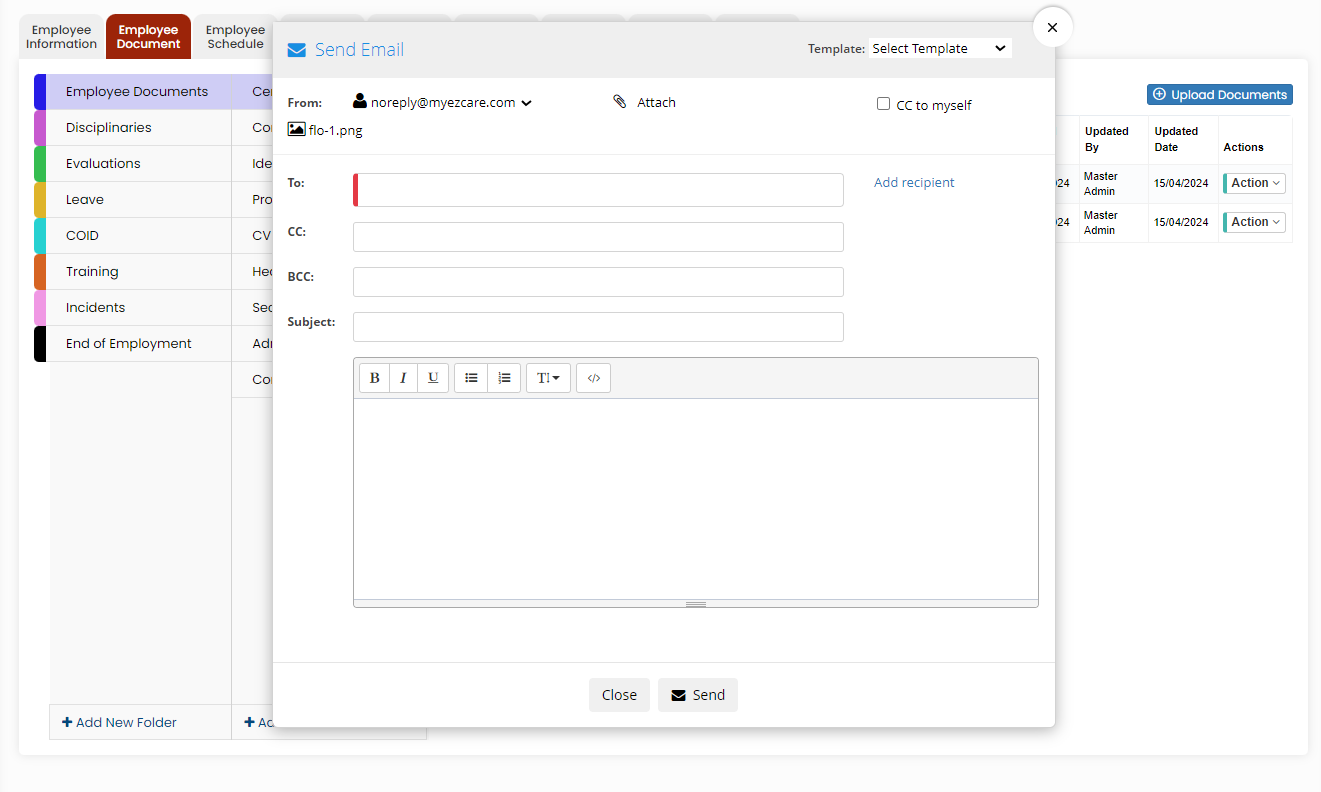
Email Option
The uploaded scanned document can be sent through Email using the Email option. Click Email option under Actions of the scanned document. The following screen appears, update the Email address, Subject and content of the Email and click Send option. The Email will be sent along with the scanned document.
We can also create templates for the Email under Settings >> Email Template option. The user can use the created email template by using the option Templates in the Email Screen.
Send for Signature option
The user can send the forms in the system to get the Electronic Signature from the Employee by using the option Send for Signature under Actions.
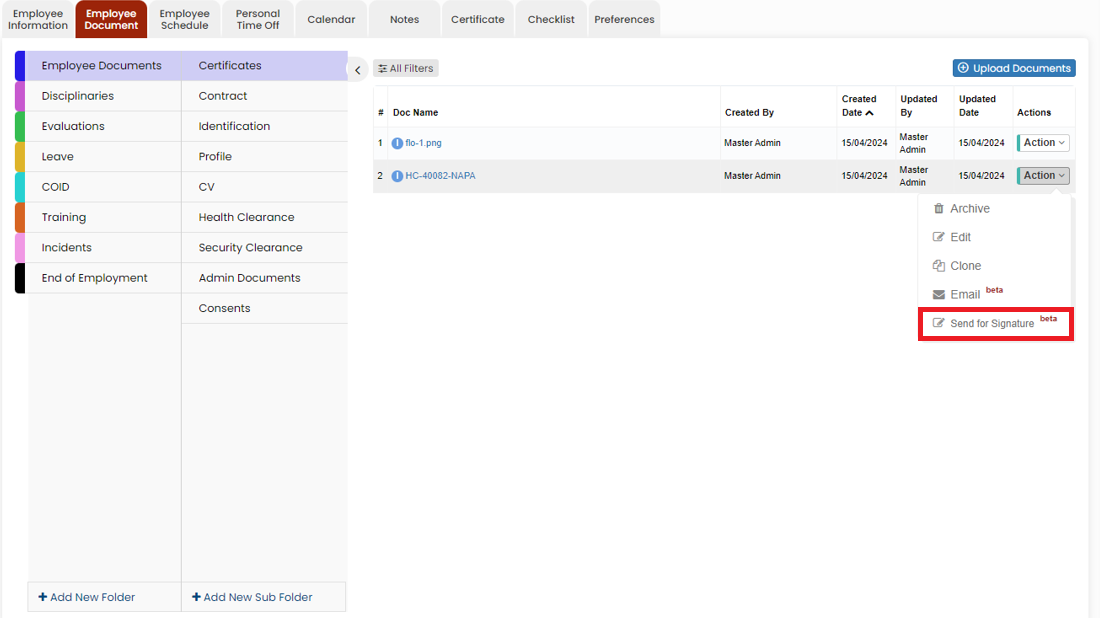
Click the option Send for Signature, the following screen appears,
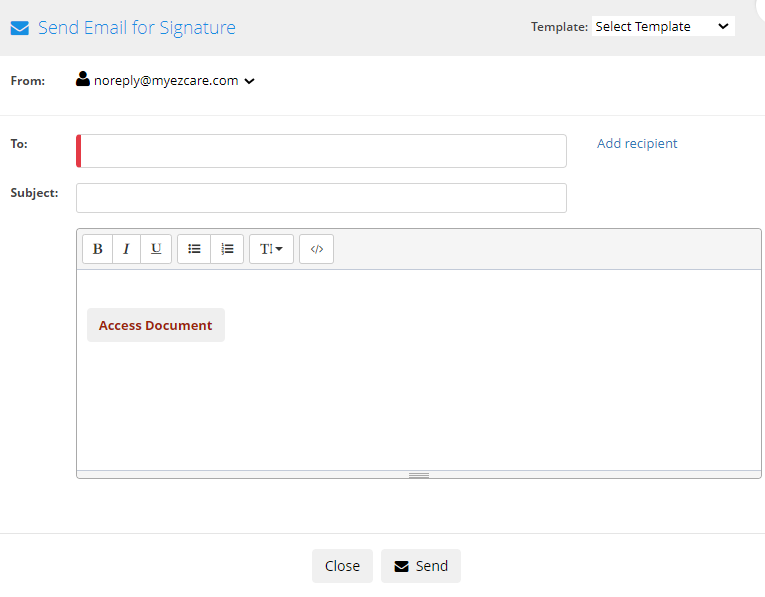
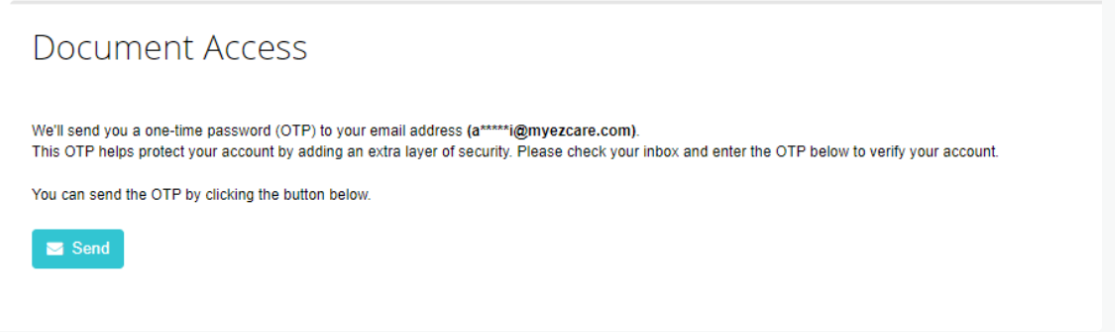
Update the required details and Click Send option. Now the email will be sent with the Document for signature. When the employee click on the Access Document, the following screen appears. On clicking the Send option, the employee will receive a 5 digit OTP for verification. Once the verification is completed, the Document automatically opens in which the employee can update their signature and save the document. The Signature updated document will be visible under the folders.
The Signature updated document will be visible under the folders.

Employee Schedule
An employee schedule in home health care is a structured plan outlining staff work hours and compliance with regulations. It ensures continuous patient care, staff well-being, and communication to ensure quality care delivery.
Adding Employee Schedule
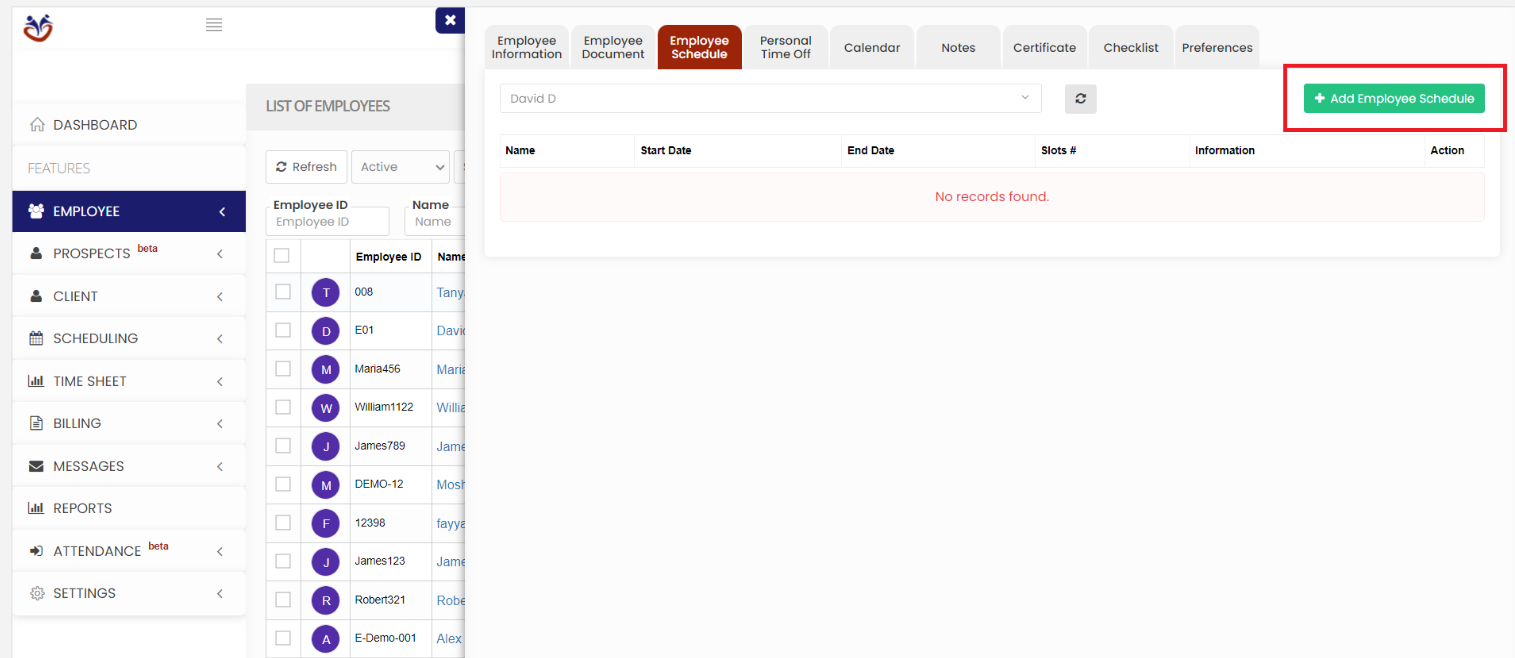
The user can update the Employee Schedule for their visits by selecting the +Add Employee Schedule button.
Employee Tab >> List >> Select Employee from List>> Employee Schedule or Employee Tab >> Schedule
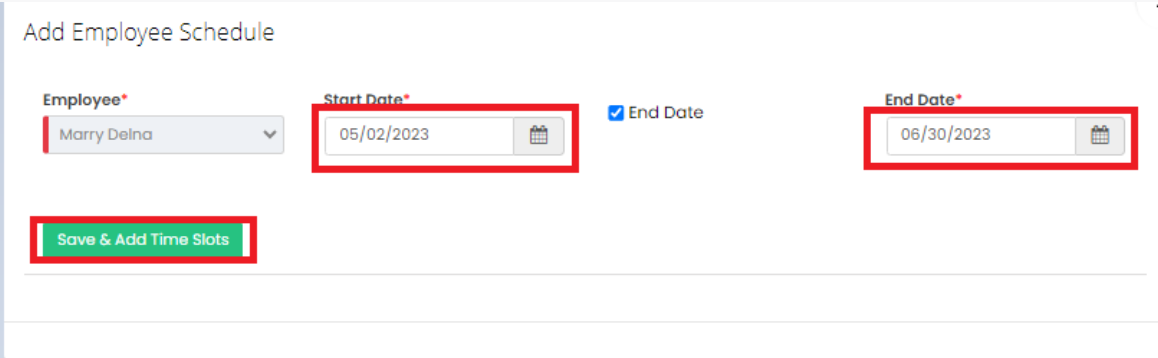
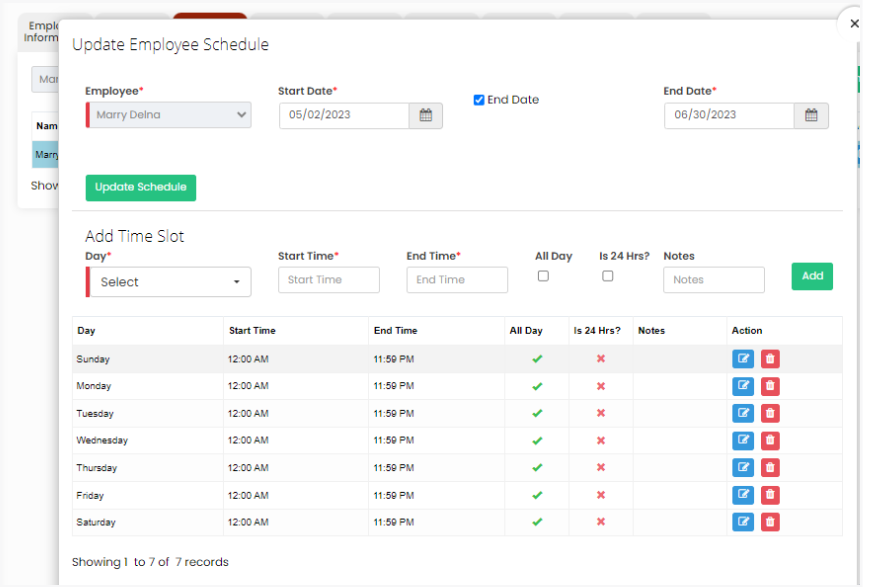
Click +Add Employee Schedule button, the following screen appears. Update the Start Date and End Date (optional) of the Schedule and Click Save & Add Time Slot button.
To Add the Time Slot of the Employee the user has to Select the Days, Start Time, End Time and check the option All Day or Is 24hrs of the Employee Schedule and Click Add.
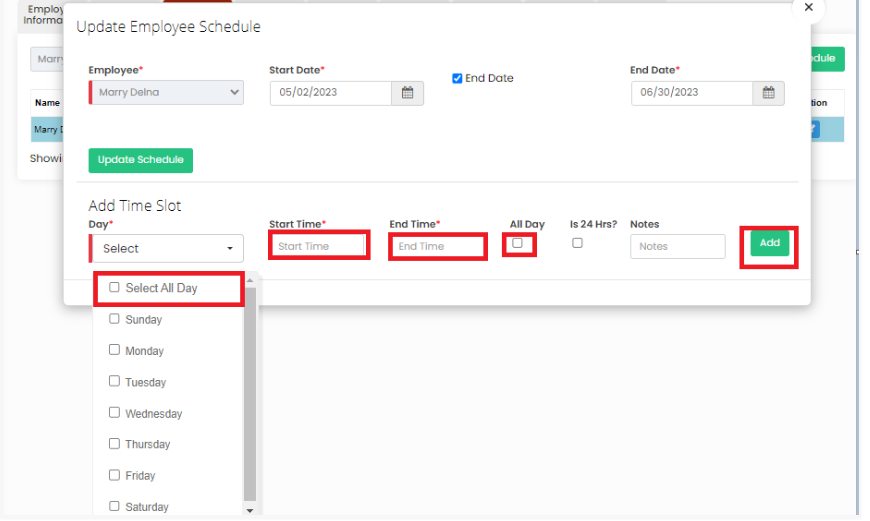
The Time Slot of the Employee Schedule is created successfully with the required details.
Employee Personal Time Off, Calendar & Notes
Employee Personal Time Off
The Employee PTO ( Personal Time Off ) can be updated by selecting the Personal Time Off Tab.
Employee Tab >> Personal Time Off (PTO)
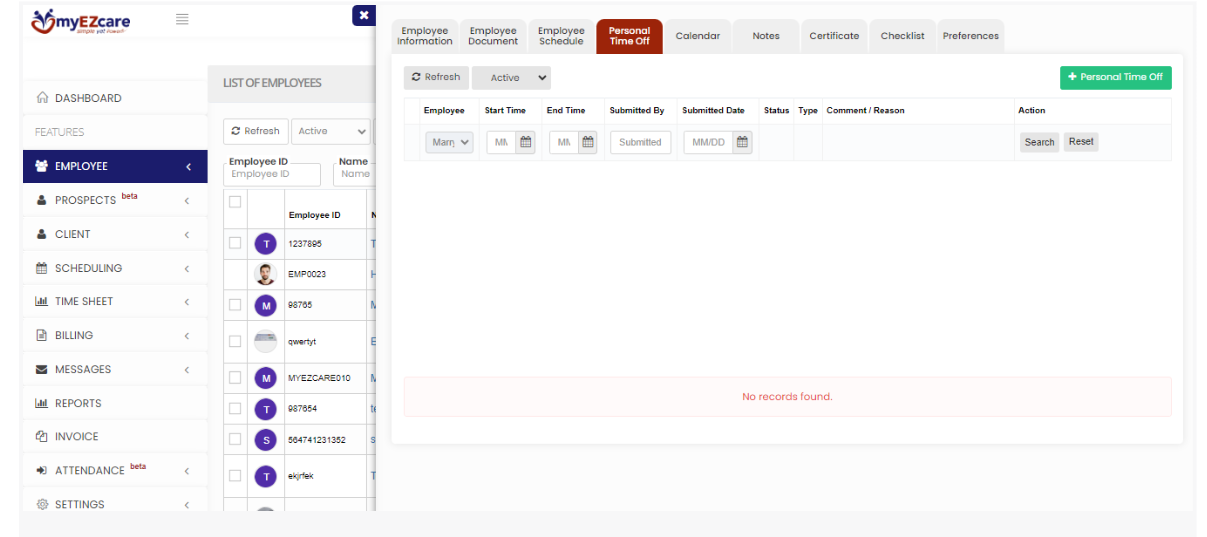
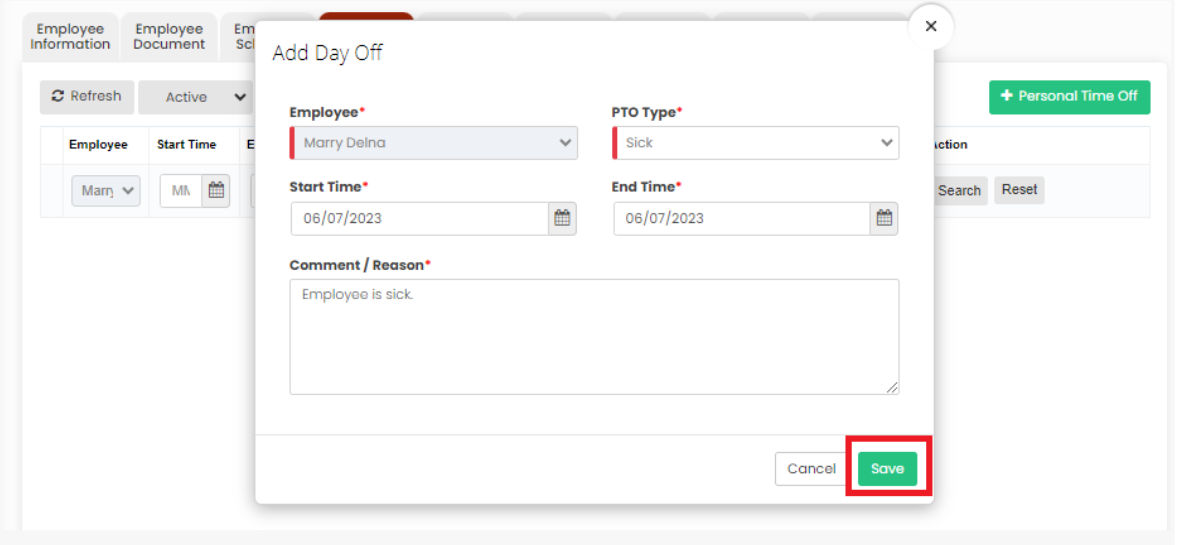
Select the + Personal Time Off option. The following screen appears, update the required information of the Employee Time Off and Click Save.
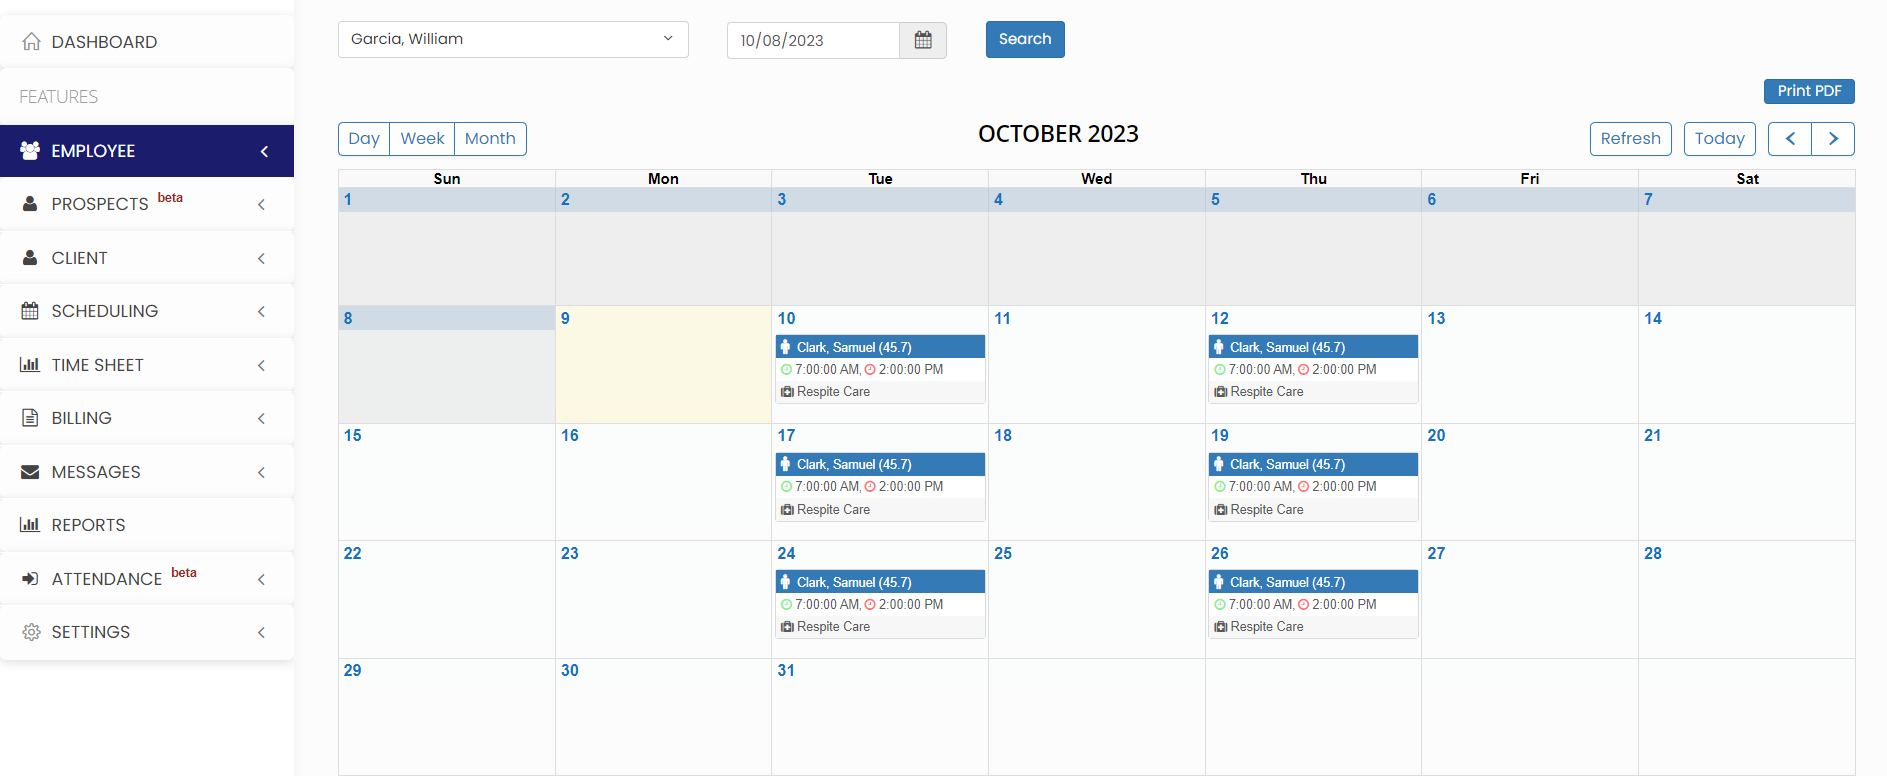
Employee Calendar
The user can view the Employee calendar for their scheduled visits. The Employee calendar has the details of the client name, Care type and the scheduled time.
Employee Tab >> Calendar
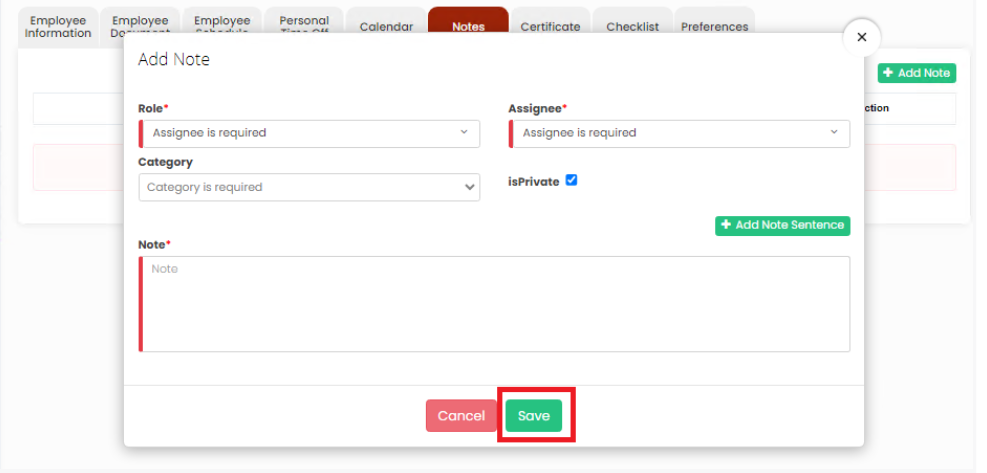
Employee Notes
The Notes Tab is used to add notes of the employee in the system. Click the option +Add Note. Select the required fields and update the notes of the employee and Click Save option.
Employee Tab >> List >> Employee Name >> Notes
Employee Certificate, Checklist and Preferences
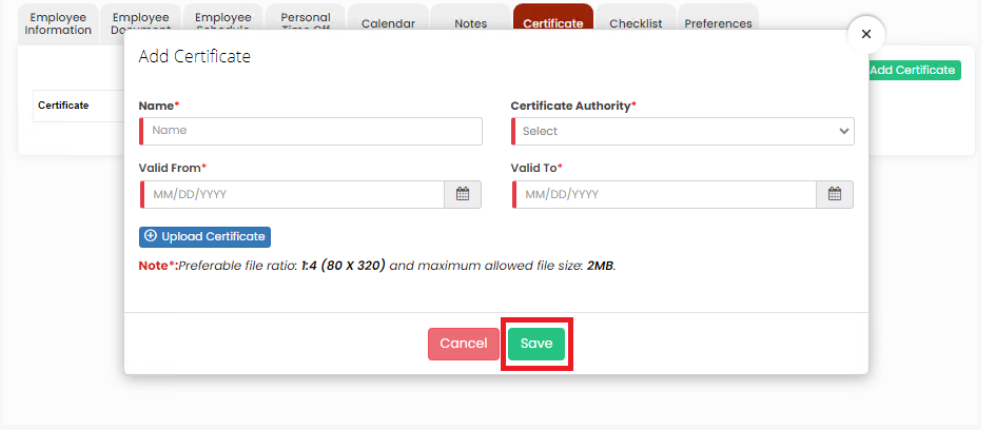
Employee Certificate
The Employee Certificate can be uploaded in the system by using the Certificate Tab. Click + Add Certificate option, update the required information and upload the Certificate.
Employee Tab >> List >> Employee Name >> Certificate
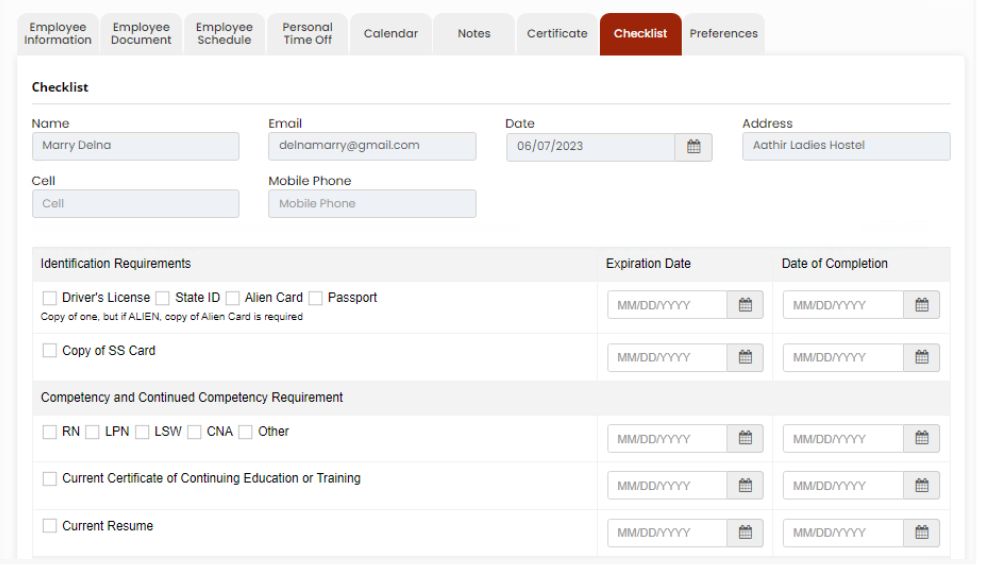
Employee Checklist
The user can check the documents in the checklist and update the Expiration date and Date of Completion in the checklist.
Employee Tab >> List >> Employee Name >> Checklist
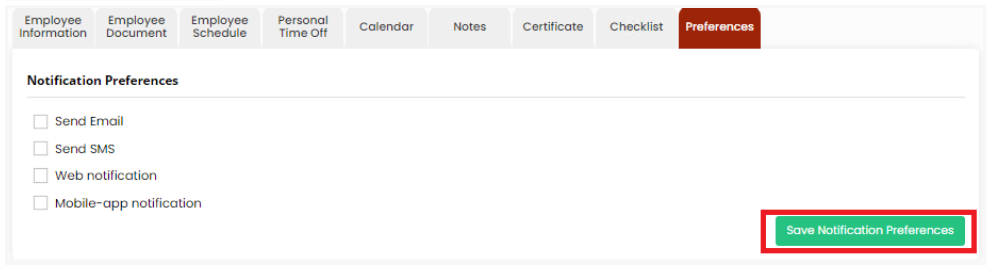
Employee Preferences
The user can update the Employee Preferences by using the Preferences option. Check the Preferences from the list and click Save Notification Preferences option.
Employee Tab >> List >> Employee Name >> Preferences
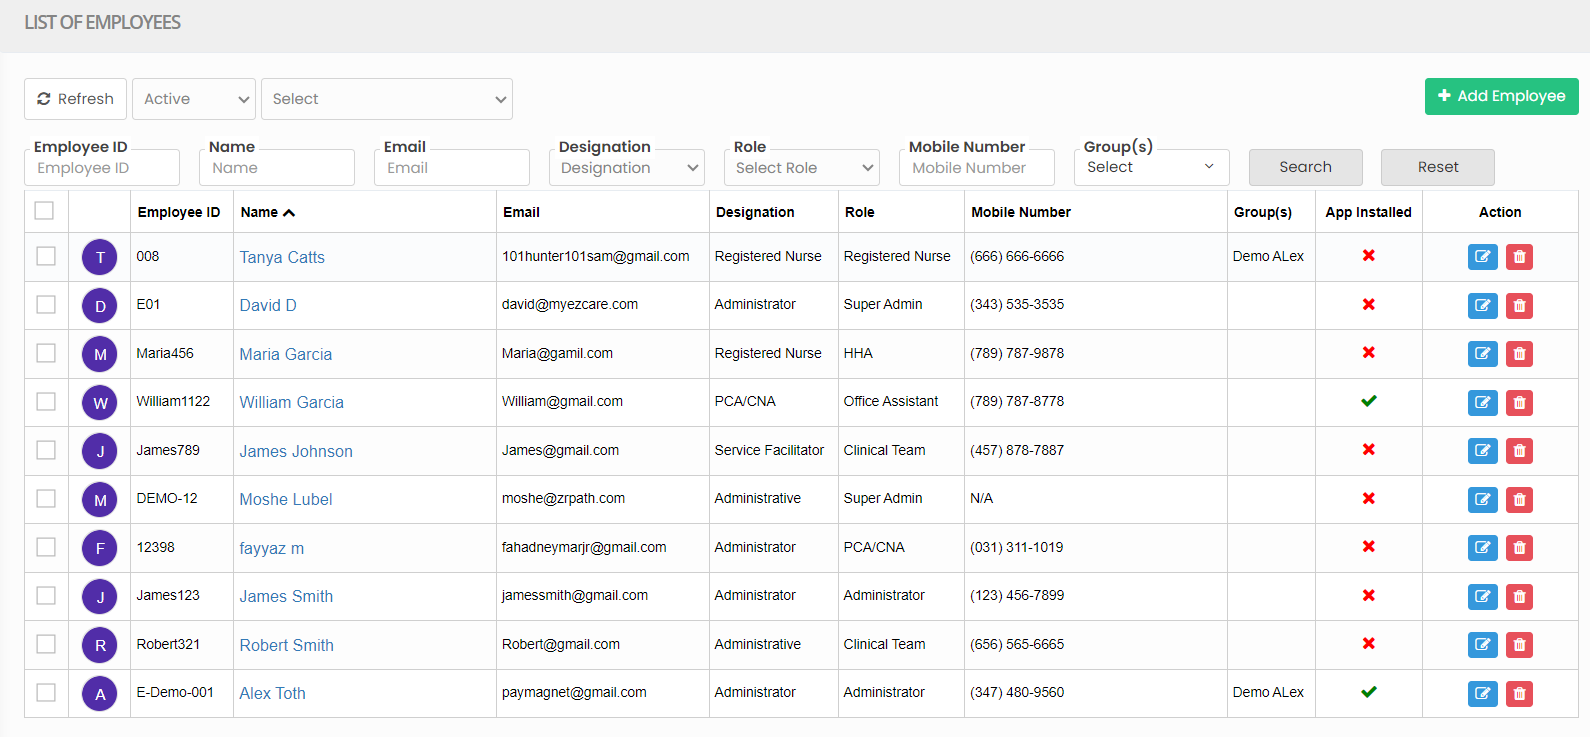
Employee List
An employee list in home health care is a record of staff providing in-home clinical and non-clinical services.
Bulk update Employee Group
The Employee Group information can be bulk updated for the list of employees in the system. Click the check-box before the Employee ID in employee list and click Update Group.
Employee Tab >> List
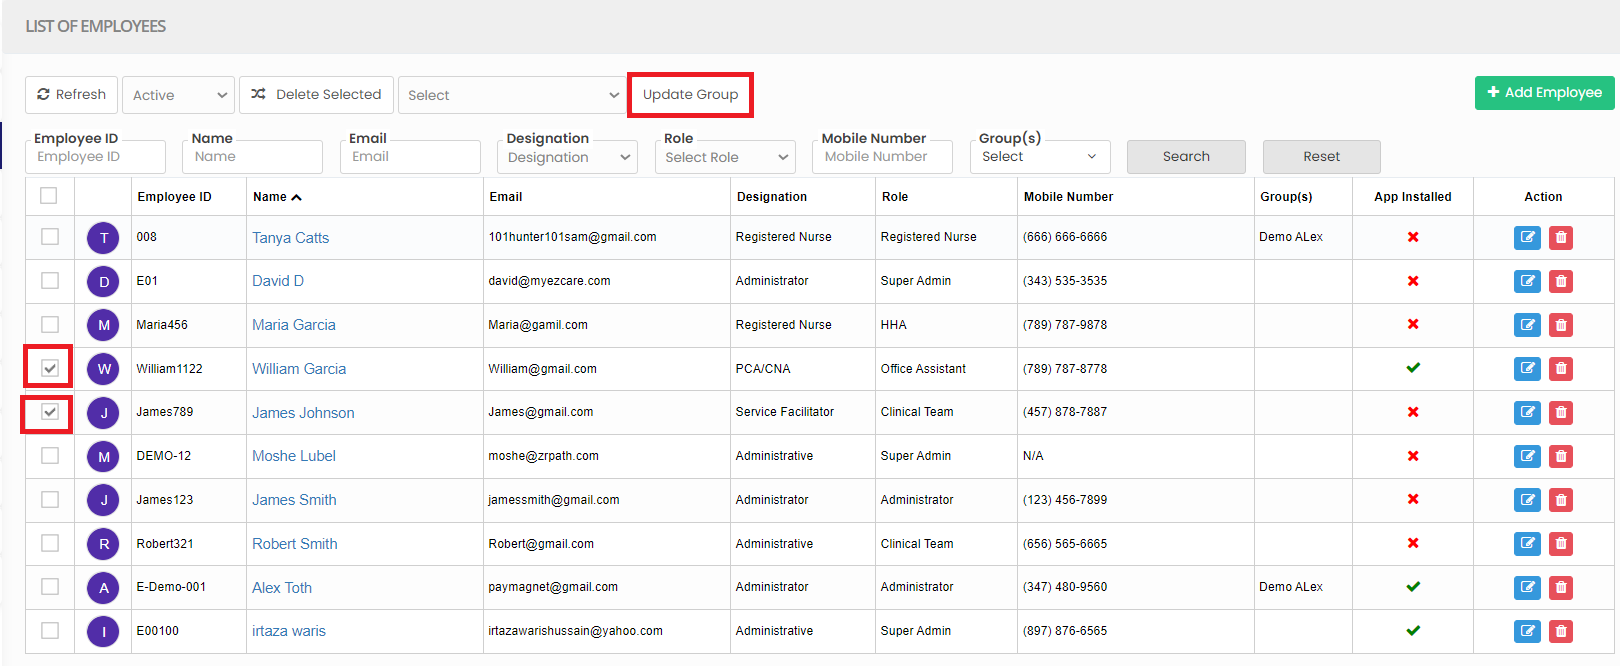
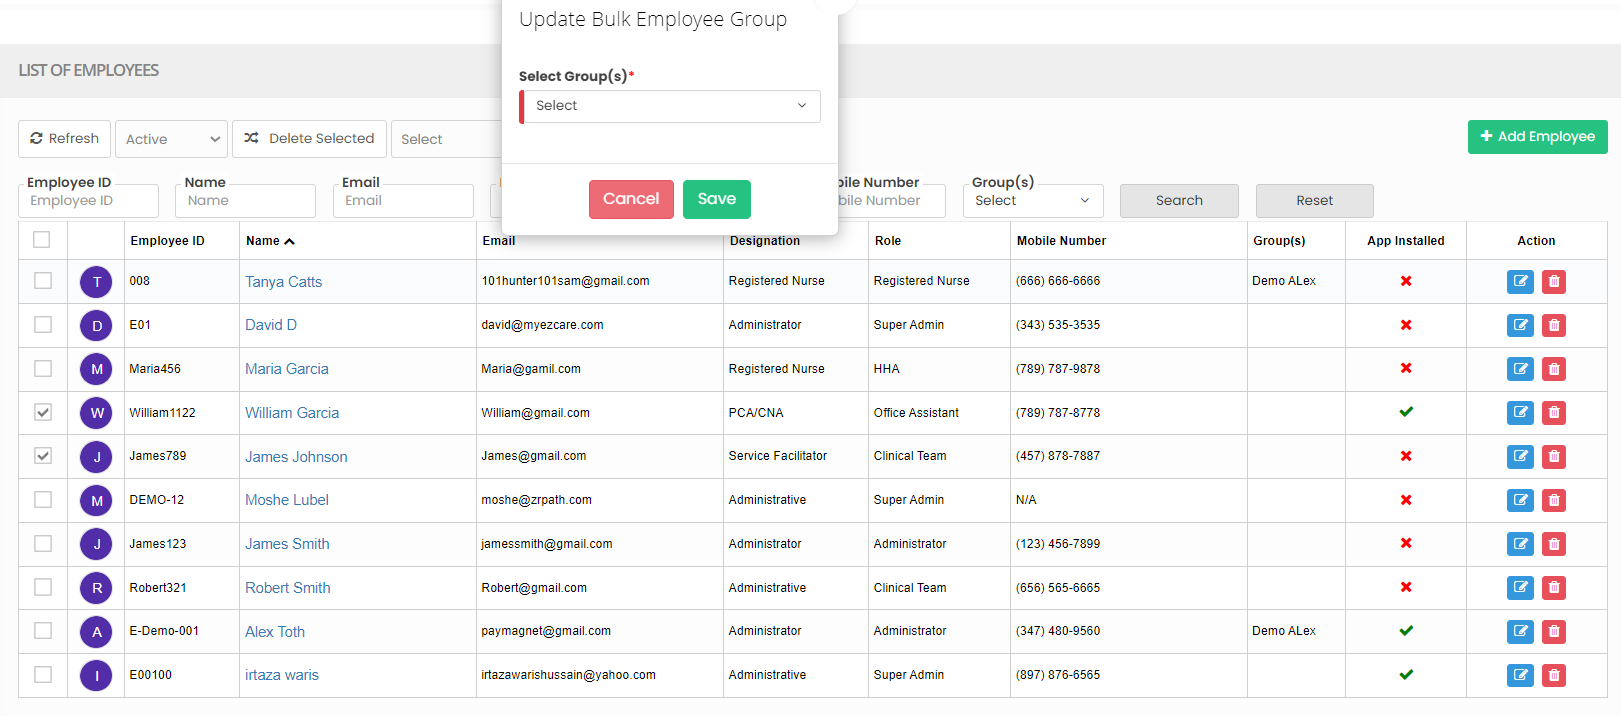
The following screen appears, select the Group from list and click Save option.
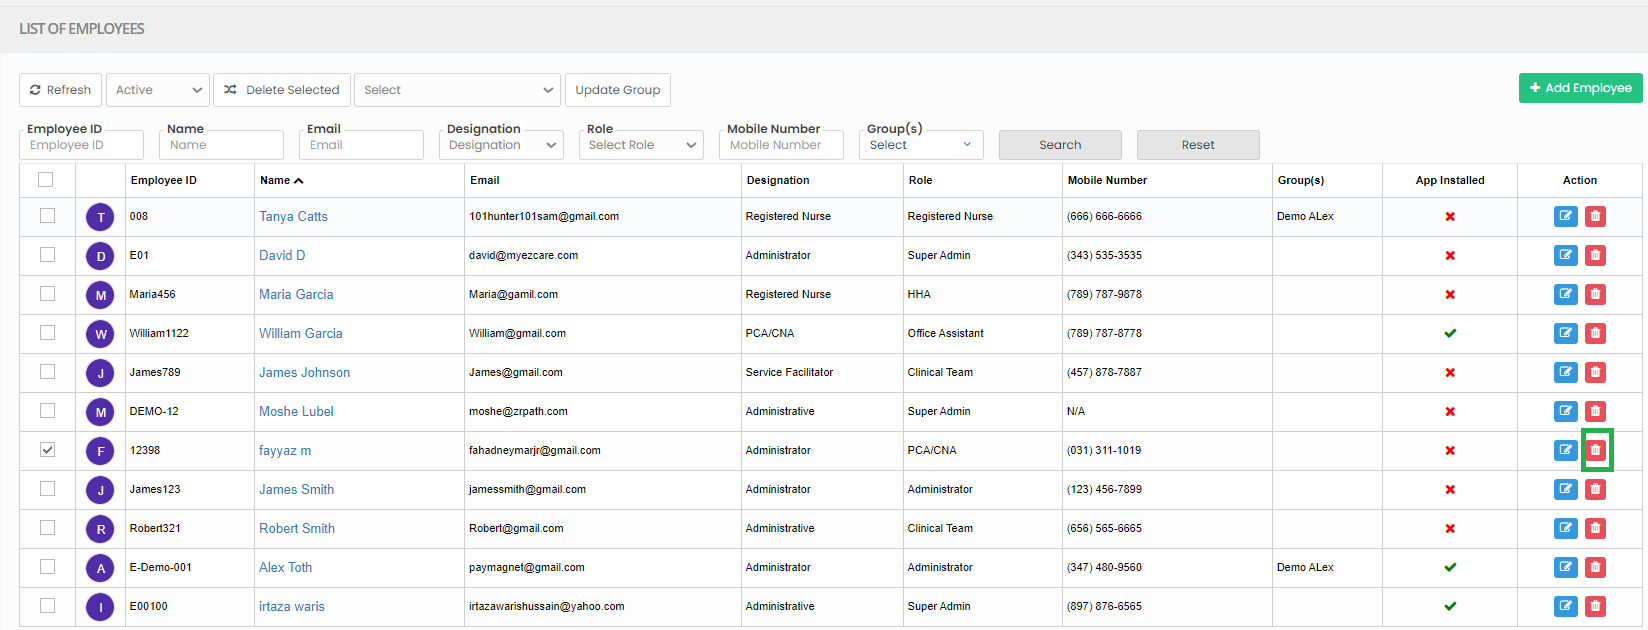
Delete Employee
The Employee can be deleted from the system by using the option Delete in Employee List. Select the Employee name by using the check box and click delete option.
Employee Tab >> List
Activate Deleted Employee
Select Deleted from the dropdown box. The Deleted employee can also be activated in the system by using the option Active.
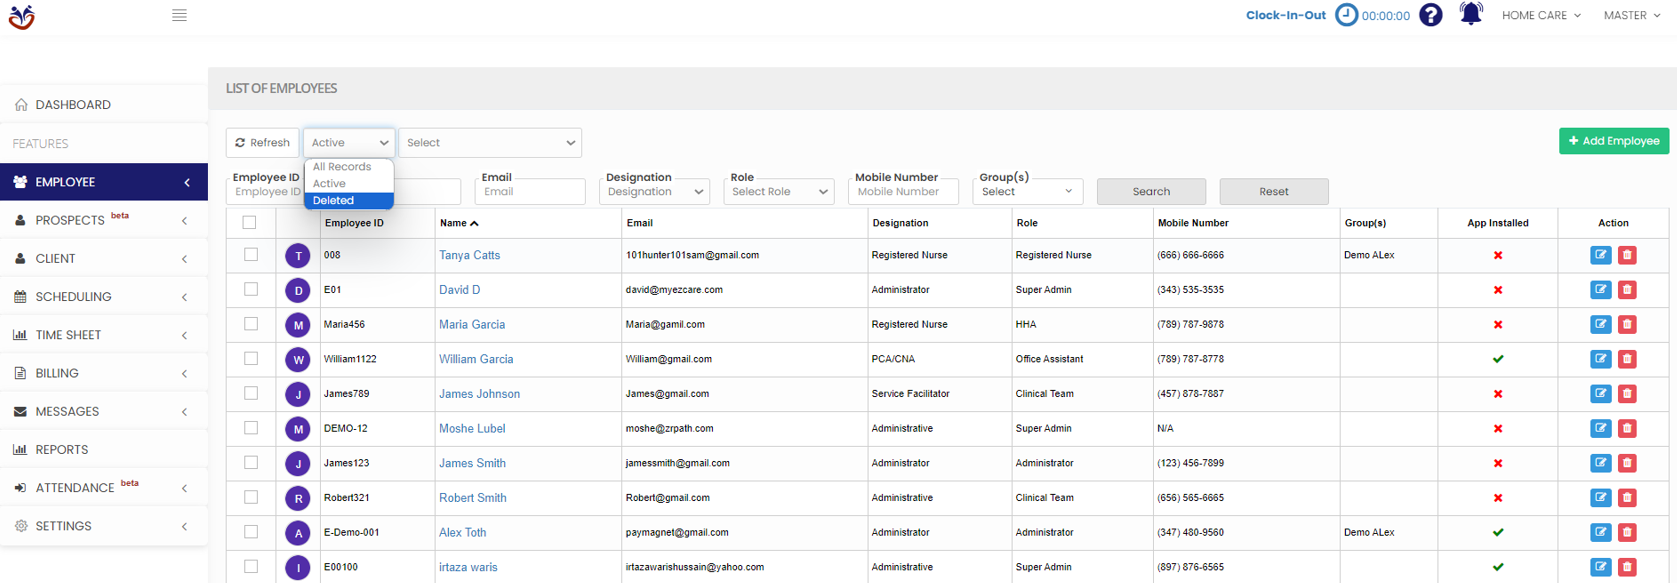
Click the check box for the employee to be activated and click Active option. Now, the deleted employee is successfully restored.
