Client
The patient often a central figure in the healthcare ecosystem, is an individual seeking medical attention and care for their physical or mental well-being.
- New Patient
- Referral History, Physician, Dx code
- Medication, Preferences / Skills, Setting, Audit Logs
- Patient Document
- Billing / Prior Authorization
- Care Plan
- Calendar, Block Employees
- Internal Messaging / Notes
- Client List
New Patient
A "new patient" in an Adult day care setting refers to an individual who is newly enrolled or admitted to the facility, typically an older adult or senior in need of supervised care, social activities, and assistance with daily living tasks.
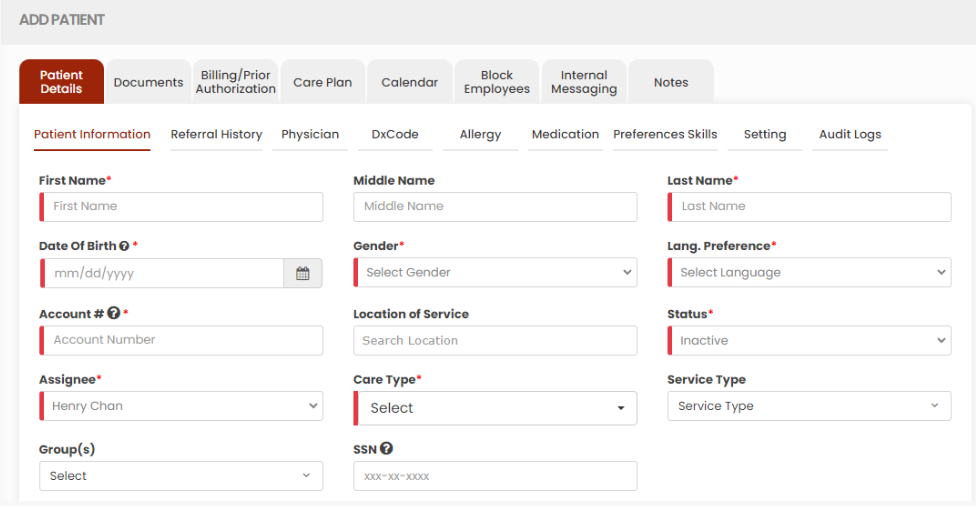
Adding New Patient
Note: All Fields marked with * are mandatory and must be filled out, otherwise the system will generate an error indicating that the required information is missing.
For adding new patient information in the system follow these steps.
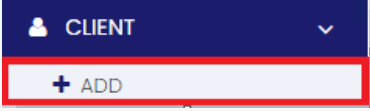
Client >> + Add option
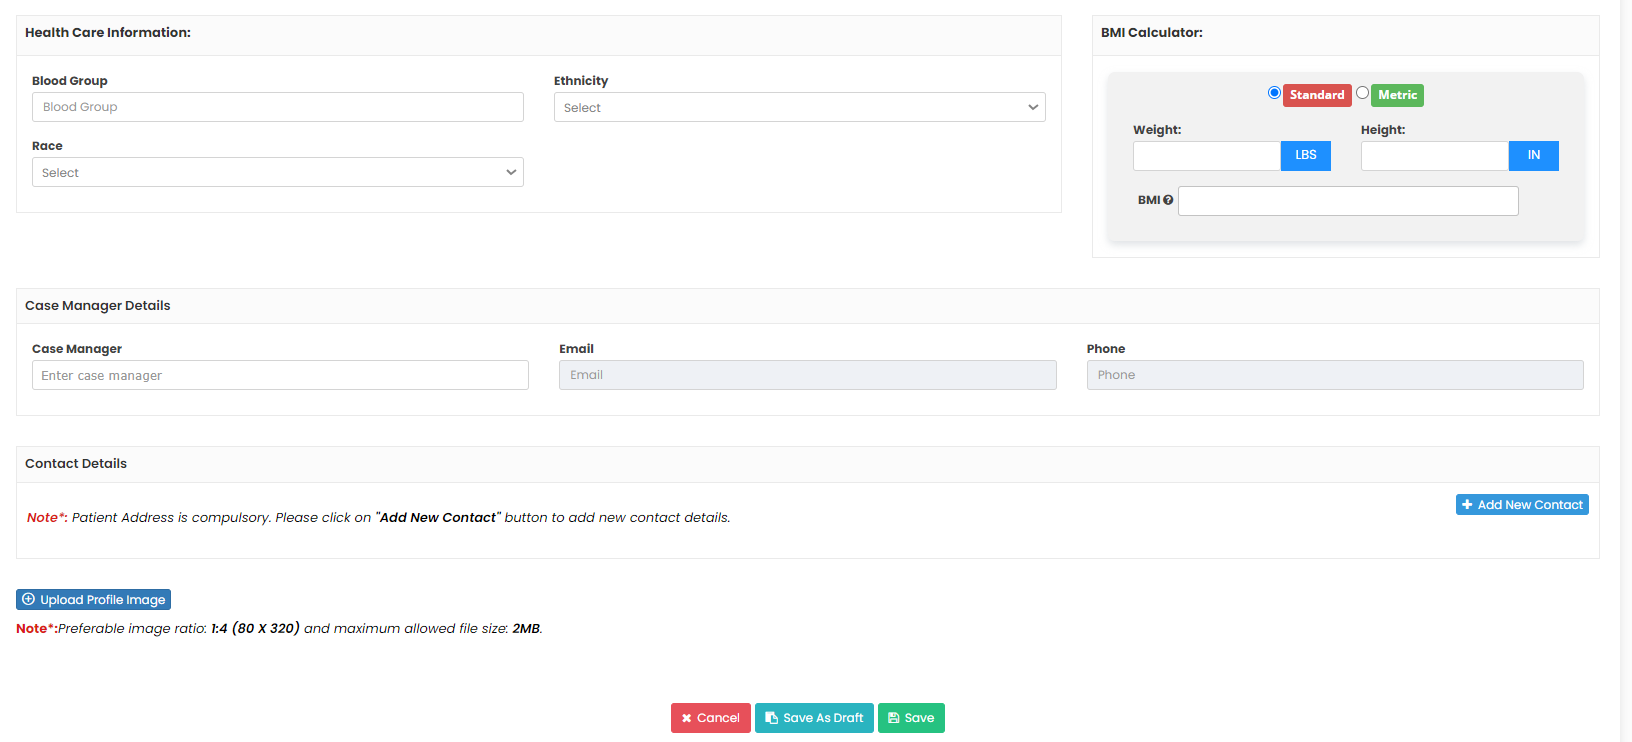
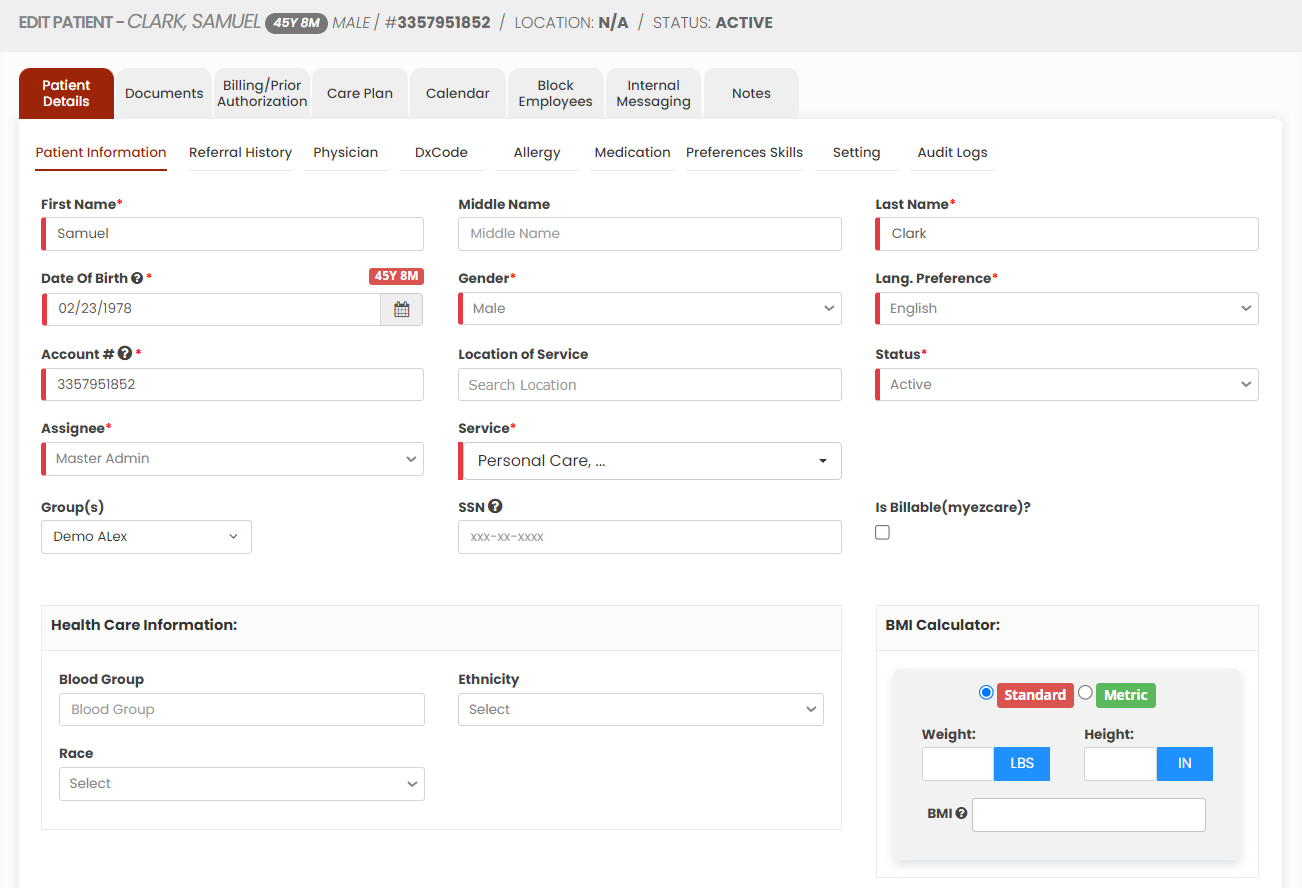
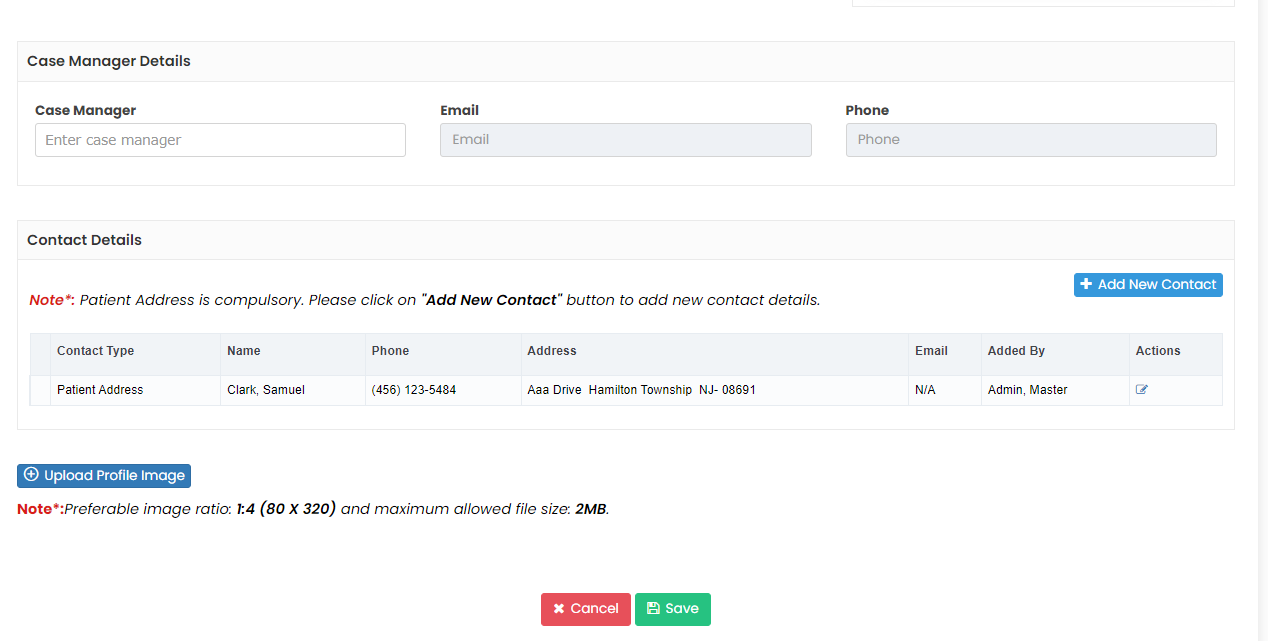
Update the patient information in the required field. Click +Add New Contact option to enter the patient address and then click save. The user can also upload the profile image of the patient for additional information.
Editing New Patient
The Patient information can be edited by selecting the patient from the list. The following screen appears to edit the required information of the Patient. Update the information and then Click Save.
Client >> List
Referral History, Physician, Dx code
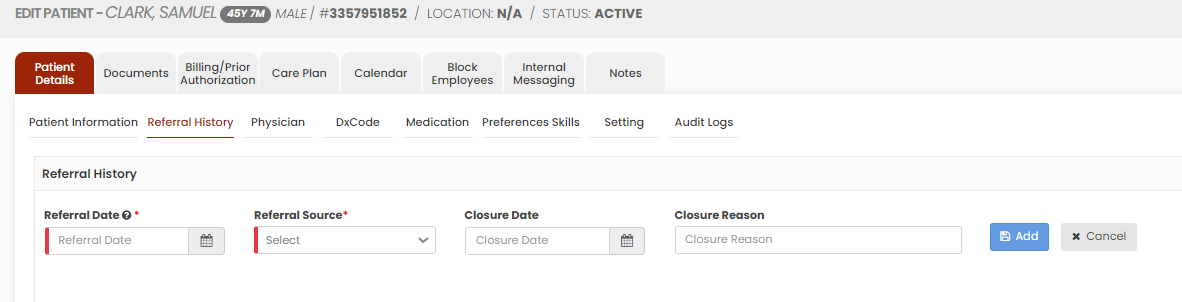
Adding Referral History
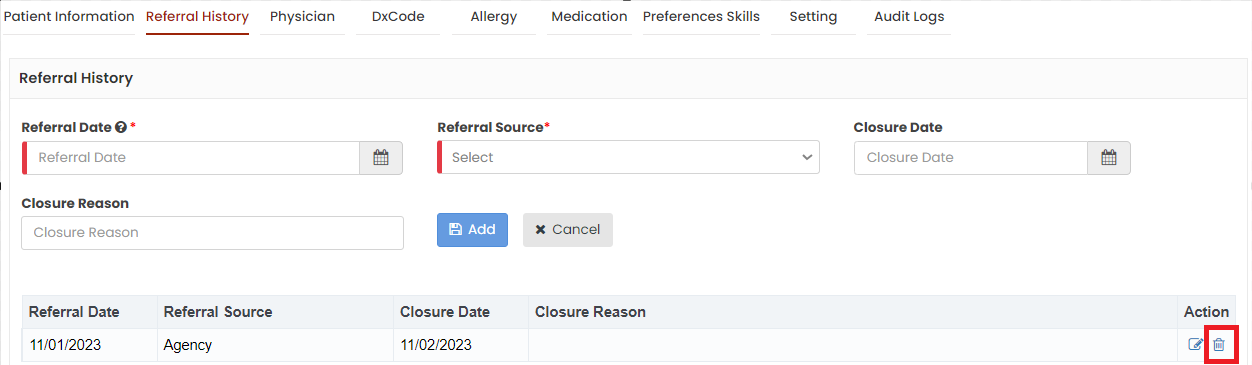
The Referral History tracks the source and progression of recommendations and connections in the system. Enter the required information in the system and then Click Add option.
Client >> List>> Patient Name >> Referral History
The added Referral History can be deleted by using the delete option under Action.
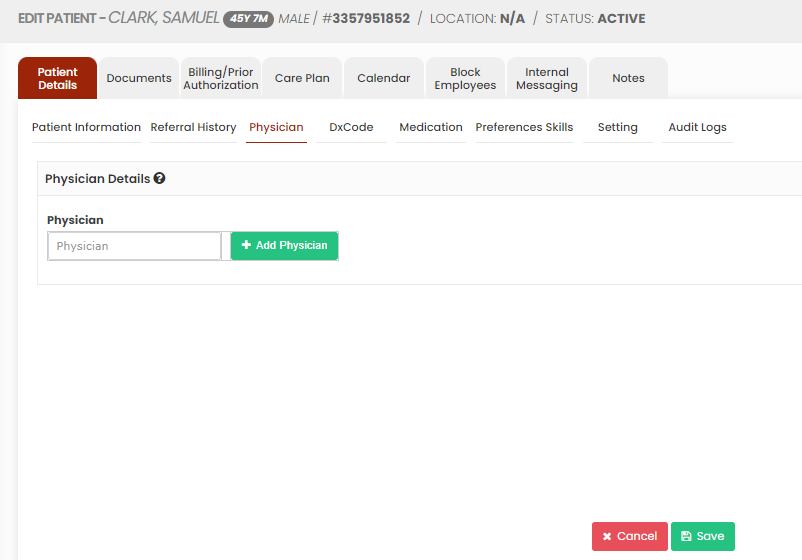
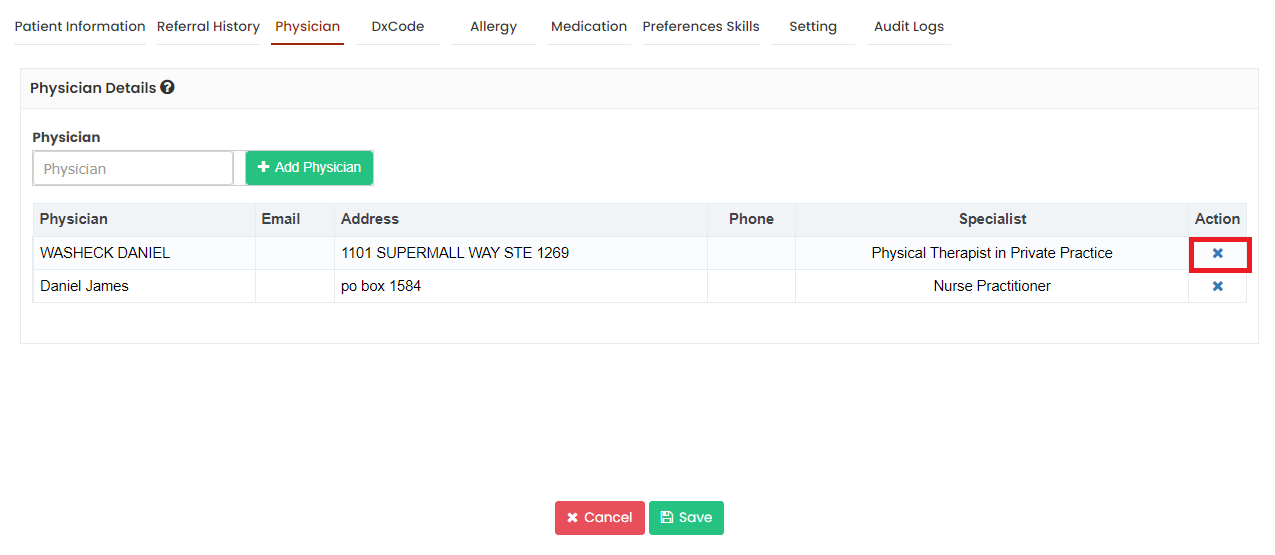
Physician
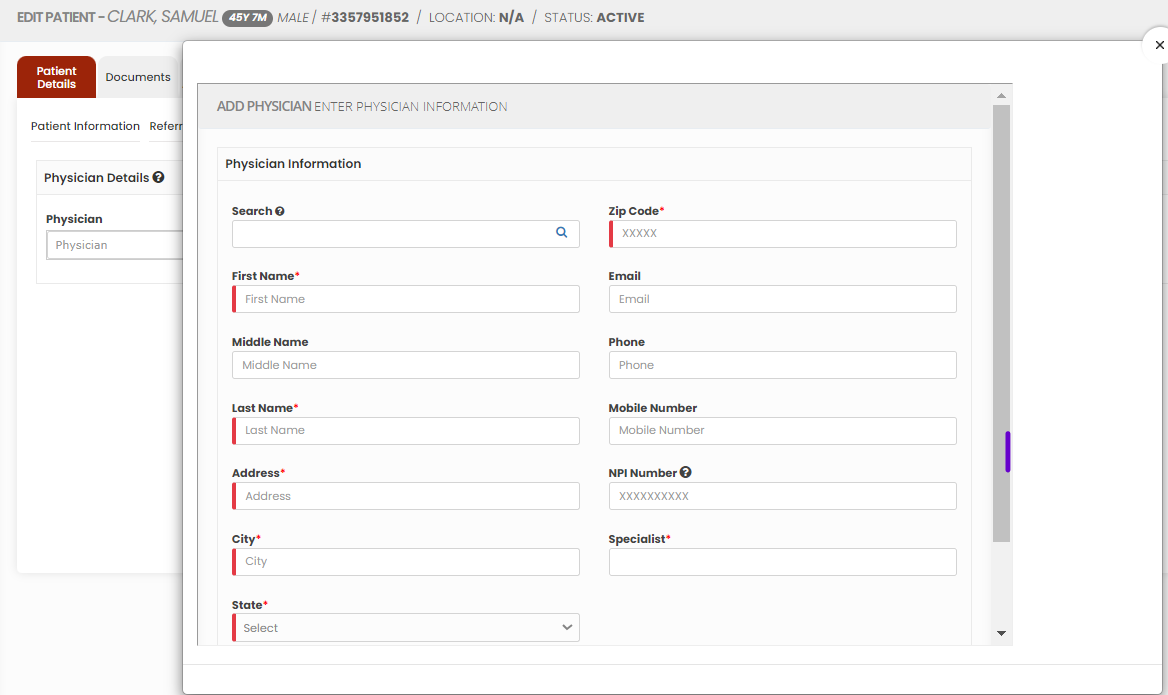
The Physician Details of the patient can be added by using the option Physician in Patient details. Click Add Physician option to update new Physician information.
Client >> List>> Patient Name >> Physician
Now, enter the required details of the Physician and Click Save option. To update existing physician, search the physician name and Click save.
The added physician can also be deleted by using the option x under Action.
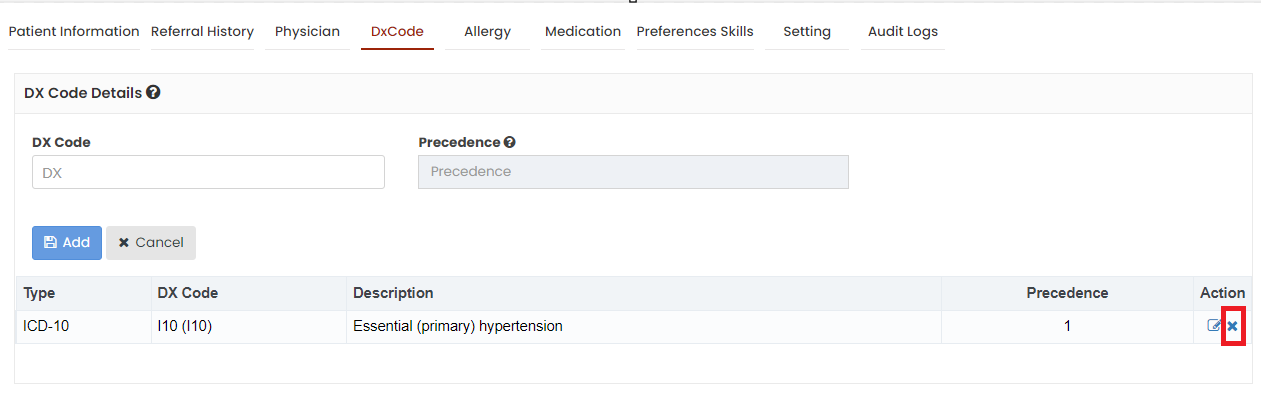
Dx Code
The diagnosis code, often referred to as an ICD code are essential to medical billing and insurance claims. Search the required Dx code and Click Add option.
Client >> List>> Patient Name >> Dx Code
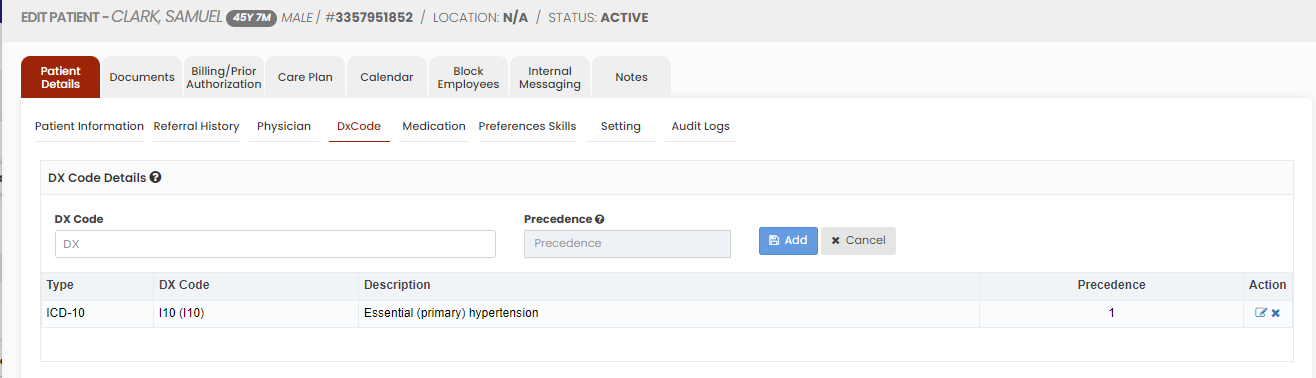
The added Dx code can also be deleted by using the option x under Action.
Medication, Preferences / Skills, Setting, Audit Logs
- Medication plays a crucial role in modern healthcare, serving as a cornerstone of disease management and treatment.
- Preference refers to the unique and individualized choices and needs of the patient. Skill refers to the specialized abilities and expertise of caregivers, including medical, nursing, and personal care skills, essential for providing non-medical assistance.
- Access detail of the patient on web application is given under Setting Tab.
- Audit logs refer to detailed records that track all electronic activities and modifications to patient information within the system.
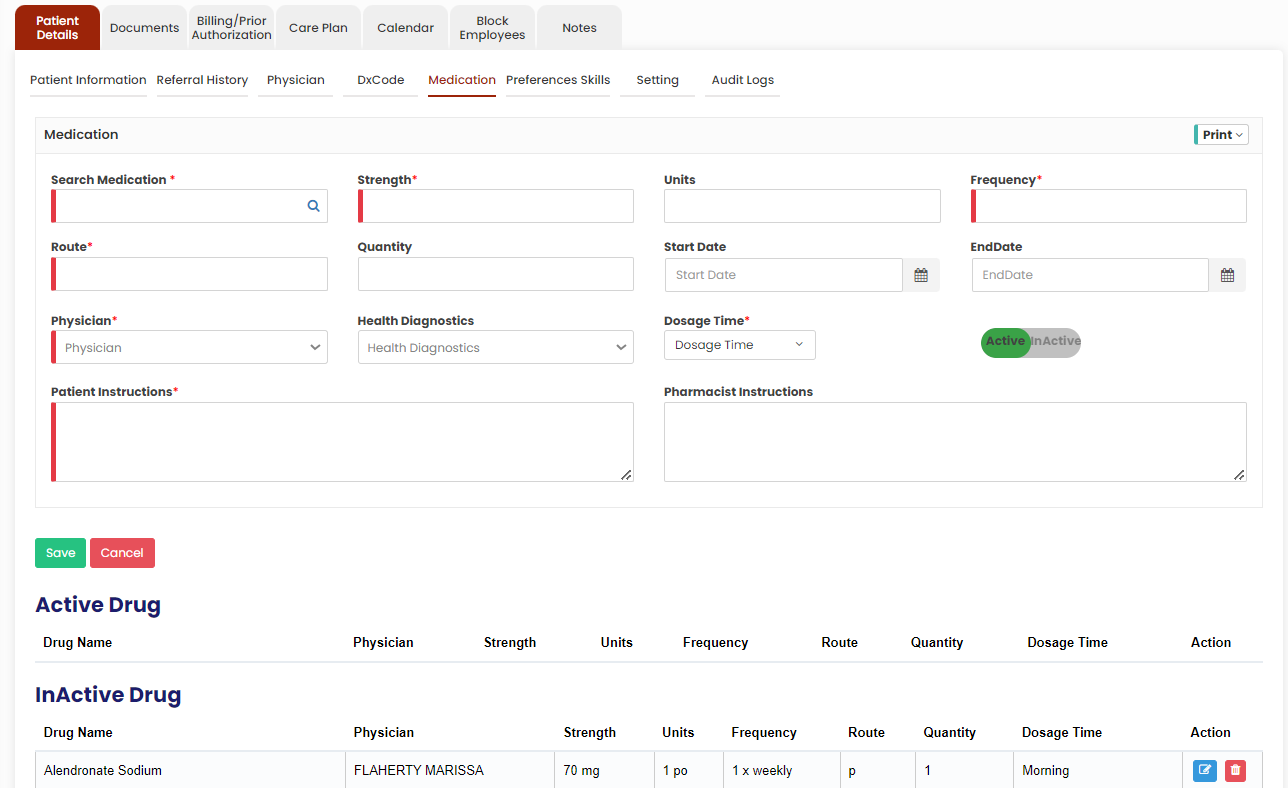
Medication
The medication details of the patient can be entered in Medication option under Patient Details. Update the medication details in the required field and Click Save option.
Note: All Fields marked with * are mandatory and must be filled out, otherwise the system will generate an error indicating that the required information is missing.
Client>>List>>Patient Name>>Medication
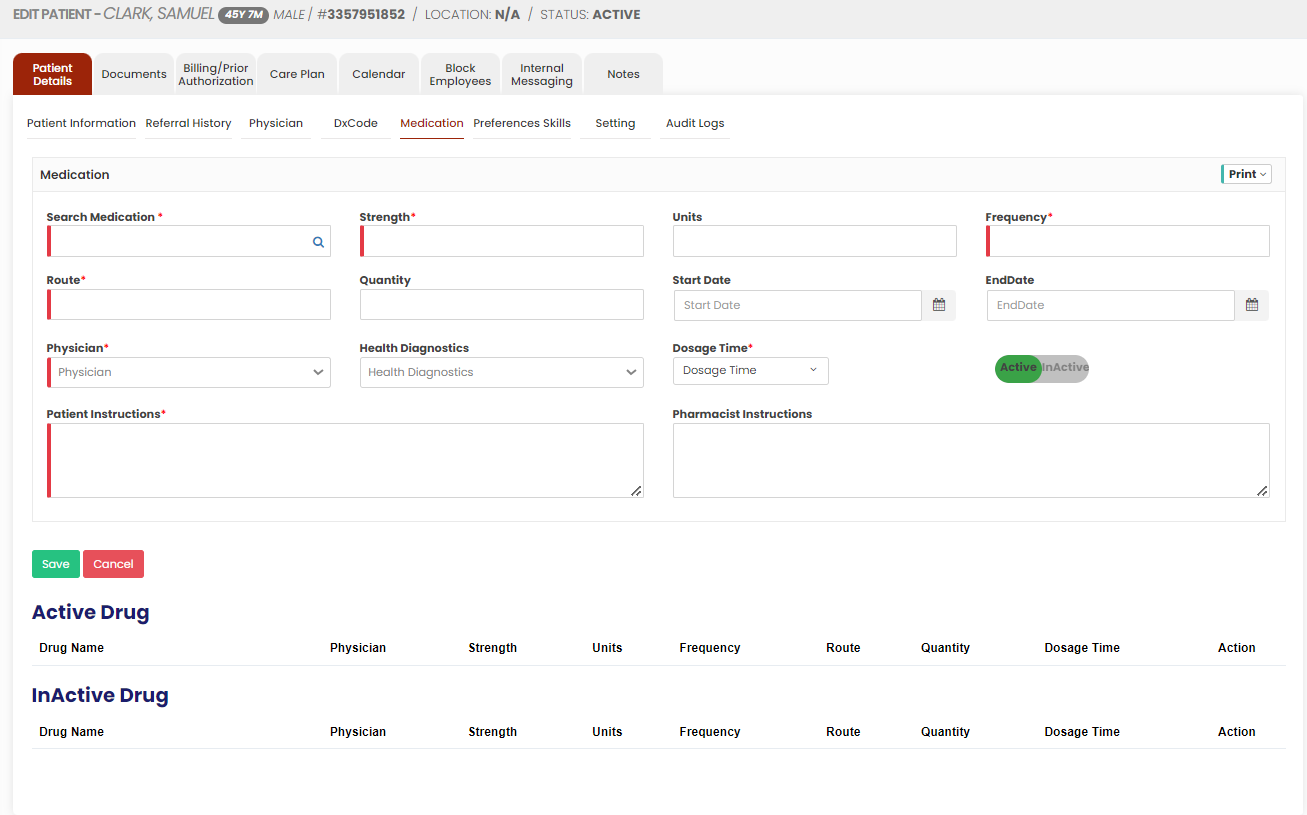
When the Active Drug reaches the end date, it will be automatically moved to Inactive Drug list.
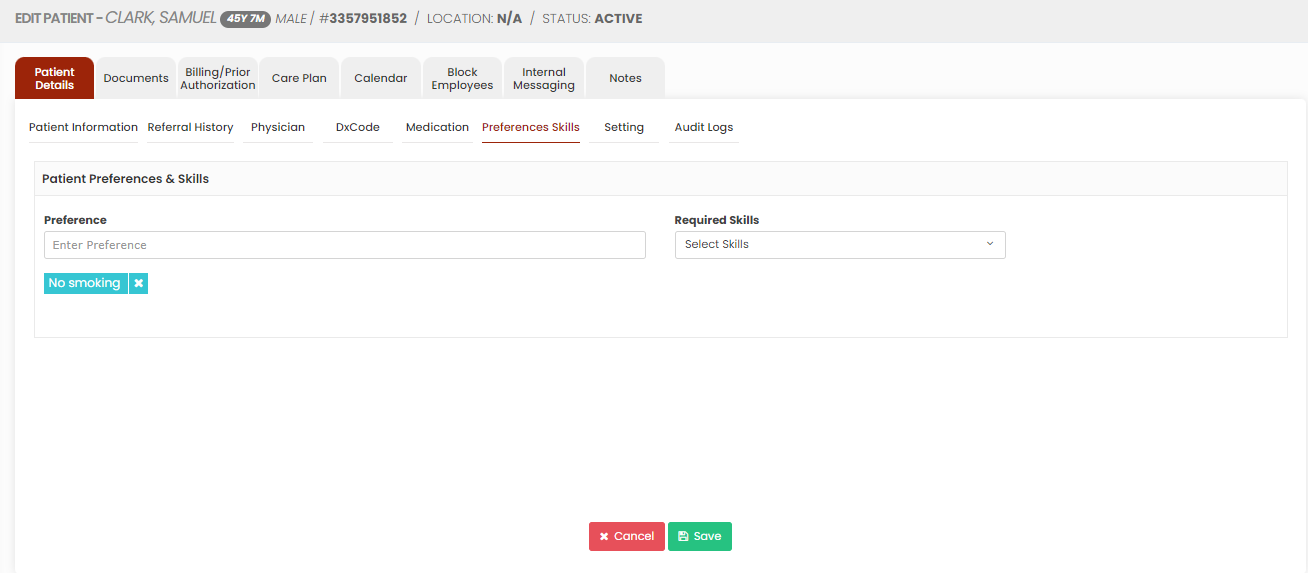
Preferences Skills
Patient Preferences and skills can be updated in the system by using the option Preferences Skills under each client.
Client>>List>>Patient Name>>Preference Skills
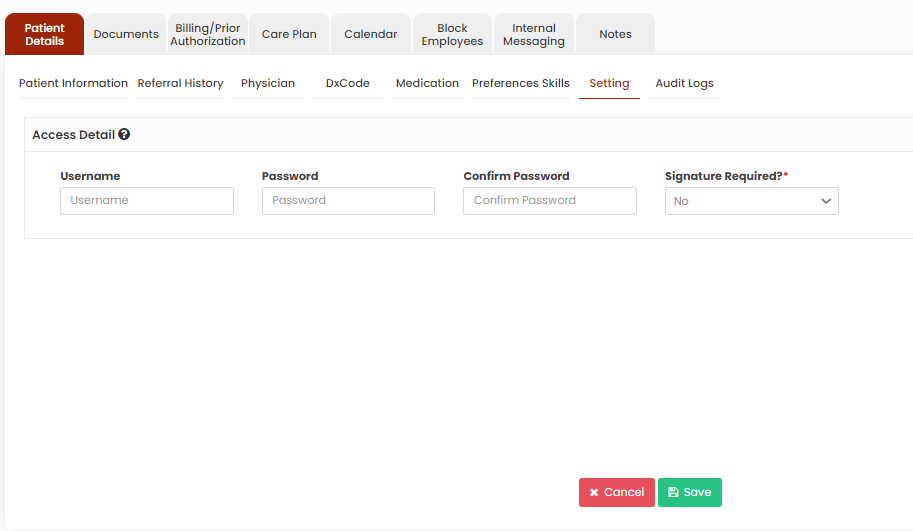
Setting
The patient access details for the application can be added by using the option Setting under each patient.
Client>>List>>Patient Name>>Setting
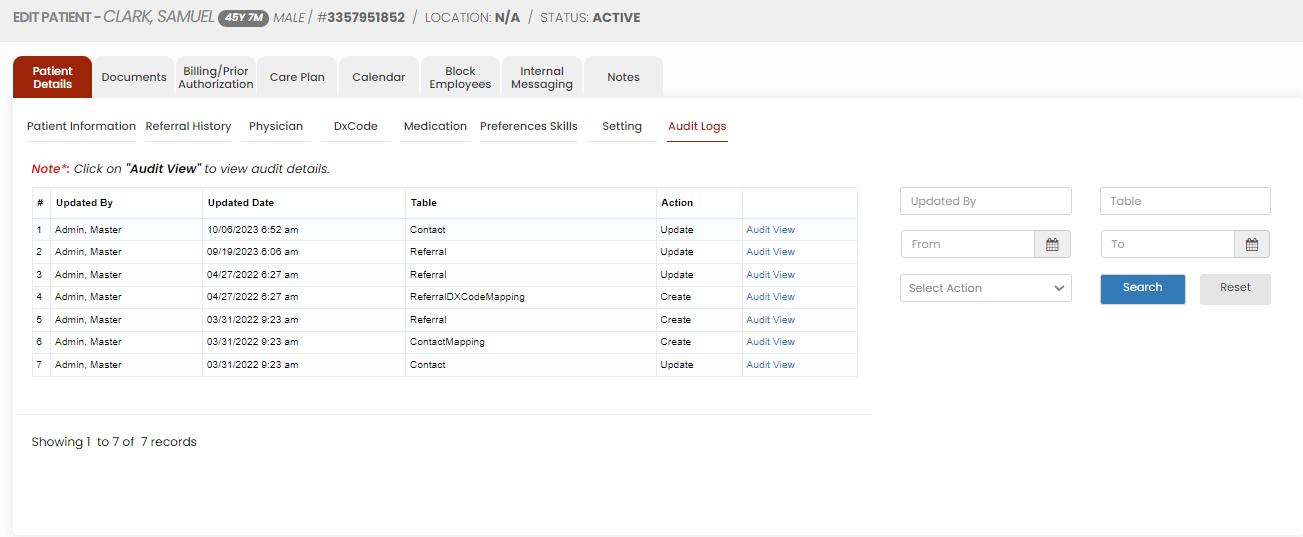
Audit Logs
The user can check the audit details and the changes made in the software in Audit logs.
Client>>List>>Patient Name>>Audit Logs
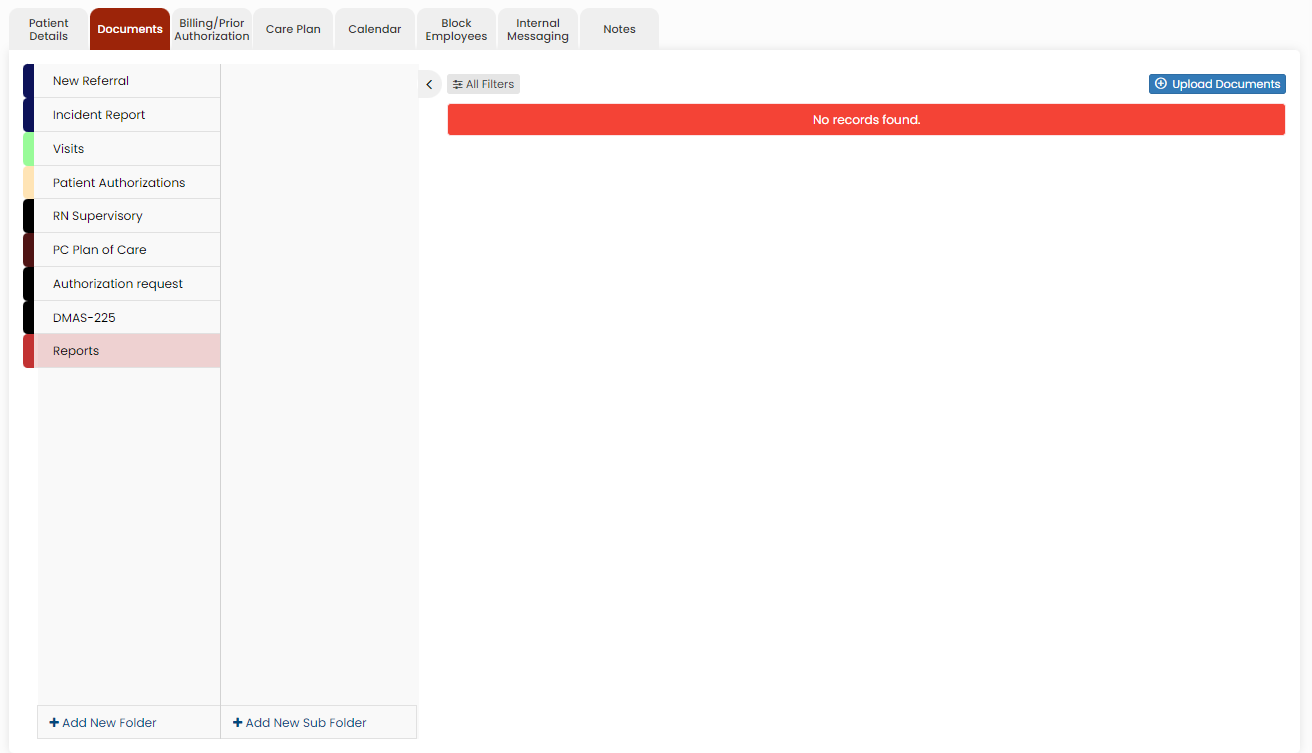
Patient Document
Patient document consist of essential medical records, treatment plans, and progress notes. These documents track the patient's health history, medications, diagnoses, and care schedules.
Uploading Patient Documents
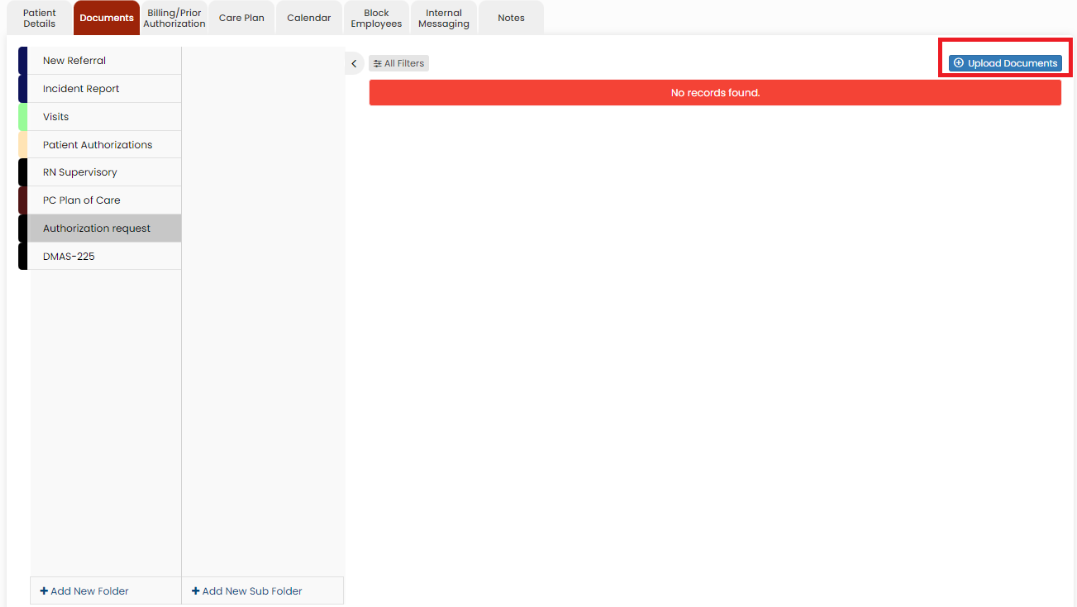
The required documents of the patient can be uploaded in the system by using the option Patient Document.
Client >> List >> Select Patient >> Document
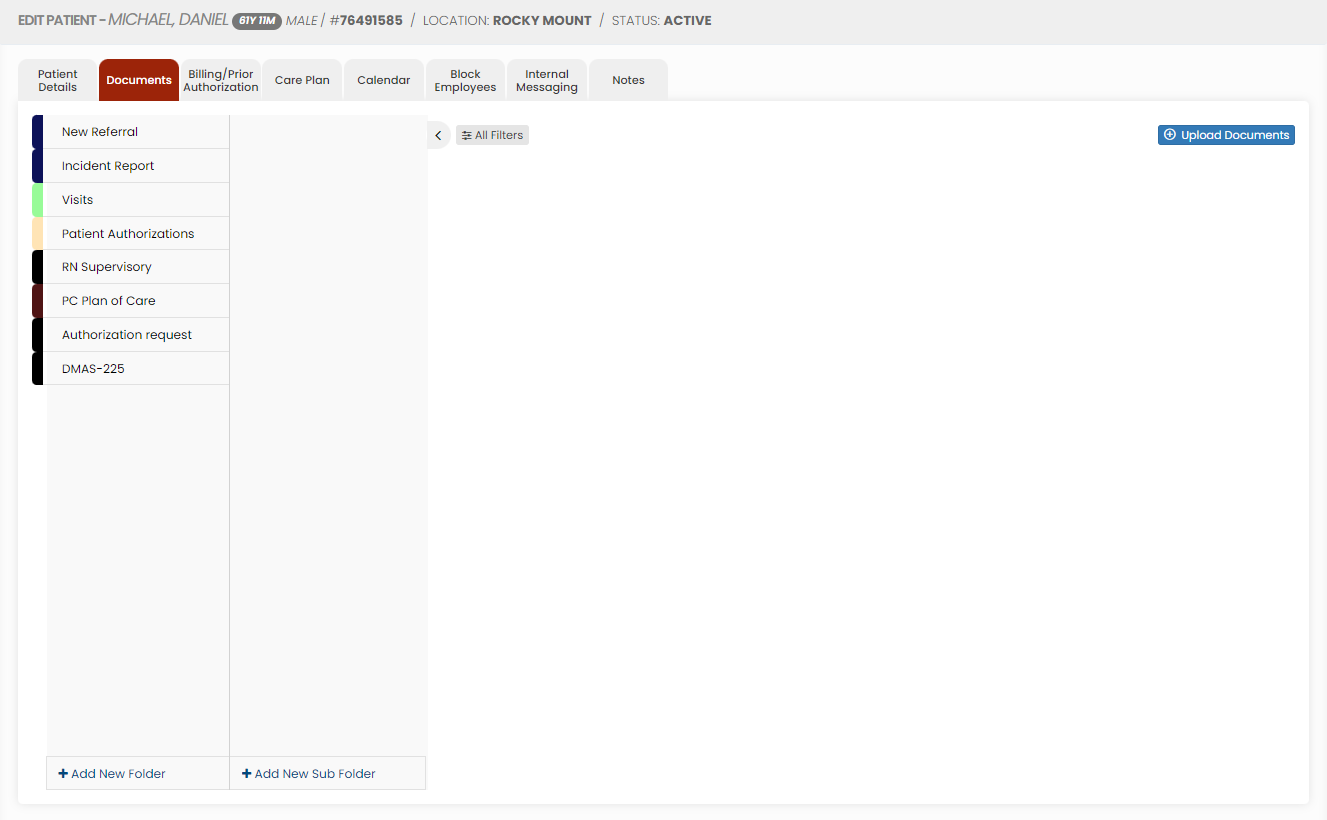
Select the type of document from the list and Click the Upload Documents option. The user can also Add New Folders and Subfolders to upload the documents.
Adding New Folder
Click + Add New Folder option in Patient document. The following screen appears, update the required information. Also in the option Show to All, if the user needs the folder name to be added for all the patient click Yes option. If the user wants the folder to be added only for the particular patient click No option and click Save.
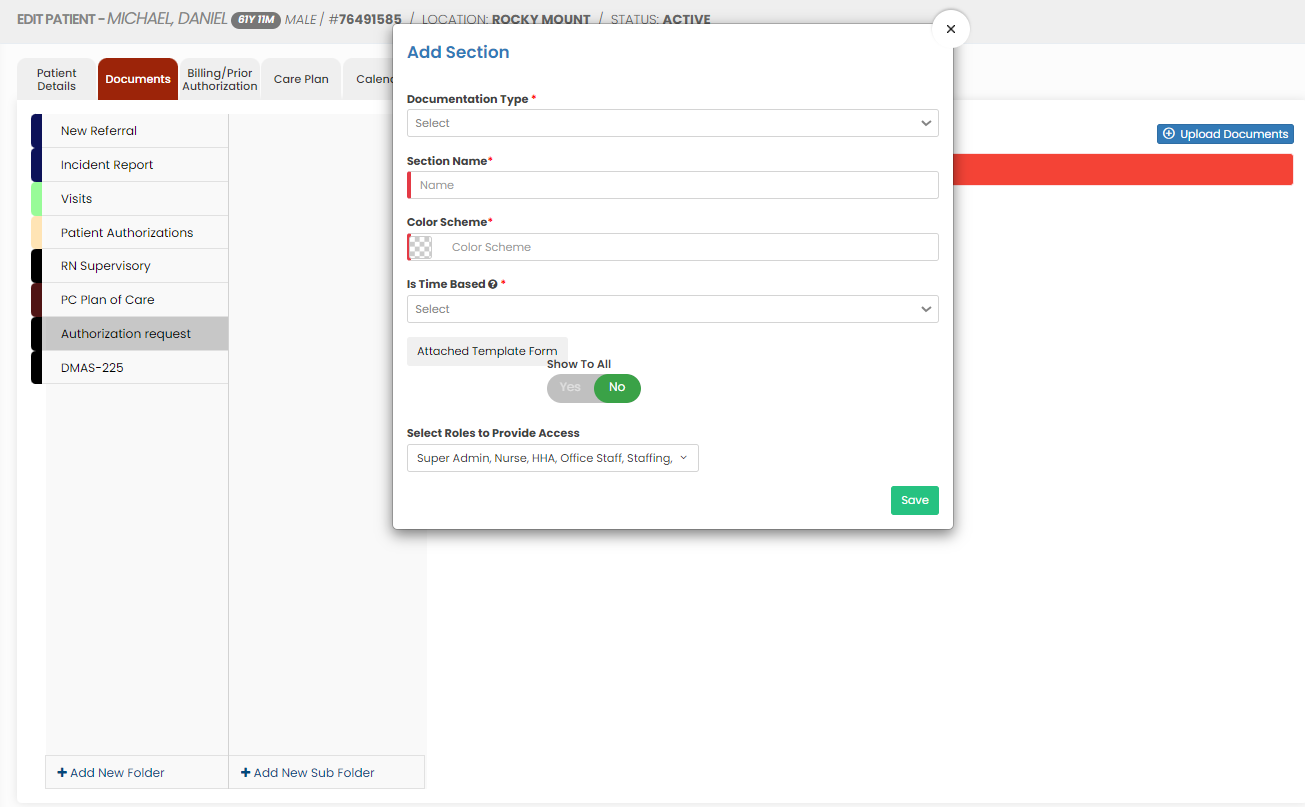
The folder Documents is added successfully to upload the required documents of the patient.
Adding New Sub Folder
Select the folder name and click the option +Add New Sub Folder option. The following screen appears, update the required information. Also in the option Show to All, if the user needs the Sub folder name to be added for all the patient click Yes option. If the user wants the folder to be added only for the particular patient click No option and click Save.
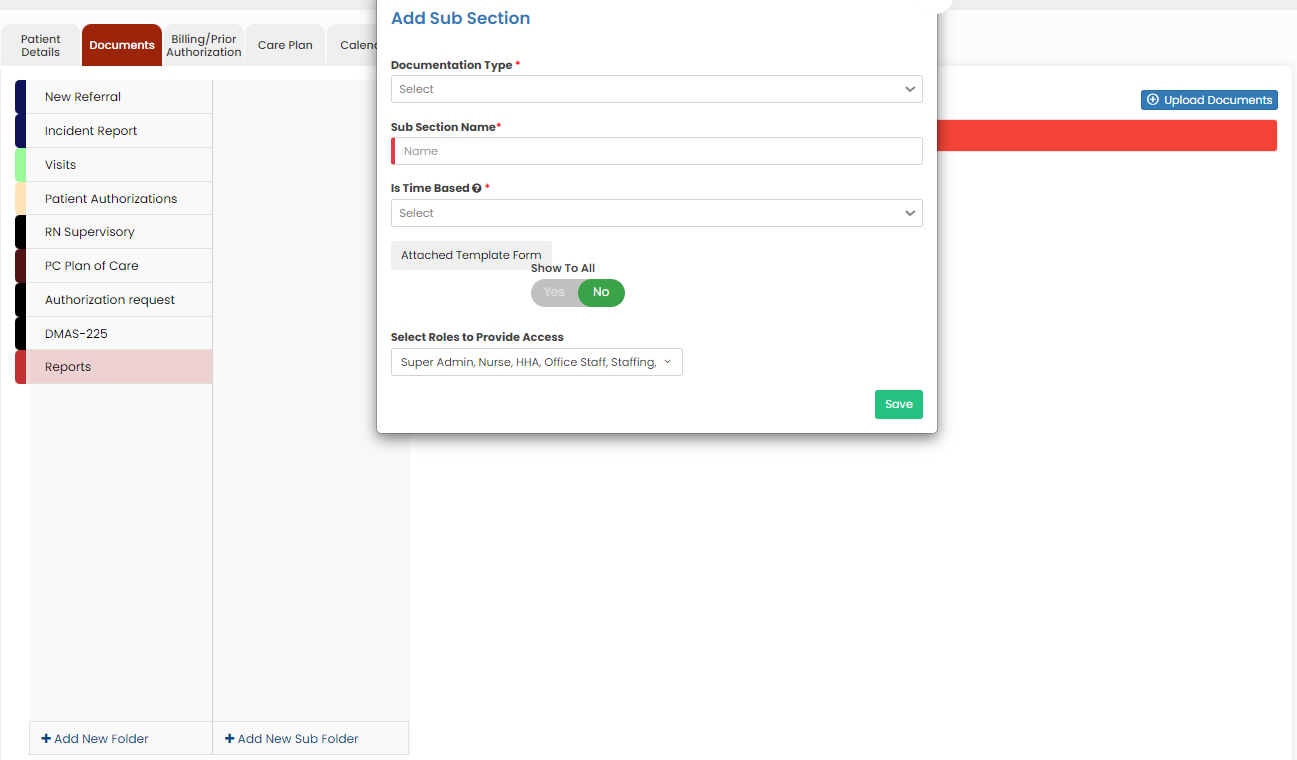
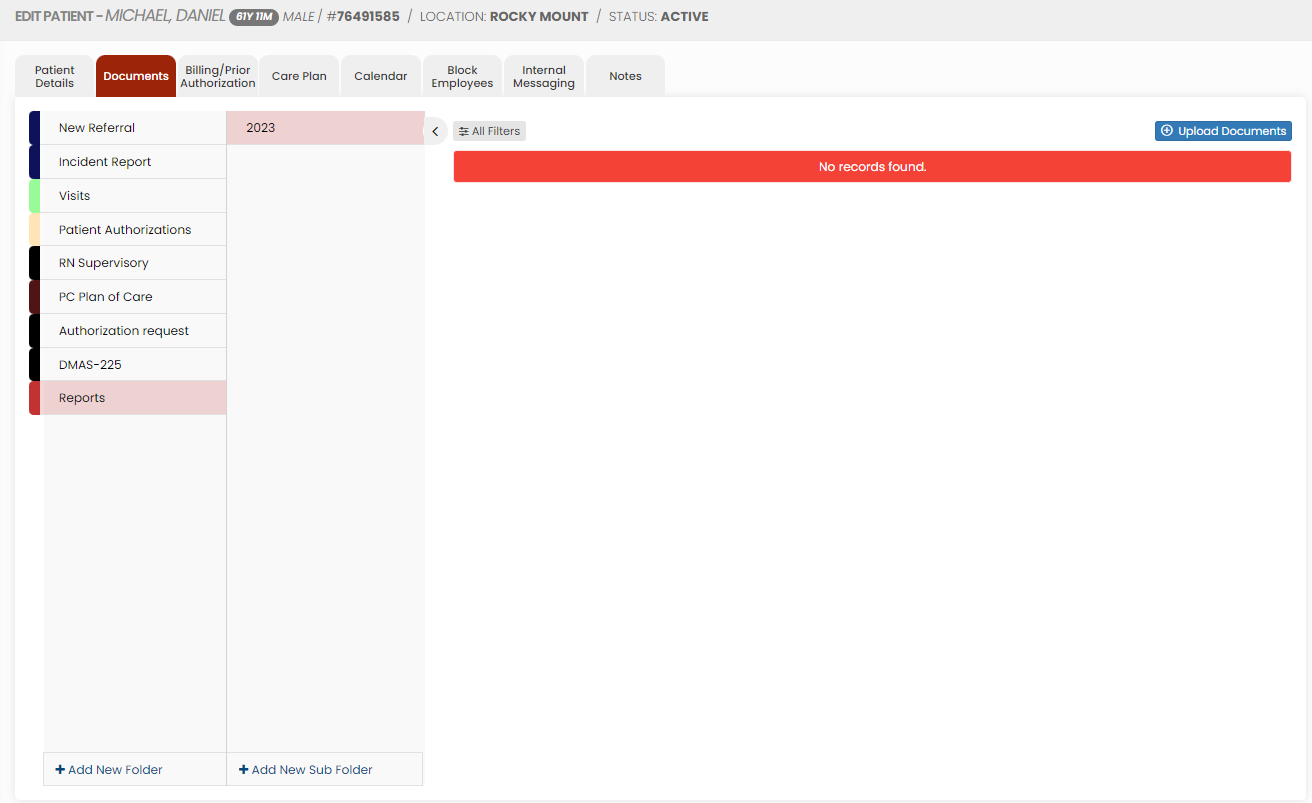
The Sub folder 2023 is now added under folder name Reports to upload the required documents of the Patient.
Billing / Prior Authorization
- Payor information comprises essential data on the entities responsible for covering healthcare costs by government programs like Medicare or Medicaid, or patients themselves.
- Prior authorization involves obtaining approval from insurance payors before providing specific medical services.
Adding Patient Payors
Healthcare payors play a crucial role in the healthcare system by providing financial coverage and helping individuals access necessary medical care.
The Payor details of the patient can be added in the system by using the option Billing / Authorization. Select the Patient Payor and update the required Payor Information and Click Save.
Client >> List >> Select Patient from List >> Billing / Prior Authorization >> Payor
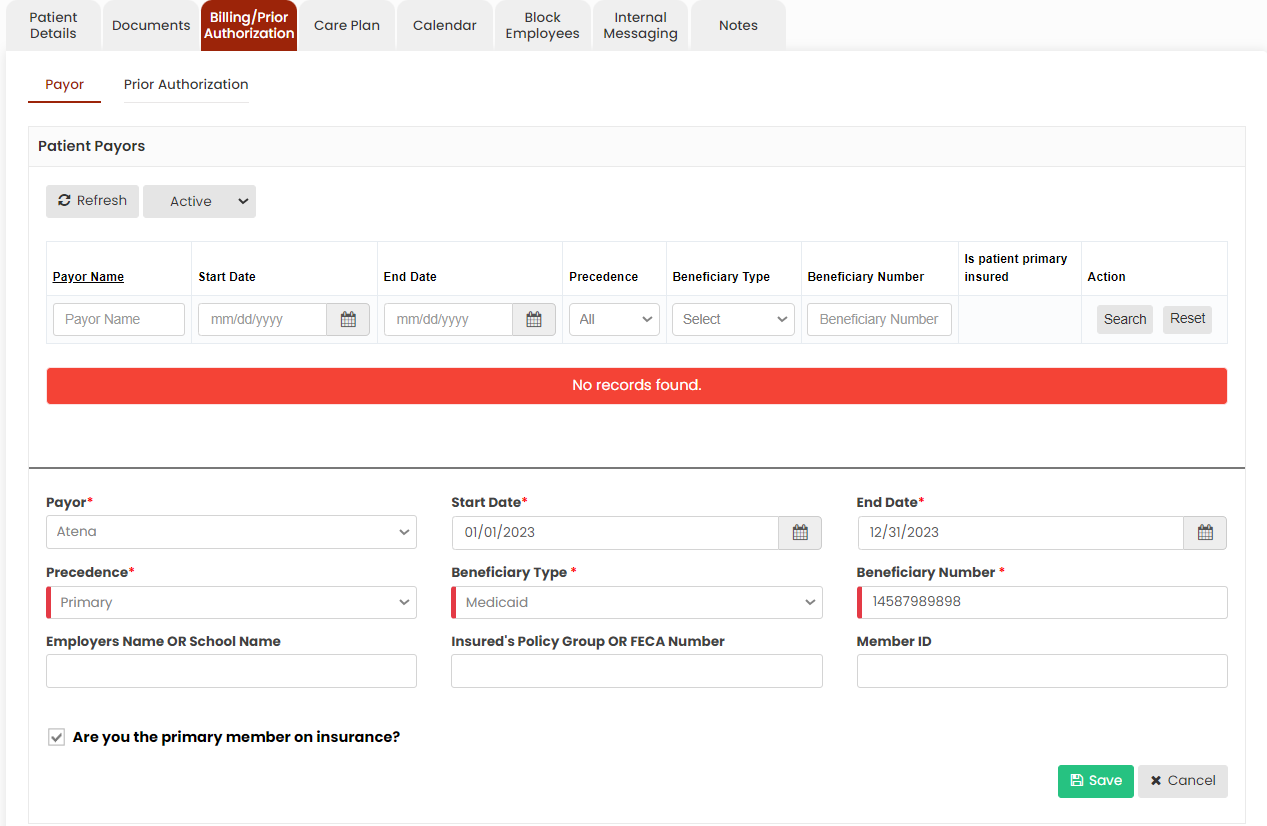
Now, the Payor details has been added successfully in the system. We can also edit the payor information using the edit option.
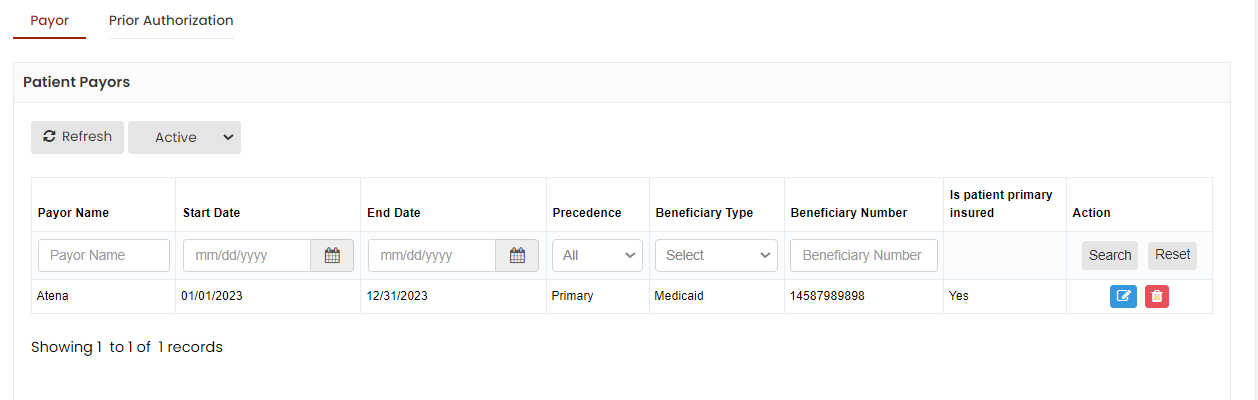
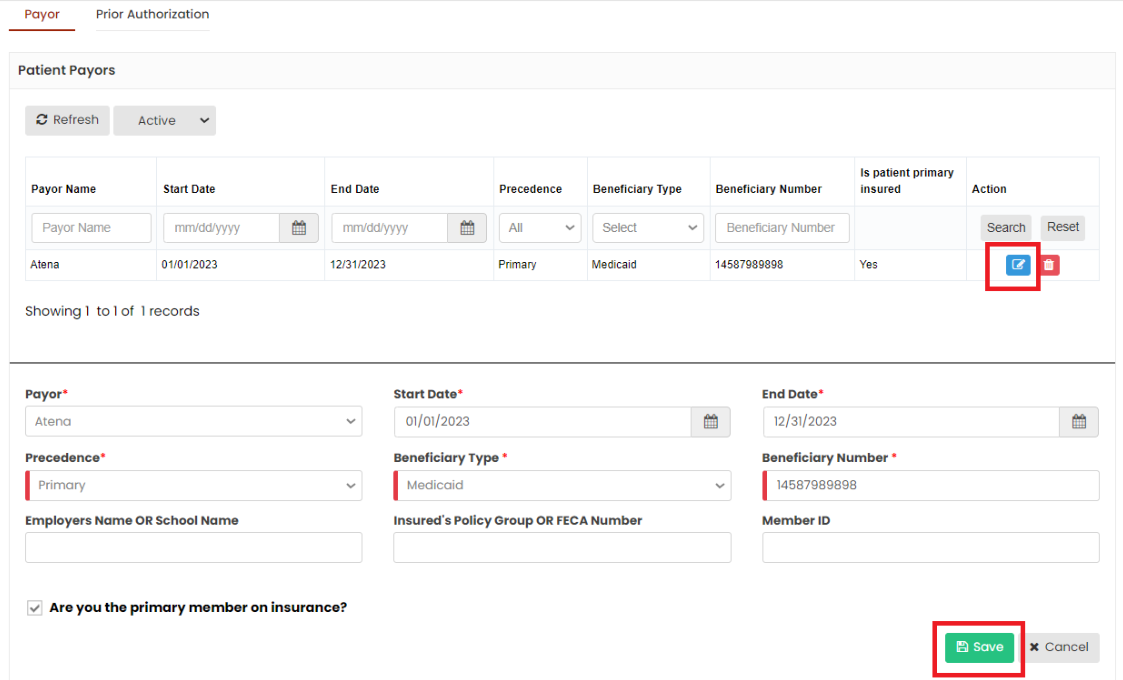
Editing Patient Payors
The Payor information of the patient can be edited by using the Edit option. Click the edit option, complete the required information and click Save.
Client >> List >> Select Patient from List >> Billing / Prior Authorization >> Payor
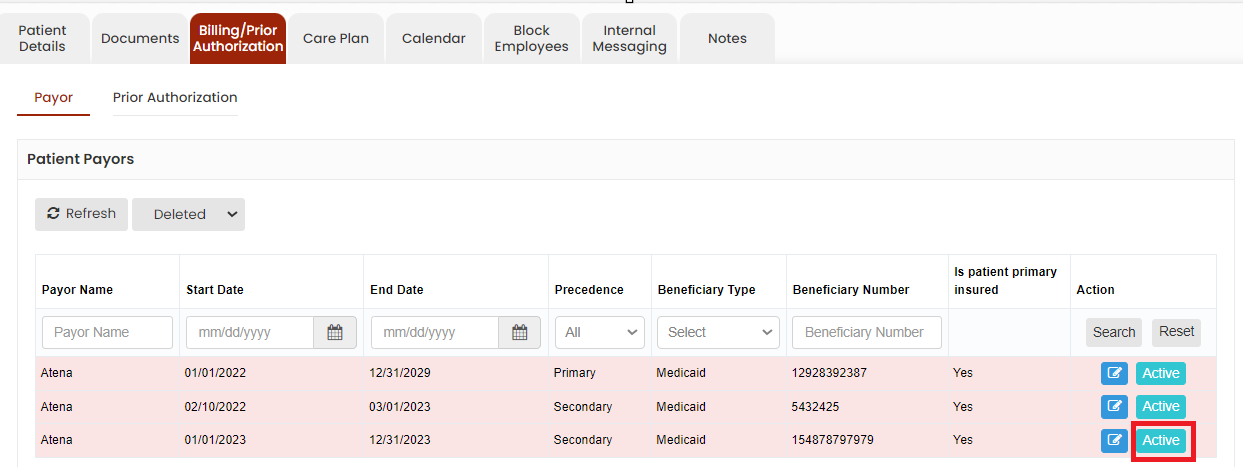
Delete Patient Payors
Client >> List >> Select Patient from List >> Billing / Prior Authorization >> Payor
The Payor details can be deleted by using the option Delete on the right side of the payor under Action.
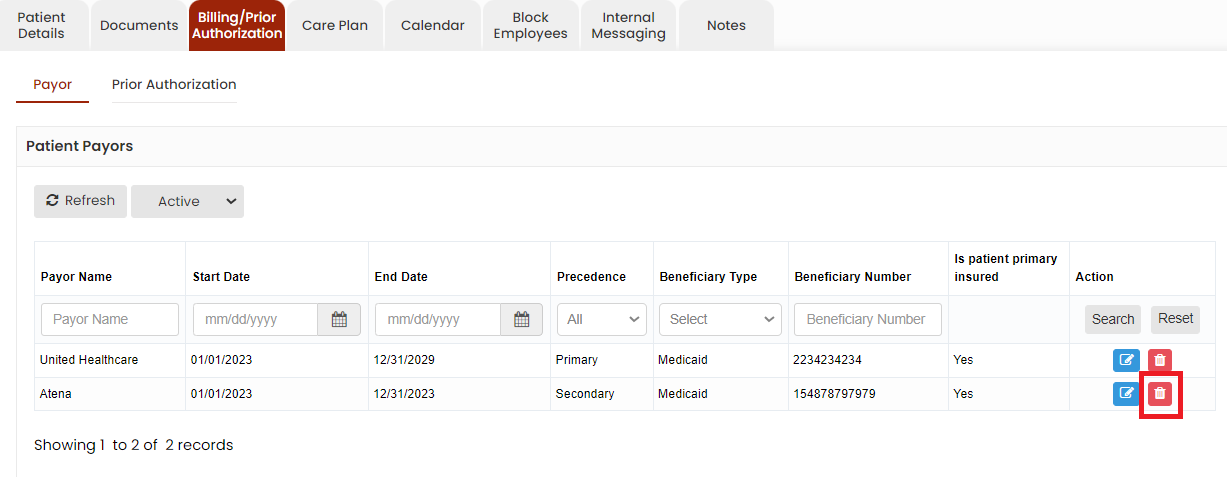
Now, the payor details gets deleted and we can view the payor under Deleted list.

The user can also Activate the deleted payor by using the option Active on the right side of the screen.
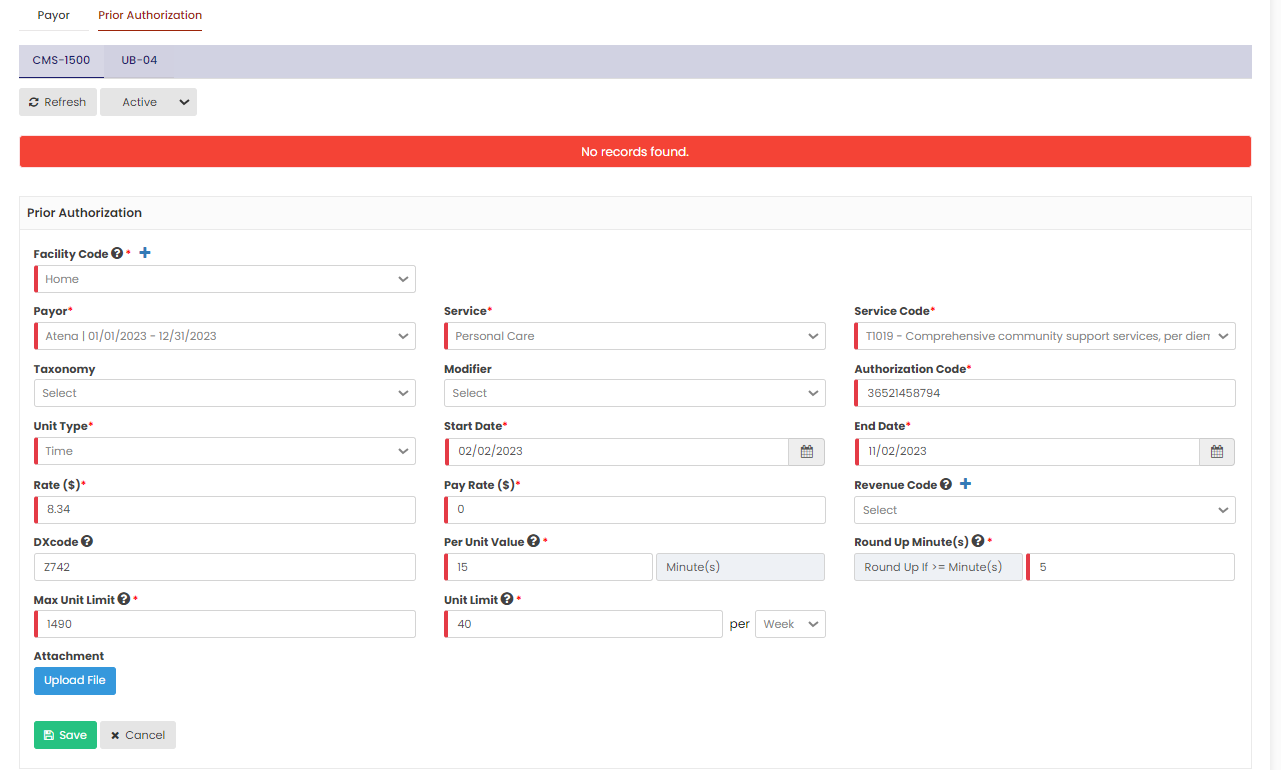
Adding Prior Authorization
Client >> List >> Select Patient from List >> Billing / Prior Authorization >> Prior Authorization
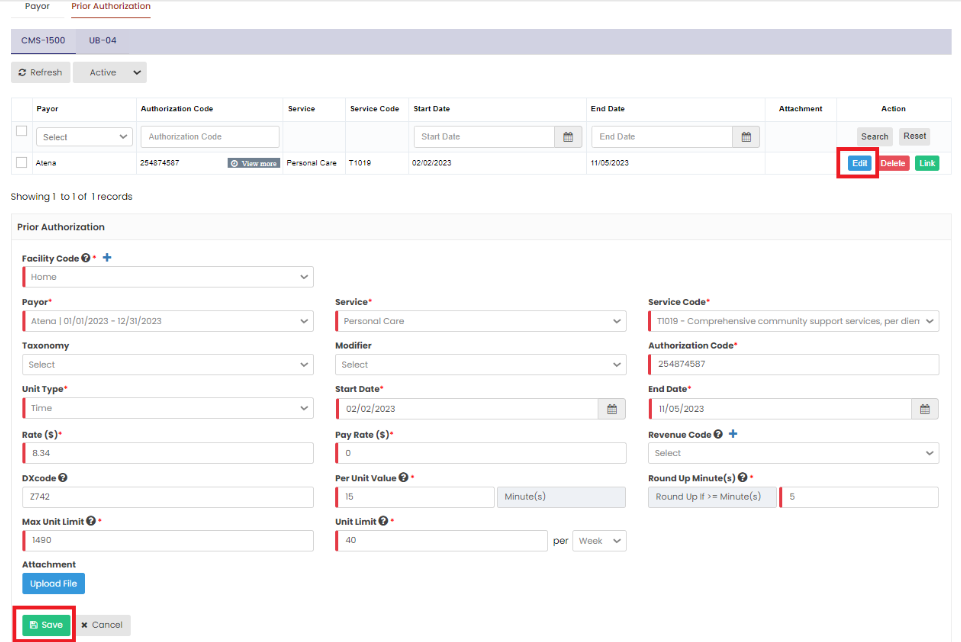
Editing Prior Authorization
The Prior Authorization information of the patient can be edited by using the Edit option. Click the edit option, complete the required information and click Save.
Client >> List >> Select Patient from List >> Billing / Prior Authorization >> Prior Authorization
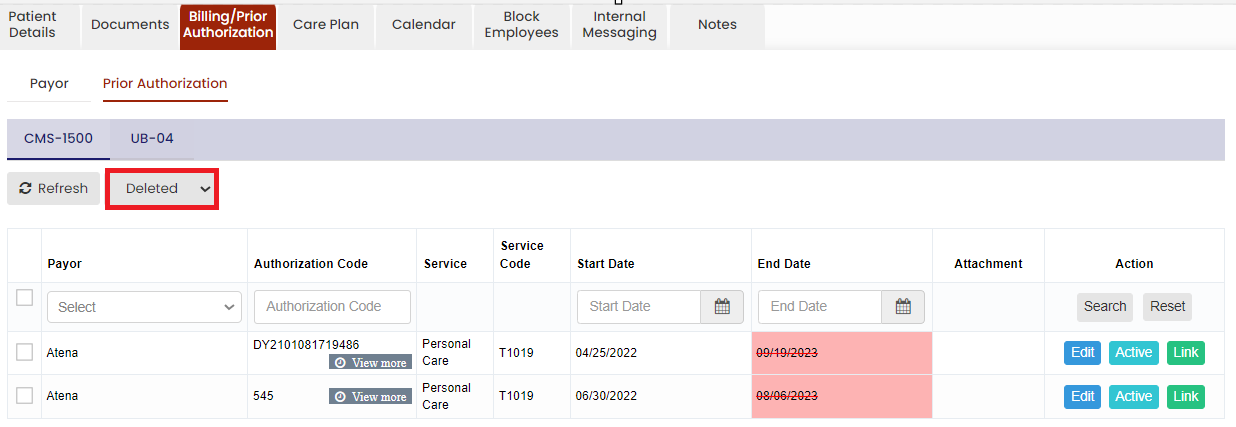
Delete Prior Authorization
Client >> List >> Select Patient from List >> Billing / Prior Authorization >> Prior Authorization
Select the expired Prior Authorization by using the check box and click Delete or Disable Selected option on the screen.
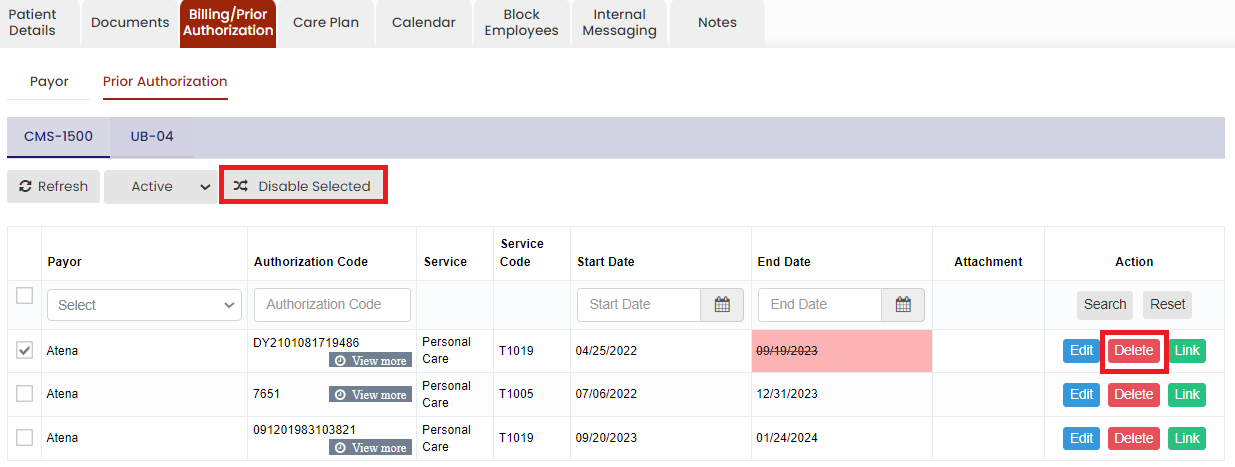
Now, the Expired Prior Authorization details gets deleted and we can view the Authorization details under Deleted list.
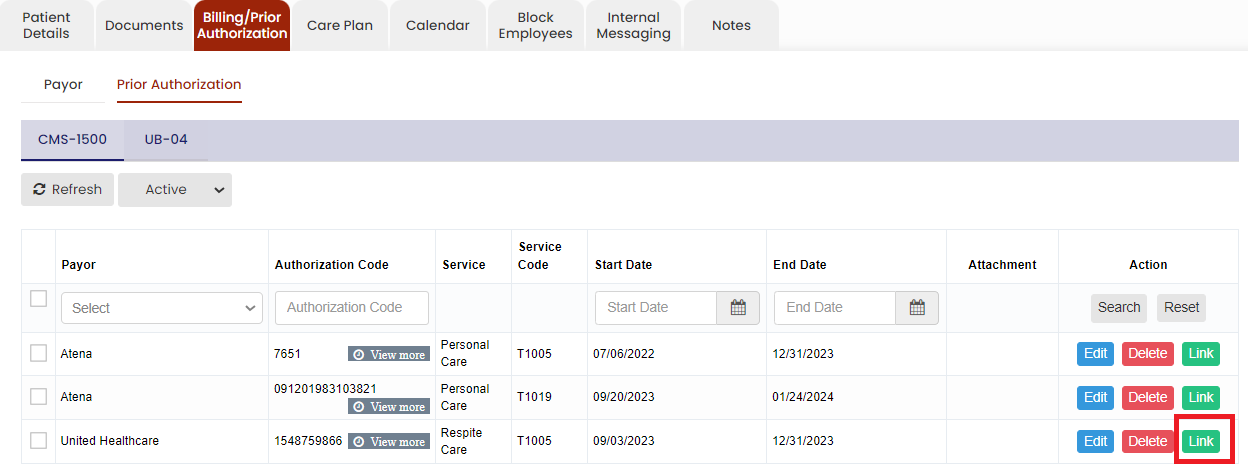
Link Option
The Link option is used to link the Authorization code with the schedules which is created without Prior Authorization.
If the user created the schedules without Prior Authorization for a patient and receives the Authorization details later, then the schedules without Authorization can be linked with the Authorization details added in the system for the past and future schedules.
Client >> List >> Select Patient from List >> Billing / Prior Authorization >> Prior Authorization
Click Link option on the right side of the Authorization details under Action.
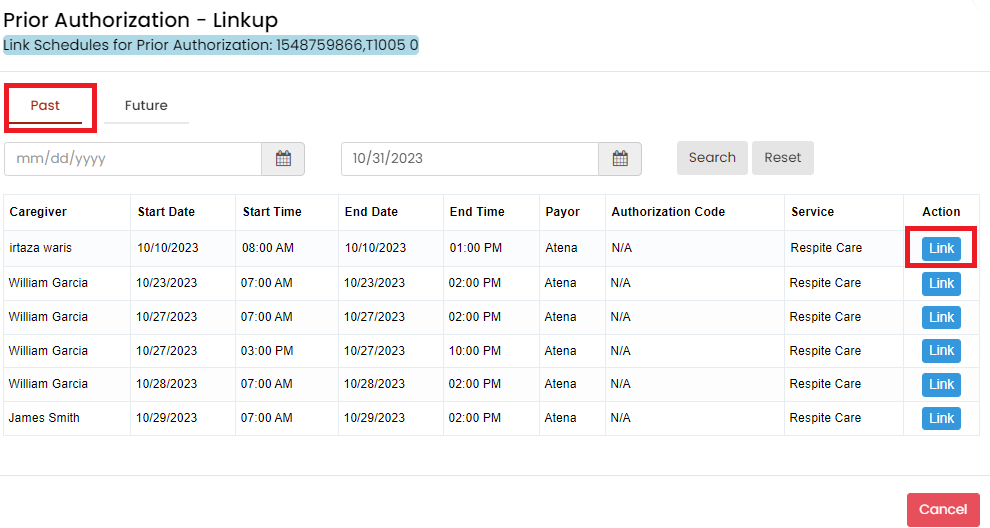
The following screen appears in which the user can click link option to update the Authorization code for the past and future schedules. Click Link button on the visits to link the Authorization code.
Care Plan
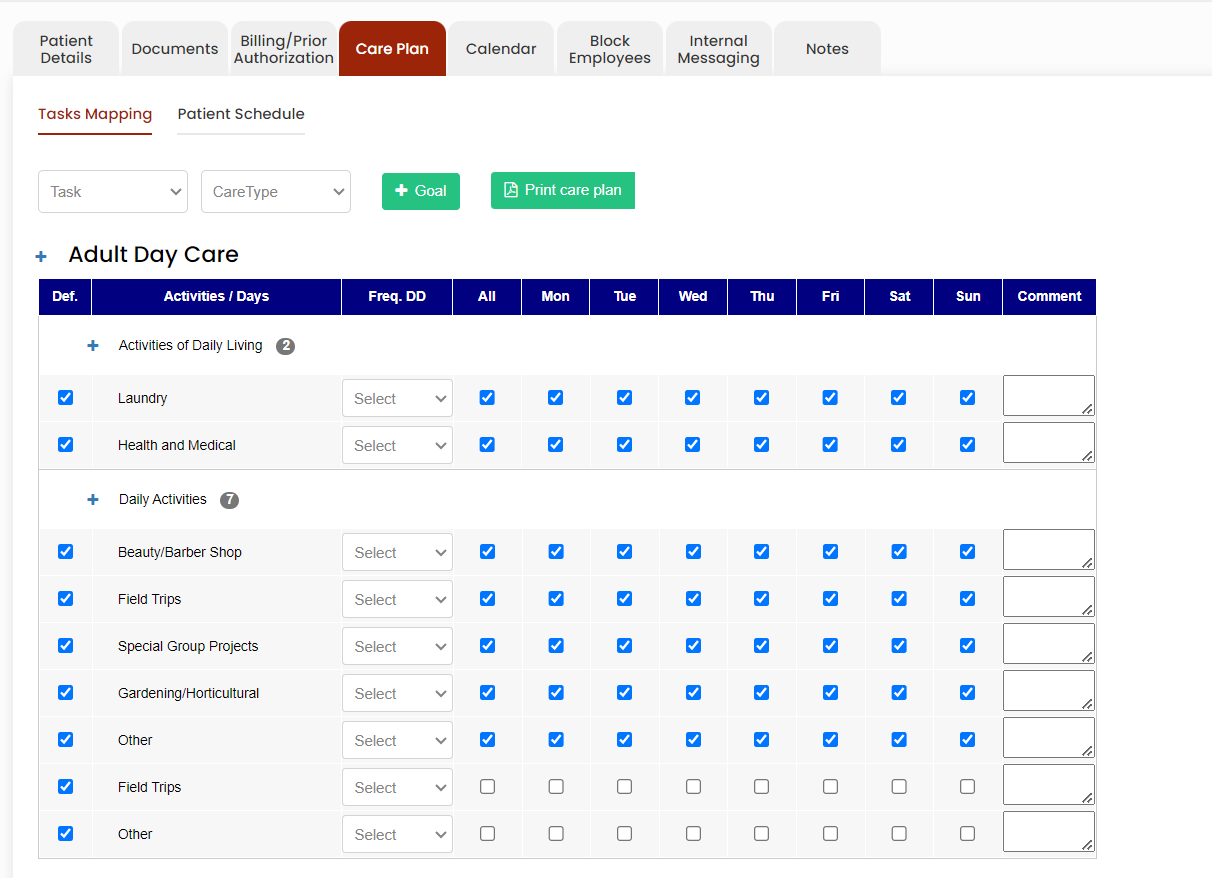
Task Mapping
The visit task activities for care plan can be viewed in Task Mapping option.
Client >> List >> Select Patient from List >> Care Plan >> Task Mapping.
The user can select the Task Activities for the Care type as required for the days of the week.
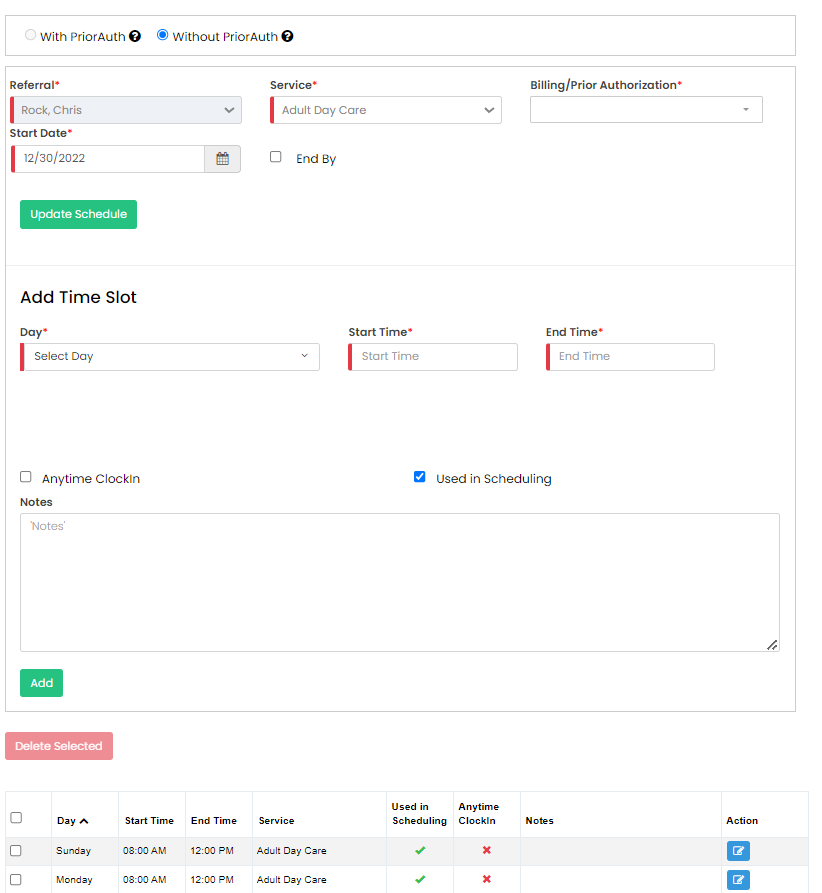
Patient Schedule
The patient schedule can be added in the system by using the option +Add Patient Schedule option. Click schedule option under client.
Client >> List >> Select Patient from List >> Care Plan >> Patient Schedule or Client >> Schedule
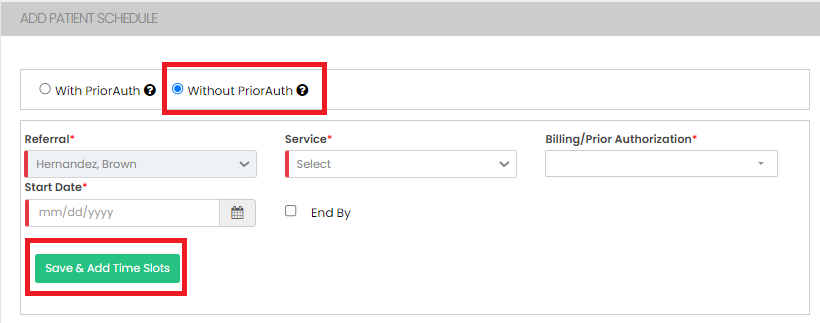
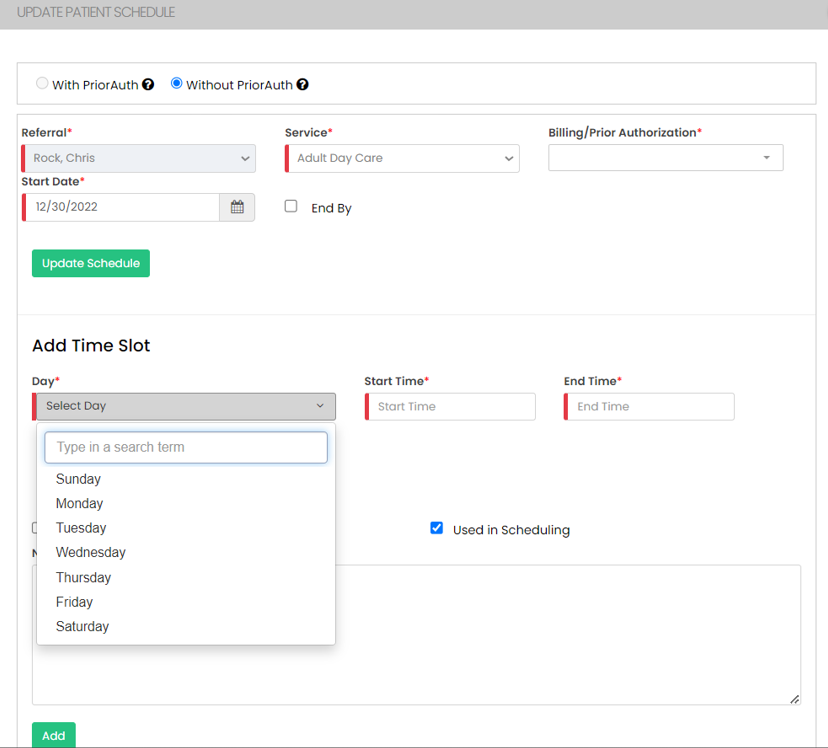
The patient schedule can be created in the system with Prior Authorization and also without Prior Authorization.
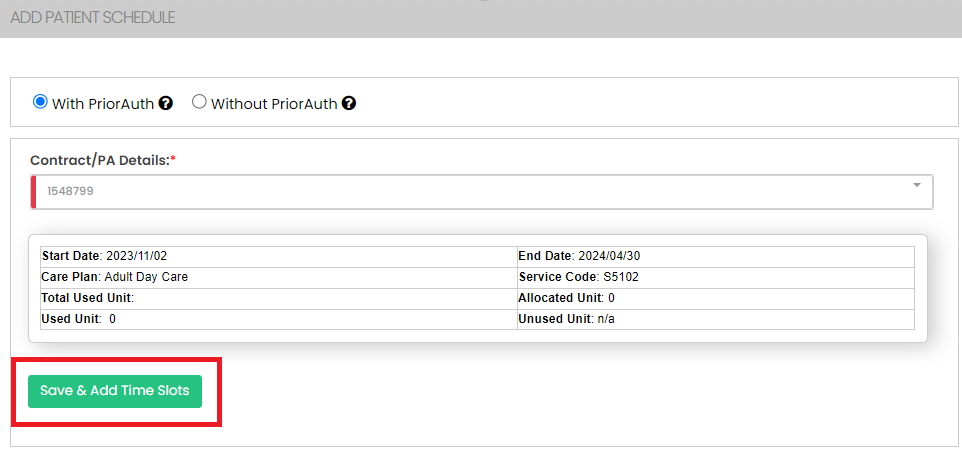
Now lets update the Patient schedule With Prior Authorization. Click on the dropdown option under Contract / PA Details. Select the Authorization details and Click Save & Add Time Slot option.

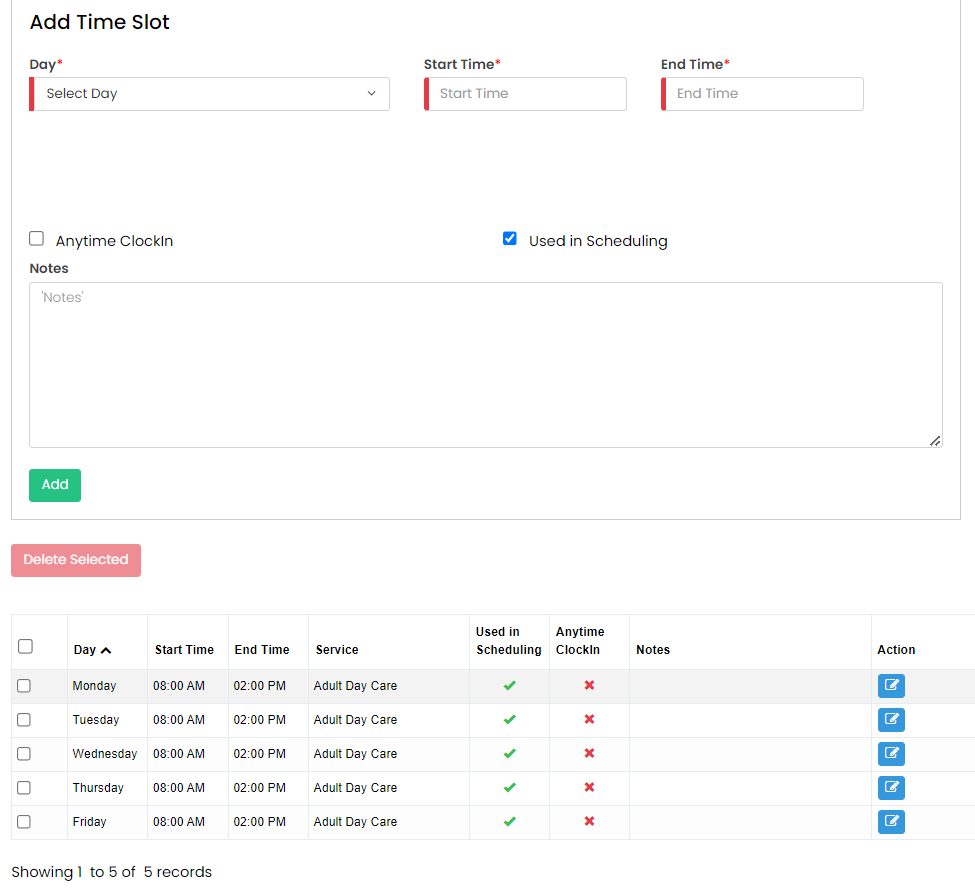
Select days under the Add Time Slot option, update the Start Time and End Time of the Schedule, Check the option Used in Scheduling and Click Add. Now the Time slot will be generated with Days, Time and Care Plan.
Select days under the Add Time Slot option, update the Start Time and End Time of the Schedule, Check the option Used in Scheduling and Click Add. Now the Time slot will be generated with Days, Time and Care Plan.
Now, the Time Slot for the patient is successfully added with the required Days and Time.
Scheduling Patient with Facility
After creating the Timeslot for the patient, the user has to schedule the patient with the Facility. Click Add Patient Schedule option.
Client >> List >> Select Patient from List >> Care Plan >> Patient Schedule
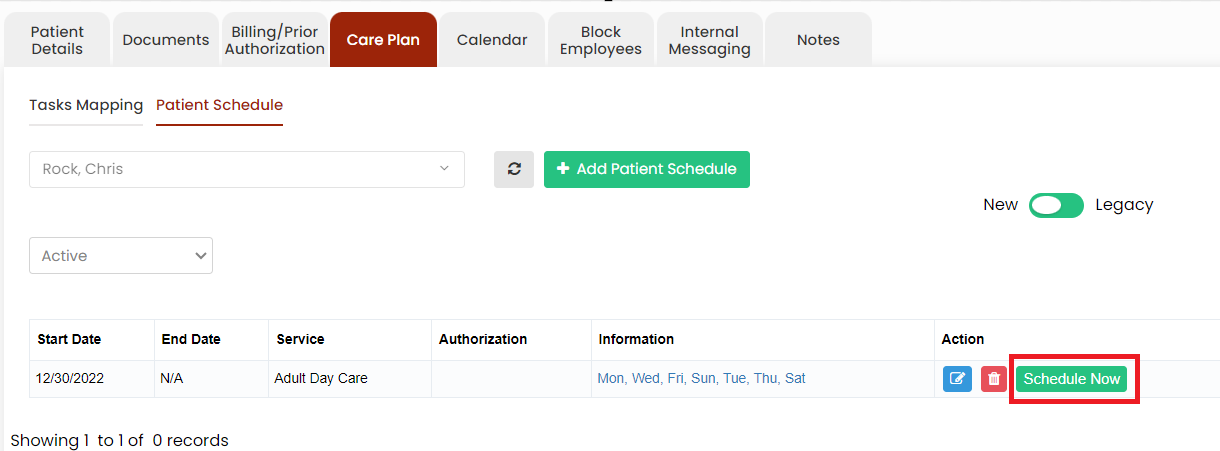
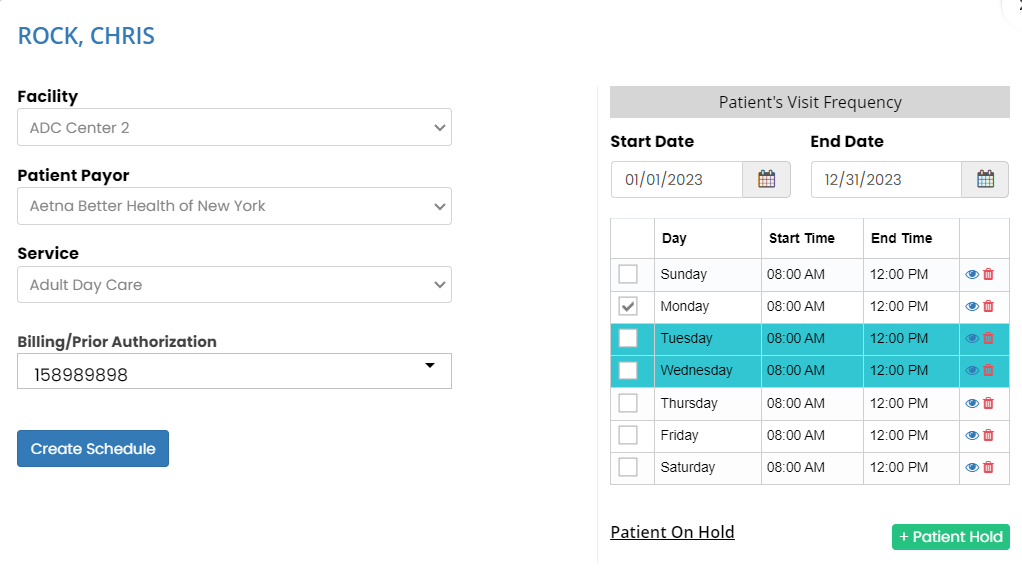
Select the Start Date and End Date and days of the schedule. Now select the Facility from the list to whom the patient has to be scheduled and click create schedule option.
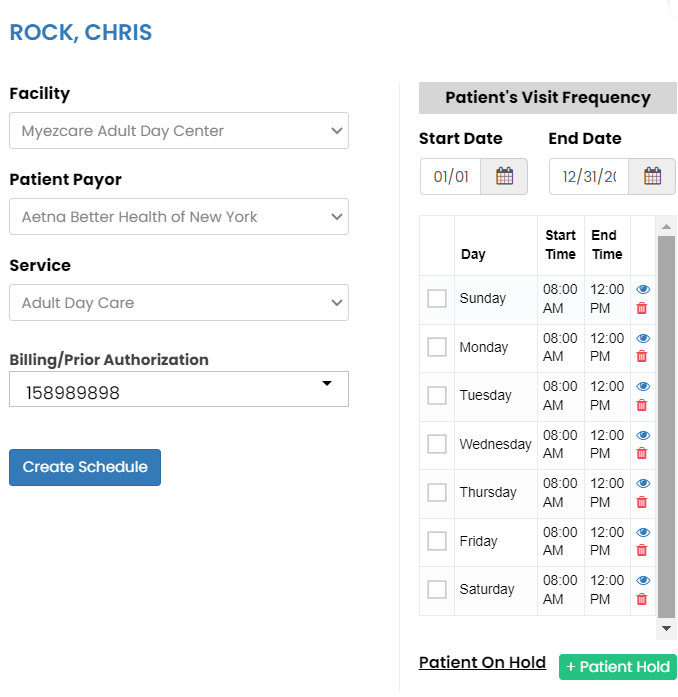
The patient has been successfully scheduled with the Facility and the Schedule has been created.
Reassign Facility for the patient
The Facility assigned for the patient can be reassigned with different facility in the system by using the Schedule Now option.
Client >> Schedule
Select the patient from the list and click Schedule now option. When we click the day of the schedule, we can see the Facility name which has been assigned to the patient for the day.
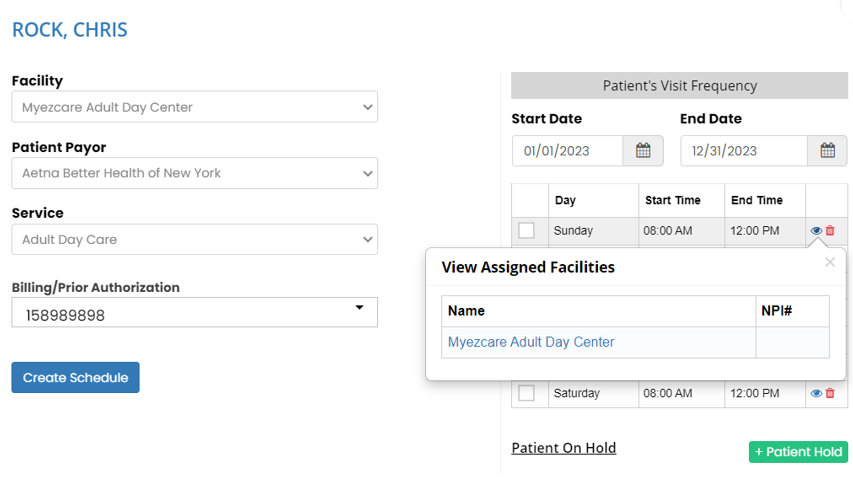
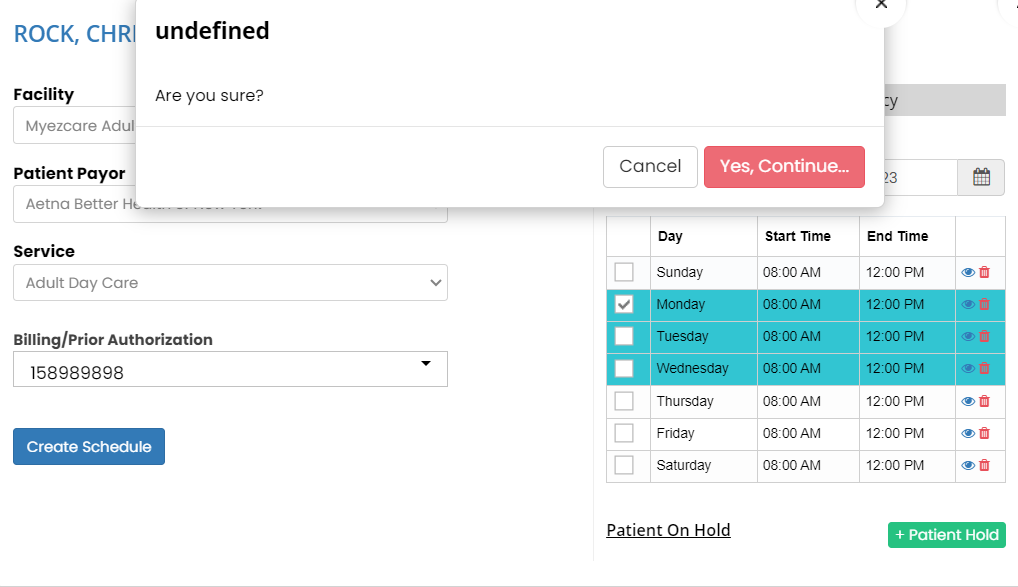
Now select the start date and end date of the schedule for which the Facility has to be reassigned. Also click the check box to select the day for reassigning the Facility and click unassign option on the right side of the day.
The below screen appears, click yes continue option. The Facility has been unassigned for the selected date range for that particular day.
After the Facility has been unassigned, change the Facility and click create schedule.
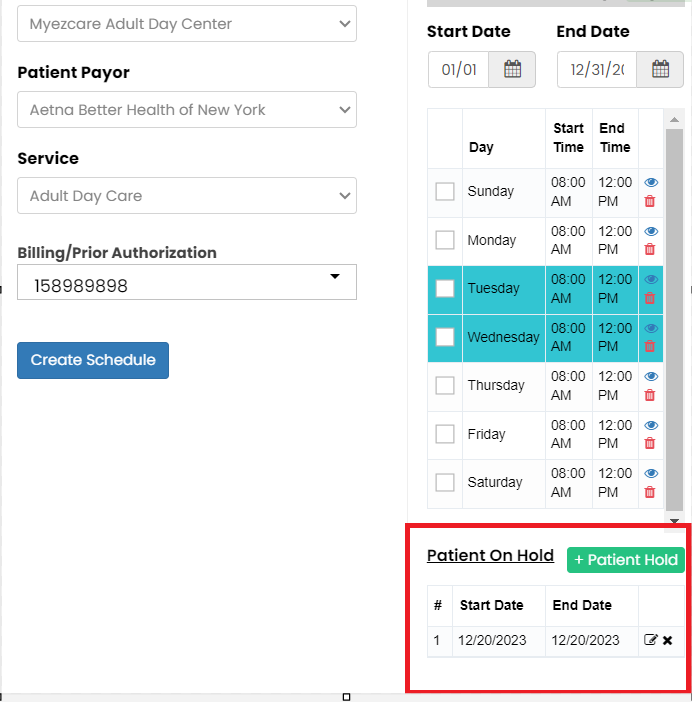
Patient on Hold
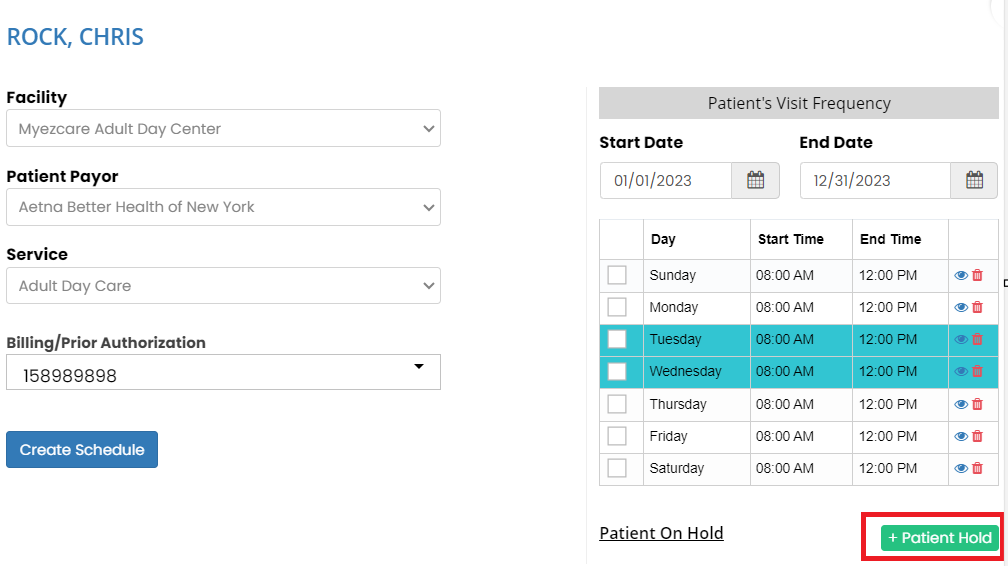
The user can keep the patient on hold for the day by using the option +Patient Hold.
Now Click +Patient Hold option, the following screen appears, update the start date, end date, reason for hold and click Save option.
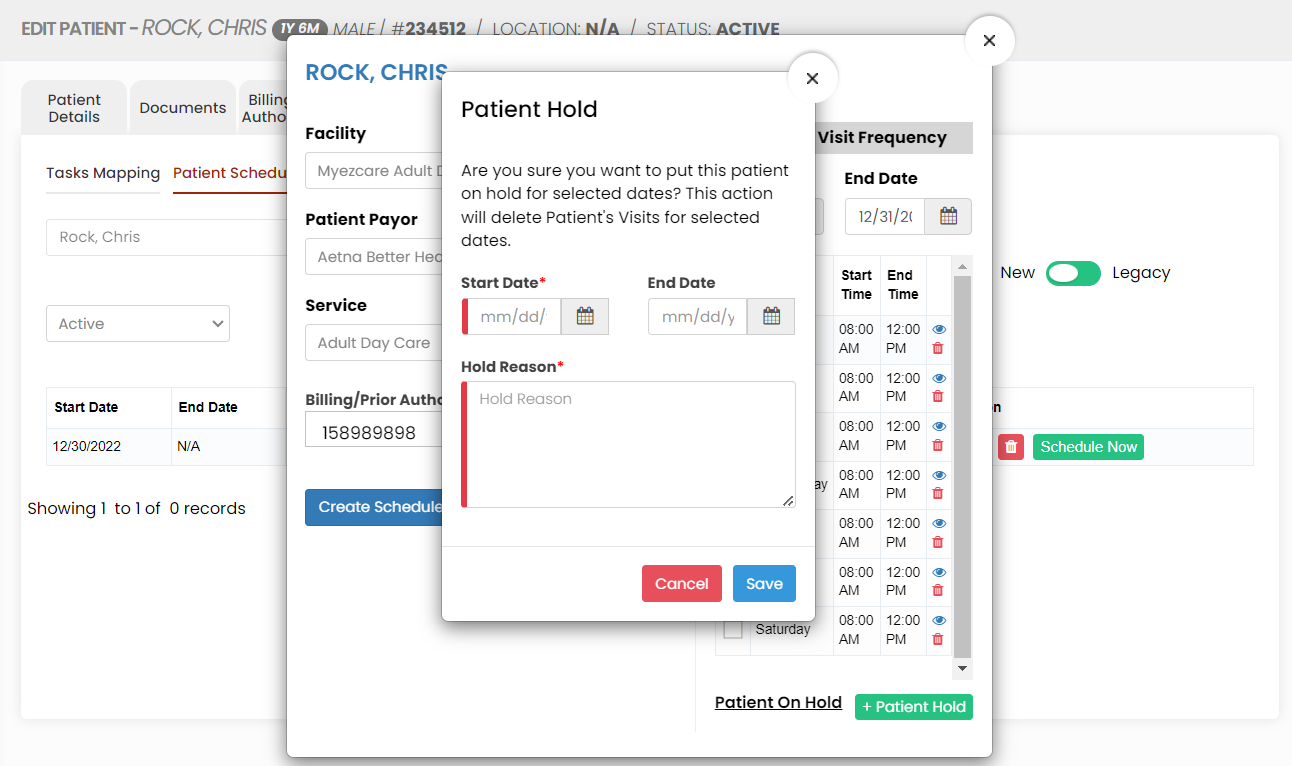
The user can see days on the screen for which the patient is on hold.
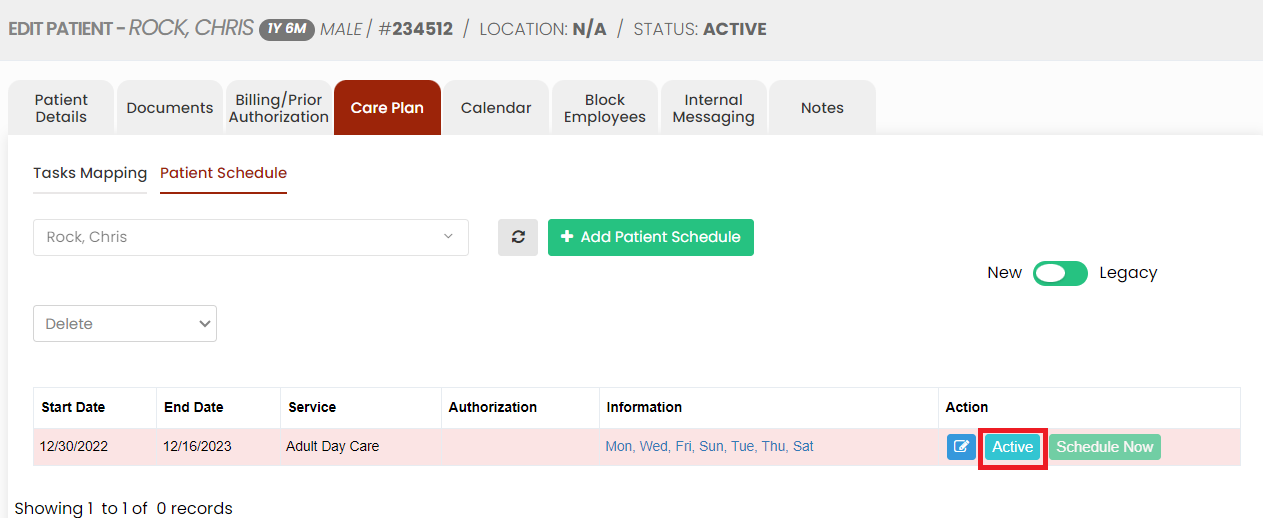
Delete Schedule
Client >> Schedule
Click the Delete button before Schedule Now option to Delete the schedules for the patient.
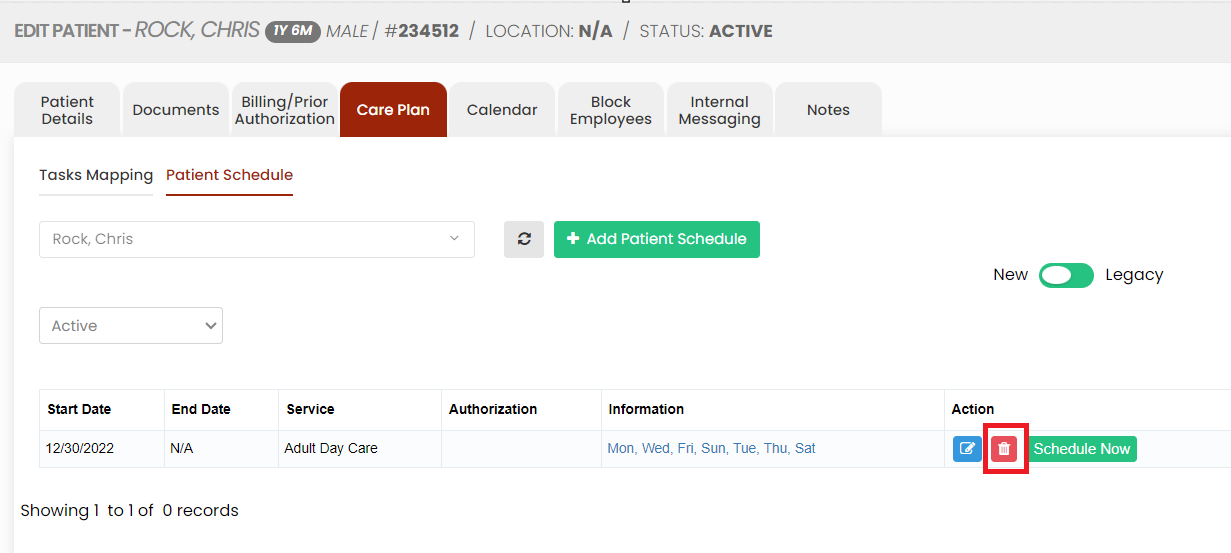
The Deleted schedules can be viewed under Deleted option on the screen.
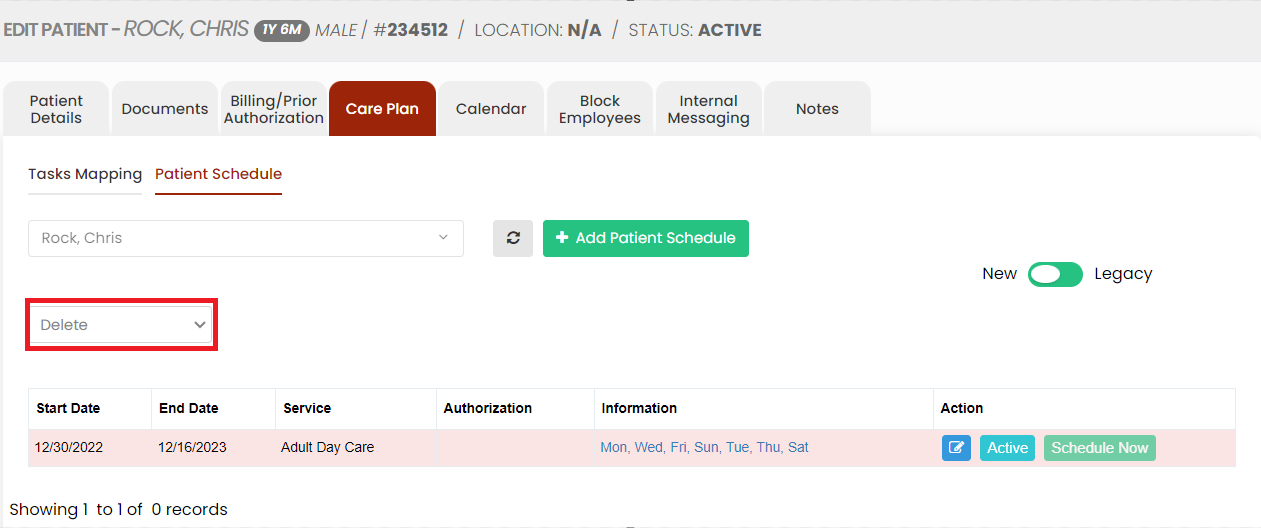
The user can also Activate the Deleted schedules by using the option Active.
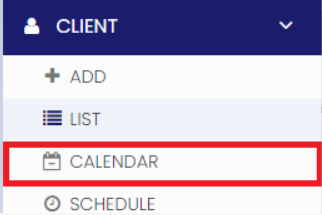
Calendar, Block Employees
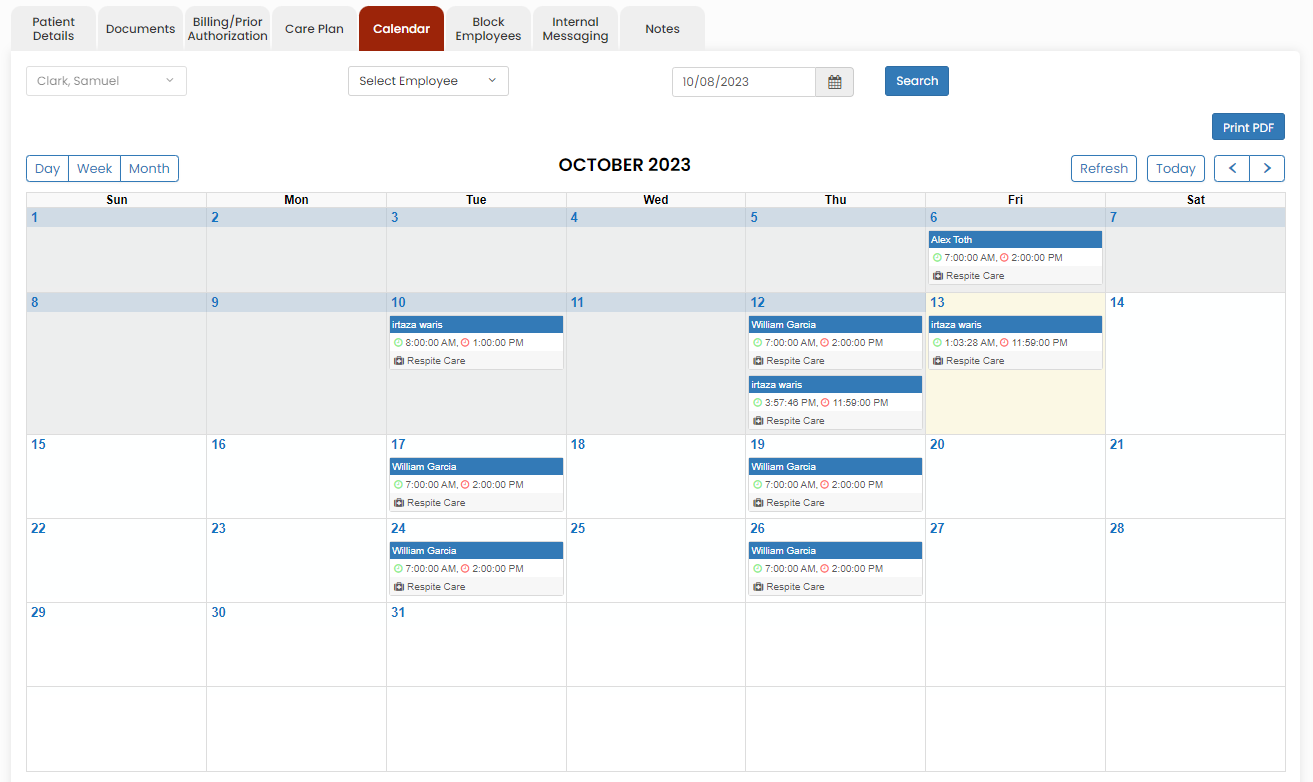
Calendar
The user can view the Patient calendar for their scheduled visits. The Patient calendar has the details of the employee name, Care type and the scheduled time.
Client >> Calendar
Select the Patient name, Month and Click Search option to view the Patient Calendar for the month.
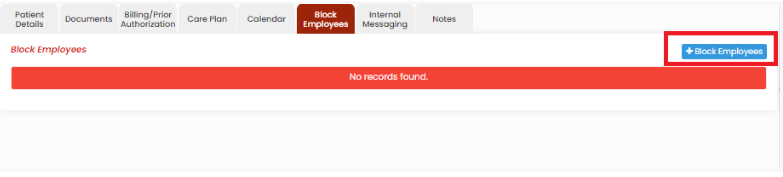
Block employees
Block Employee is a feature where the patient does not want a certain employee to visit him/her, they can be blocked using this option.
Client >> List >> Select Employee Name >> Block Employees.
Update the Employee Name, Blocking requested by and the Blocking reason in the system. Click Save option to save the information.
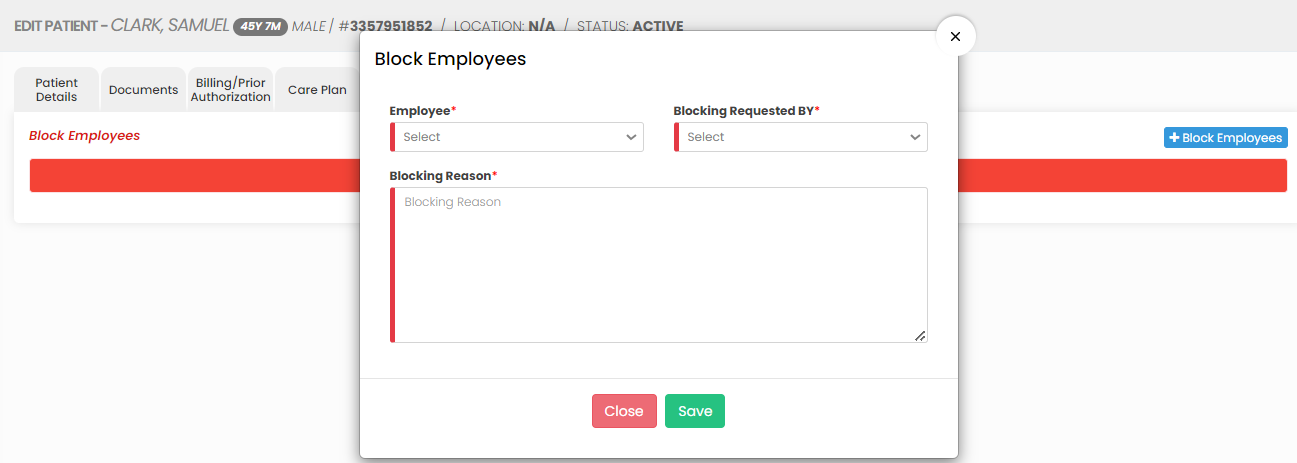
Click Delete option under Action to Delete the Block Employees details in the system.

Internal Messaging / Notes
Internal messaging tools enable caregivers, nurses, and administrators to coordinate patient care, share vital information, and manage schedules efficiently.
Internal Messaging
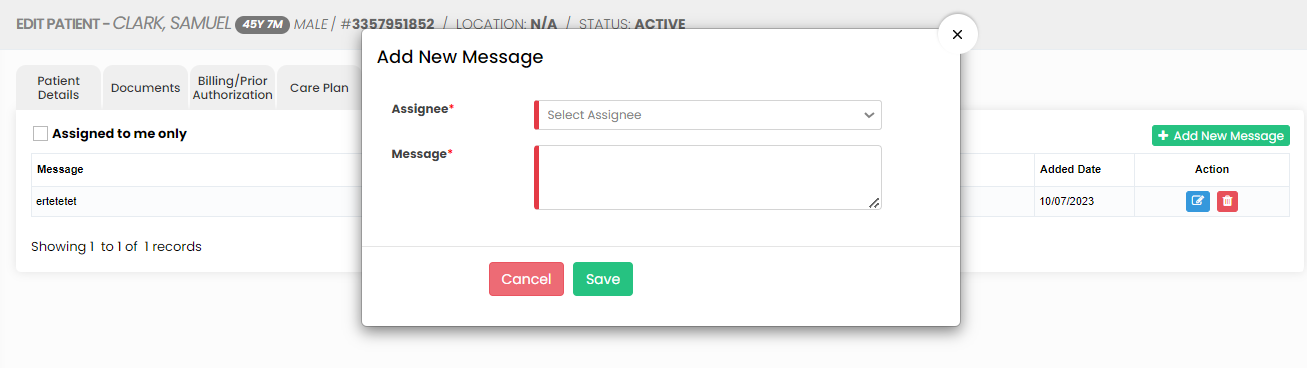
The Internal Messaging option is used to send internal messages from the patient to the employee. The user has to click +Add New Message option to send the messages.
Client >> List >> Select Patient from List >> Internal Messaging

Select the Employee name and enter the message for the employee in the system. Click Save option to send the message.
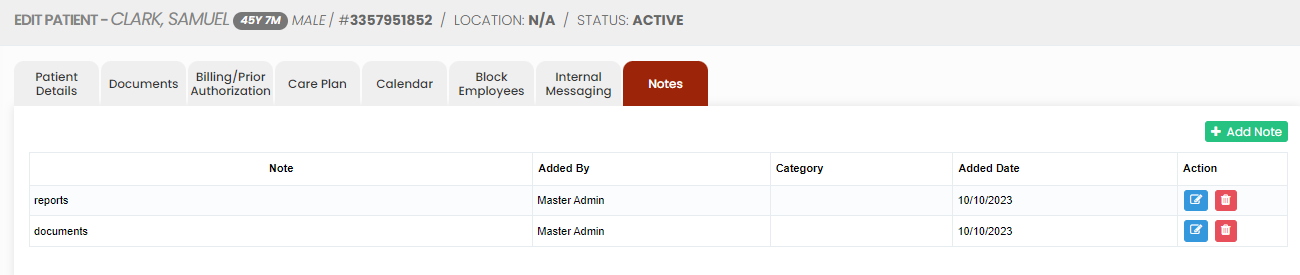
Notes
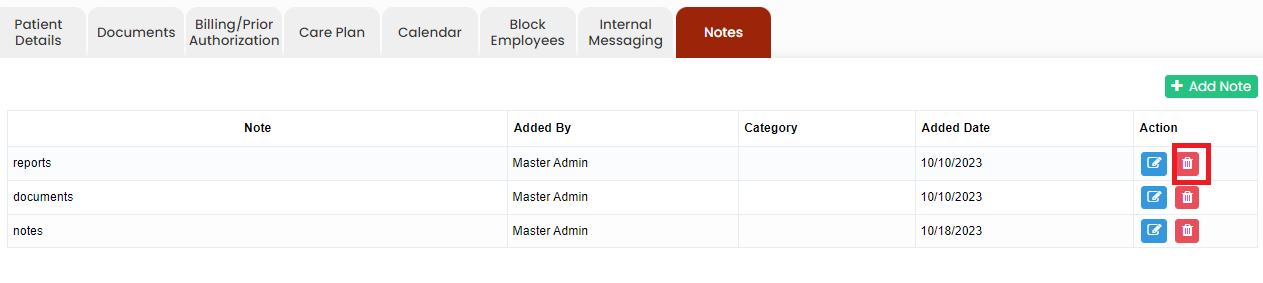
The Notes Tab is used to update the internal notes for the patient in the system. Click +Add Note option to enter the notes.
Client >> List >> Select Patient from List >> Notes
Now, update the notes for the patient and click Save option.
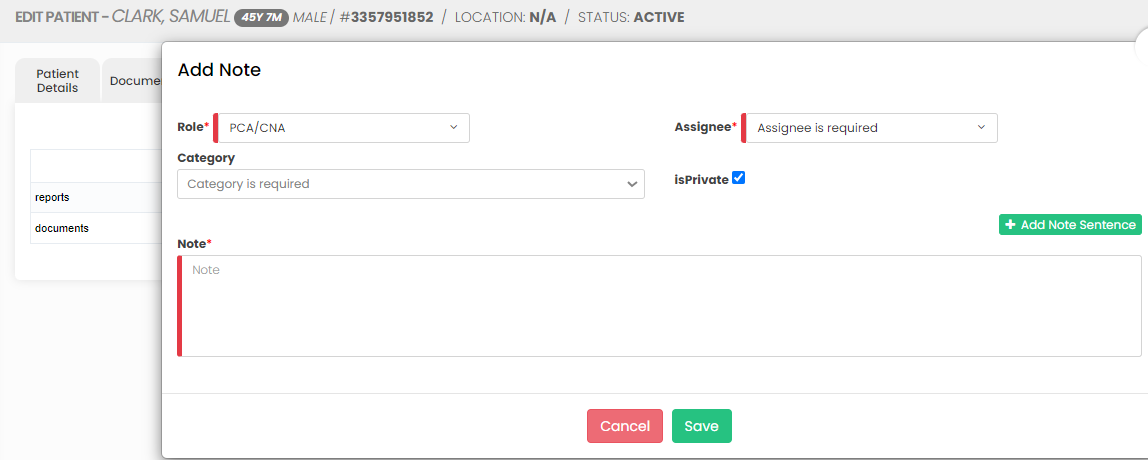
Click Delete option under Actions in the system to Delete the Notes.
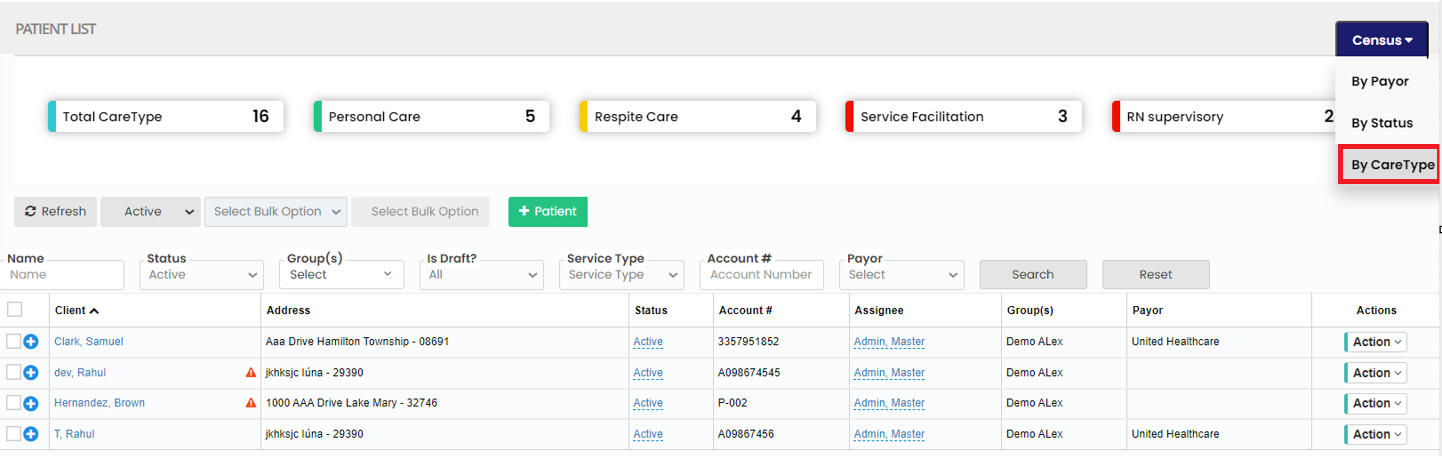
Client List
A patient list in an adult day care facility is a roster of individuals who are receiving care and support services. It includes their names, medical conditions, care plans, and emergency contacts. This list helps staff coordinate and provide appropriate care, ensuring the safety and well-being of participants during their stay.
Client >> List
Referral Details
Click the option ![]() in client list before each patient name to view the referral details of the patient in the system.
in client list before each patient name to view the referral details of the patient in the system.

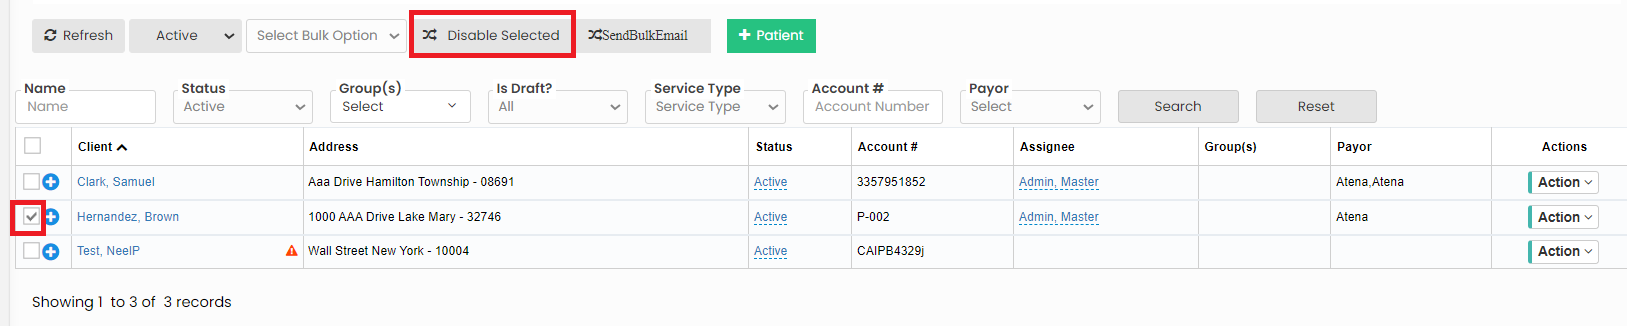
Delete Patient
The Patient can be deleted from the system by using the option Disable Selected in Patient List. Select the Patient name by using the check box and click Disable Selected option.
Restore Deleted Patient
The Deleted Patient can be activated by using the option Enable Selected in Deleted Patient List. Select the Patient name by using the check box and Click Enable Selected option.

Bulk update Patient Group
The user can bulk update the patient group by using the option Set Bulk Group in patient list. Select the Patient name by using the check box and click Group under Select bulk option. Now select the Group code to be updated and click Set Bulk Group in patient list. Likewise we can Bulk update Assignee and Status for the patient.

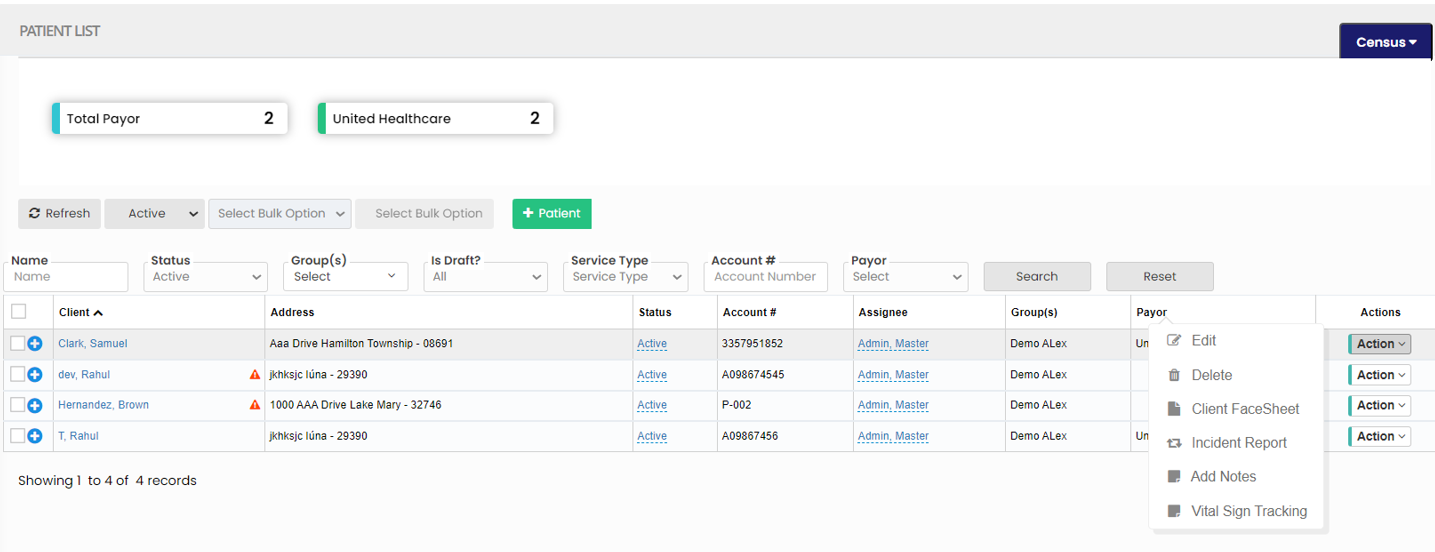
Features under Action
The following features are uploaded for the patient under Action in client list.
- Edit
- Delete
- Client Face Sheet
- Incident Report
- Add Notes
- Vital Sign Tracking
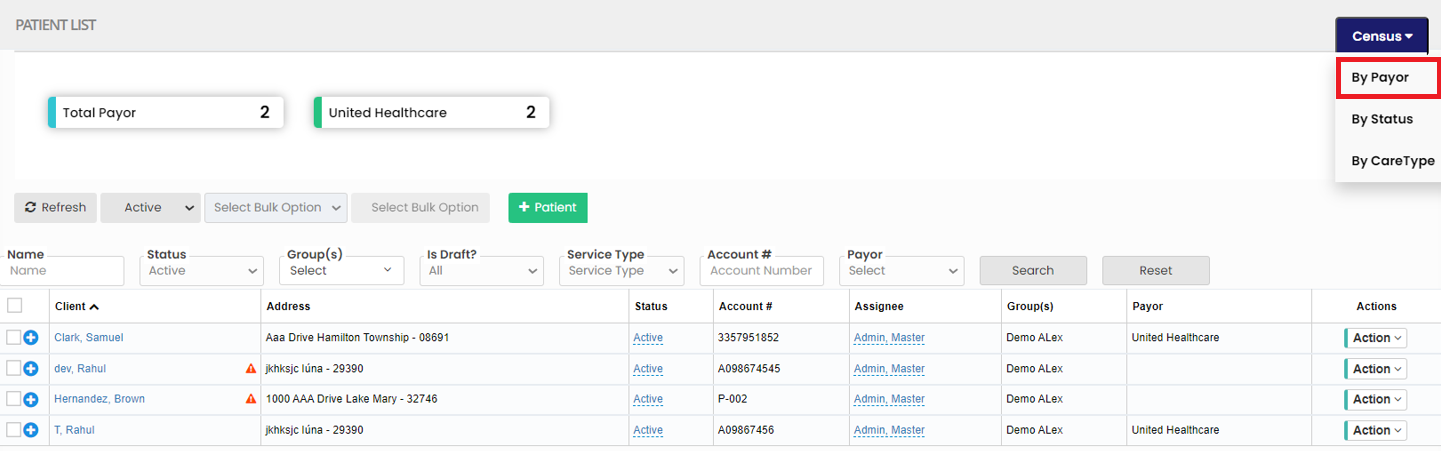
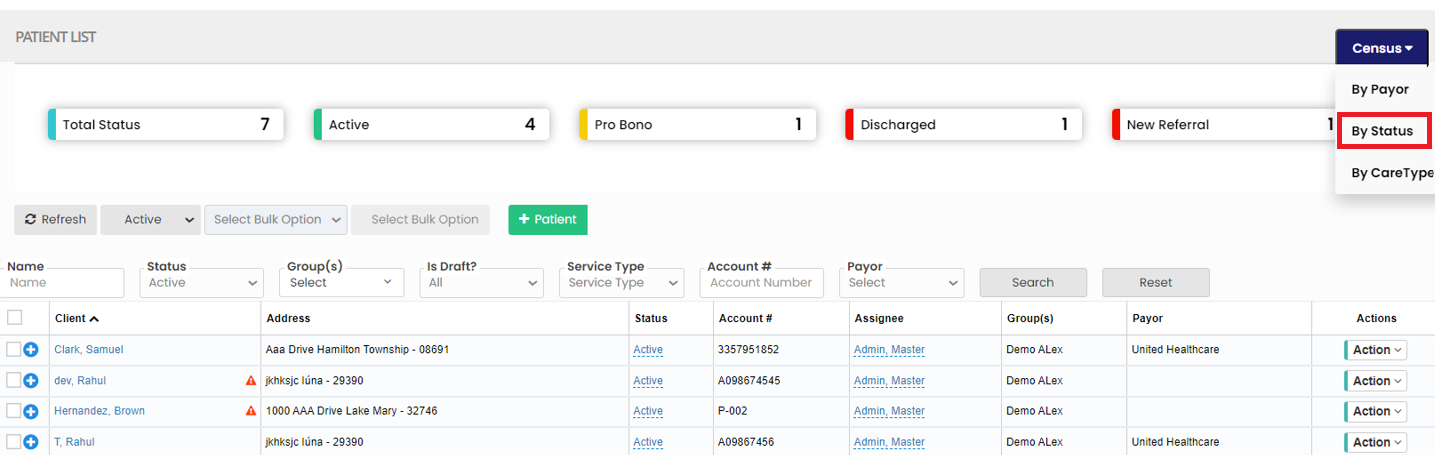
Census
The number of Payor for the list of patients can be viewed by using the option Payor under Census.
The number of patients according to their Status can be viewed by using the option By Status in Census.
The user can sort the number of patient in the list according to their Care type by using the option By Care Type in Census.